 Recently I was looking for a fabric that I could use as curtains for our new living room. Buying interior decoration stuff is always hard with Marvin. He always settles on earth tones and I want to have a living room that looks like the Villa Villekulla! I don’t know how he does it but in the end he won and I ordered some beige/brown curtain fabric at Stoff&Stil To recover from this unpleasant experience I ordered one (or two.. or three) colorful fabrics together with the curtain fabric. You know I didn’t want the Stoff&Stil staff to worry about me. I didn’t have a choice really!And so I ordered 2m of bright red raincoat fabric, it is really called that! And it had been on my mind for long to sew a raincoat. On last year’s MeMadeMay I realized that I didn’t have a hand sewn raincoat, not that I really needed one.. But the fit if the one I own really isn’t that great, so .. well, I don’t need a reason to sew me a raincoat!
A few weeks ago I started looking out for suiting patterns. I didn’t find anything that pleased me. Okay, maybe i didn’t give those patterns out there a real chance. You see, I had my mind set on sewing another Minoru jacket. But as this is the third Minoru Jacket I have made in 4 months or so, I thought I should pretend to look out for another pattern ;) For an instance I considered making another Colette Albion, but meh!
BUT to be fair, I did alter the pattern a lot! You see, the Minoru Jacket is a relatively simple jacket, there is, to be honest, nothing special about the design. Like this or not it does give you a lot of opportunities to add those features to the jacket you really need and want. Because of the simplicity of the pattern there are no real restraints to adding pockets where ever you want and a different pocket can make a totally different jacket (at least that’s what I tell myself ;))
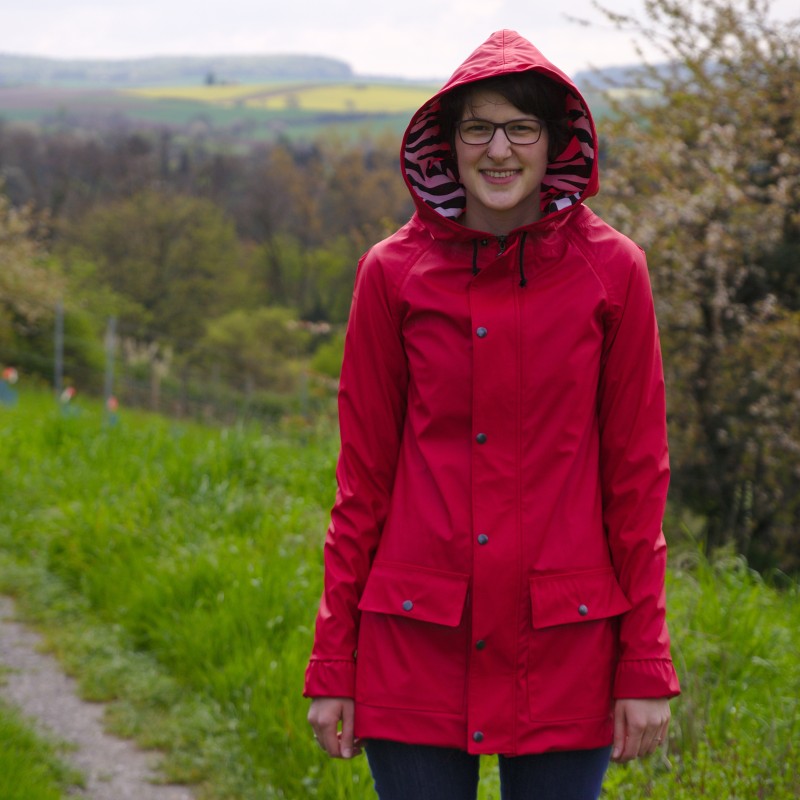
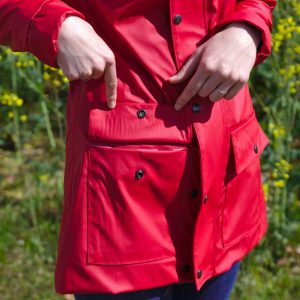
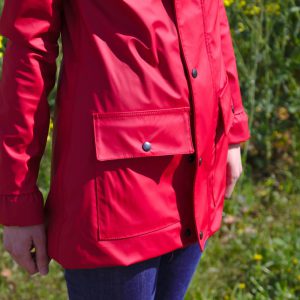
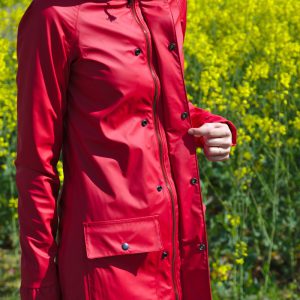
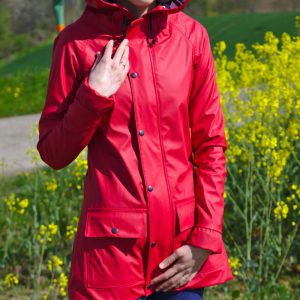
I decided to go with patch pockets, a raincoat needs patch pockets. I also wanted a facing to cover the zipper and a hood. I also didn’t want neckline gathers for my rain coat and I found SallieOhs Tutorial on how to remove them. A great tutorial, I must say! I learned a lot, now I even know how to remove bust darts! Thanks Sallie!
From the separate collar and hood pieces I constructed one collar-hood-piece. I used half of the height of the collar and attached the hood to that. I did that because I was trying to omit seams on my raincoat fabric, so that water has as little chance as possible to get in. Otherwise I would have gone for the high collar and hidden hood version of the pattern.
I made a muslin before cutting into my fabric. The hood was a little too large but that was it. I almost forgot: I made one pattern piece from the front and the facing, I added the width of the facing to the front. I did that to have as little outside seams as possible. However, I worked with the facings on the lining fabric. I sewed size 6. That is the size I sewed the other two Minorus in and it fits me nicely. I only lengthened the jacket and did no other alterations fitting-wise. I didn’t lengthen as much as I usually do, I’m under the impression that Sewaholic patterns are made for taller women which is great! I also did not alter the waist. I thought about this As I didn’t want to gather the jacket there, but I don’t think it is too wide, I think it looks fine :)
The sewing process really wasn’t hard. I had sewn this pattern twice before and I think the instructions are exactly as they should be. Not too long so that you’d get lost and not too short so that you wouldn’t understand them. I bought fusible plastic band that was sold to me as something you iron onto your seams to keep them leak proofed. I ironed it everywhere. Even on the seams of the patch pockets, but I always applied it after topstitching.
I started the sewing process with the patch pockets. And I did use Gütermann topstitching thread there. Again I had issues with it. It is so stable that it produced loops on the left sides. I’m really not a fan and so all the other seams are topstichted with all purpose thread.
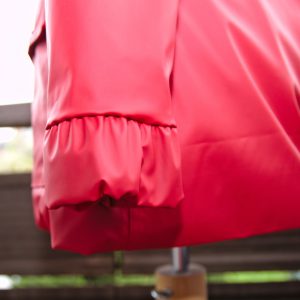
I used my Teflon foot a lot for this project. It was really expensive but I couldn’t have done the topstitching without it. The fabric was so sticky. And also elastic. It kind of looks like latex and it behaves that way. A pain in the ass to sew. And also to wear. As it is so elastic everything is showing underneath it. I really would not recommend making rainleggings from this fabric! Unless you like to show your underwear off, or your cottage cheese ;) I think I managed to get this fabric under control. Though ironing the water proof ribbon to the seams was hard. Both the jacket and the ribbon were elastic and when I even remotely stretched them by accident this resulted in puckers. So there are some puckers especially along the neckline were the seams wasn’t straight. But I’m just going to call this a design feature!
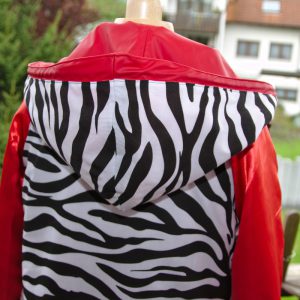
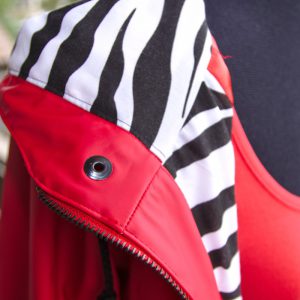
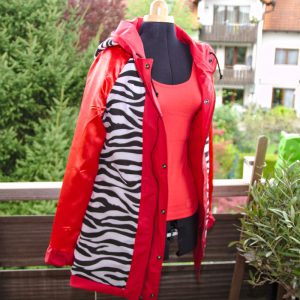
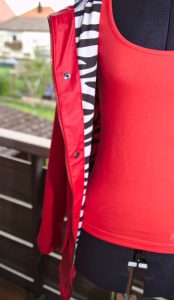
The lining fabric looks like a Zebra! I’m still amazed everytime I see the lining! A Zebra! I think red and Zebra look great together and I’m still proud for having this thought when I ordered lining. It is some parts cotton some parts Polyester. It does look nice but is is not very slippery and so I used some nylon lining that was super slippery for the sleeves so that I wouldn’t have problems getting into the jacket.
I bought the whole haberdashery in a store this time. Usually I order snaps and zipper on ebay. It cost my about 35 € all together, which is a lot compared to ebay! All in all this jacket was rather expensive now that I think about it… But look there is Zebra inside the jacket!
I think the snaps (which cost 10 €) were worth their money too. They’re from Prym and my hammer didn’t even need to touch the plastic thingy and the snaps were perfect! I didn’t even have a chance to screw things up!
I always iron a very stable interfacings at the places the snaps go, so I don’t have to worry about ripping them out.
I sewed the hem by hand. Before I did that I even sewed the lining to jacket at the neckline by hand so that I didn’t have to stitch into the raincoat fabric again. I simply stitched into the ironed-on ribbon. I pressed the hem once and then I hand stitched it to the lining and thus omitted new stitches to the fabric! I’m so proud of myself!;)
I tested this jacket already! There was a fabric market and it was raining like mad. It was great! There weren’t as many people as usual, I was able to test my jacket and it actually kept me dry! Whey!
A great feature that I build in by accident is that the hood is big, I can wear my headphones under it! And because of it’s size the hood is just heavy enough to stay on my head even when it is a little windy. Plus there are zebra stripes in the jacket! or did I already mention that? ;P
On to another topic. People keep asking my whether I needed to change the silhouette of Sewaholic patterns, because they are drafted for pear shaped women (at first I wrote pea.. haha, pea shaped women.. :D). Let me say at fist that I don’t like being called a pear. I don’t think comparing bodies with fruit is anything but nonsense.. Pear shaped… who wants to be called pear shaped? I Mean a pear doesn’t have an appealing shape to me. However I have wide hips, you could say that (and people do in fact, especially doctor calling my hips birth friendly. Thank you….! Also I didn’t have to do any hip-wise fitting alterations to the pattern which might suggest, that it is designed for larger hipped women (or whatever). I didn’t think about being pear shaped before people started asking me if I had to make alterations. As far is I know I am more of an X-Shape, as my shoulders are as broad as my hips (well, I’m tall…). So if you’re a normal hipped person (therefore more of a carrot shape.. or banana or whatever) you might want to check if there is too much fabric around your hips.
So and now I’m leaving you, (gleeful because I did call myself a pear) with another picture of me and this beautiful red jacket with the Zebra lining! Have a good day!
Katharina











You look great in your new raincoat! I really like the look of the Minoru, so I might have to get it one day when inspiration to make a coat strikes…
WOW!! Your new raincoat is absolutely gorgeous!! Every time you make another minoru I’m tempted more and more, it always looks fabulous on you and I really like all the details you add. The sewing modifications you explain are all so helpful,thank you! I think I might just have to get the pattern and make one for myself, very soon :)
Thank you Carolyn! I’m excited to see your version of this pattern :)
Beautiful and well made raincoat! I love the colour and the lining. Haha… nice story about pear shape. Well, I don’t even know which shape I suppose to be, I am petite with more meat in the hips and arm :)
Thanks Hana! In doubt you can always say you’re potato shaped ;) :D
What an awesome raincoat!!! You are always so creatively clever with your design modifications and explain everything so well. I’m another who has yet to make a Minoru and think I need to put that on the list soon too. Your shapes commentary was so funny! There is no way I’d call you a pear! Love your backdrops as always! :)
P.S. Forgot to mention I totally ‘heart’ the zebra lining too!!!
Thanks Lisa! :) I’m looking forward to your version of the jacket :)
Hey Kat,
Your jacket looks great! I love the difference the raincoat fabric makes and I love the changes you made.
I also wonder how that fusible plastic band works… I would be afraid to iron it onto the plastic raincoat fabric, or iron the fabric at all, since I assume that since it is plastic, it has a low melting temperature.
Anyways, I hope you get a lot of use out of it! I was quite impressed when you mentioned you had sewn 3 Minorus in the last 4 months!! Holy!! That’s some productive sewing!!!
Cheers!
M
Thanks M! :) You don’t need a very hot temperature to get this band to stick on the fabric, so that really was no problem. Also the fabric is not sticky from the wrong side, so the ironing really wasn’t that hard :)
Nice jacket! I would love wearing a bright red jacket on a rainy day. Even better with zebra lining. ;-) I prefer to think that some fruit is human shaped… like “hey — that pear looks like that cool sewing blogger?!”
Haha, I hope the next time you see a pear you think if me (or not :-D)