
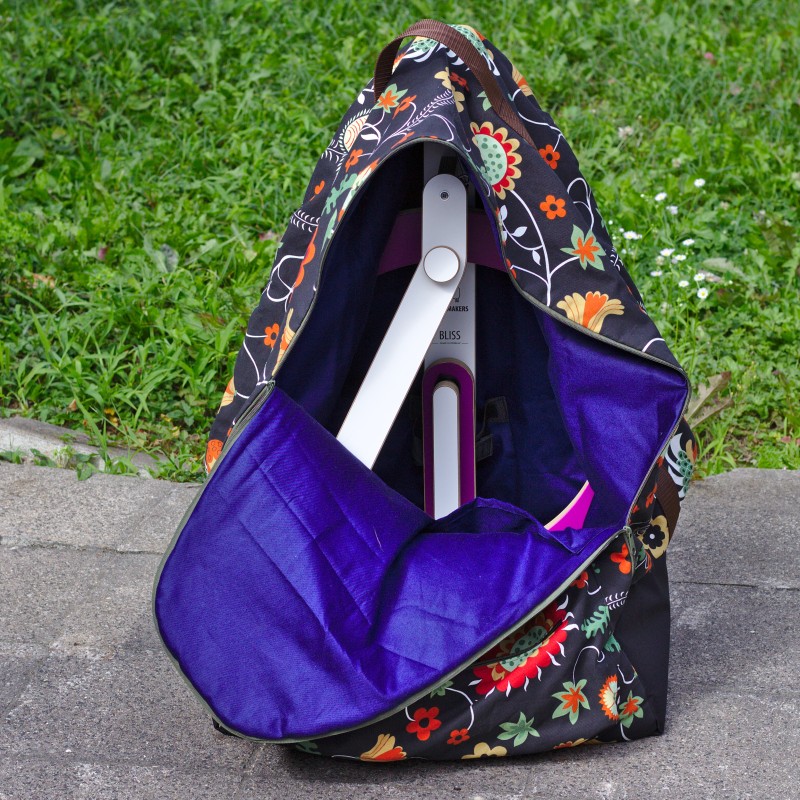
 Today I have something different to show you. A little different at least. On their Facebook page Woolmakers shared someone else’s self made transport bag for the Bliss spinning wheel, and I was head over heels. Unfortunately I cannot say who actually made the Bag Woolmakers shared, as I don’t have a Facebook account. I sometimes take a look at their Facebook page because their website has very sparse for over half a year now. I hope they’ll get it going again some day, because obviously I am not a fan of Facebook and they make it pretty hard for people to read posts if they are not a member. However, were was I? I yes, I was determined to make a Bliss Bag for myself.
I slowly got started and bought all the ingredients :) I found the fabric at Ikea, I bought some kind of super duper outdoor fabric for the bottom at stoffe.de, I found fabric for lining and polyester webbing for the handle and shoulder straps in my stash, I ordered the zipper via ebay. I also bought some thick padding via ebay.
I measured the spinning wheel and started constructing some kind of a pattern. The pattern piece for the front and the back is huge, mostly because of the huge treadle of the wheel, the width of the wheel and the height. I decided to go with identical front and back pattern pieces, that made things a little easier.

And then everything was ready for me to start, but I lacked motivation. And so I started other projects, always knowing that this project was waiting for me. After two month or so, this started influencing my sewing mojo. Everytime I started something new I felt guilty for not starting the bag project and in the end I found myself not wanting to sew anything at all.
Not wanting to sew has become an alarm signal for me. If I don’t want to sew usually something is wrong. Luckily this time I figured out quickly that the problem simply was the bag. And luckily there was an easy fix: start sewing that thing!
I think the reason why I didn’t want to get started was my old enemy: perfectionism. In my mind I was thinking about adding some fancy pockets and other super cool features and that simply overwhelmed me. I also thought about which way would be the best to assemble the bag and that got more complicated the more I thought about the features I could add. The one thing that helps me get out of this trap usually is to just do it. Stop thinking and start. And when something goes wrong I can try to think of a solution then.
I decided that I didn’t need all those features or that I could add them in the process. My goal was to create a bag my spinning wheel fits in, and I was successful.
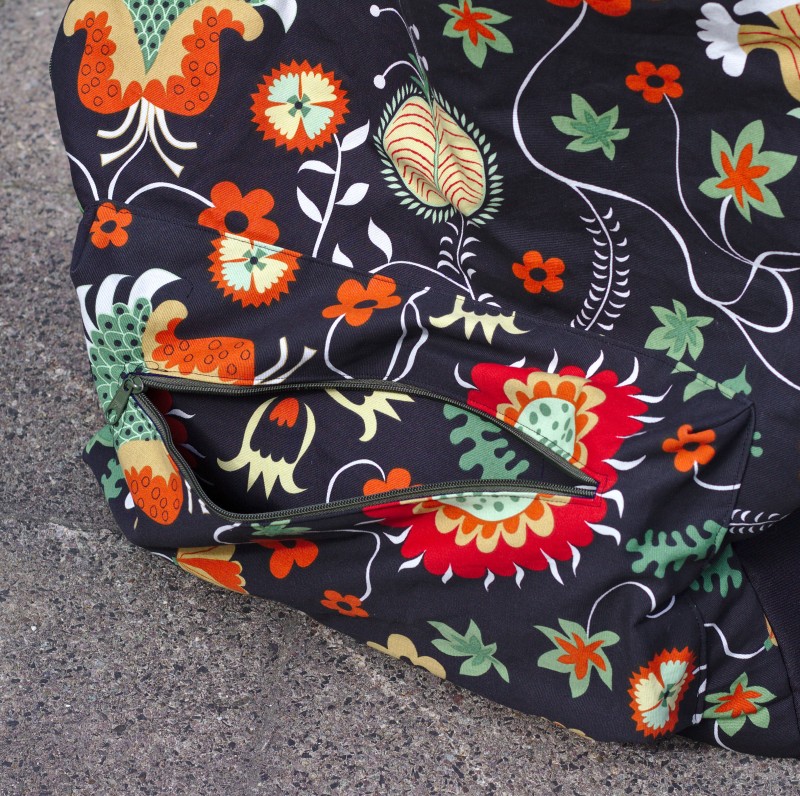
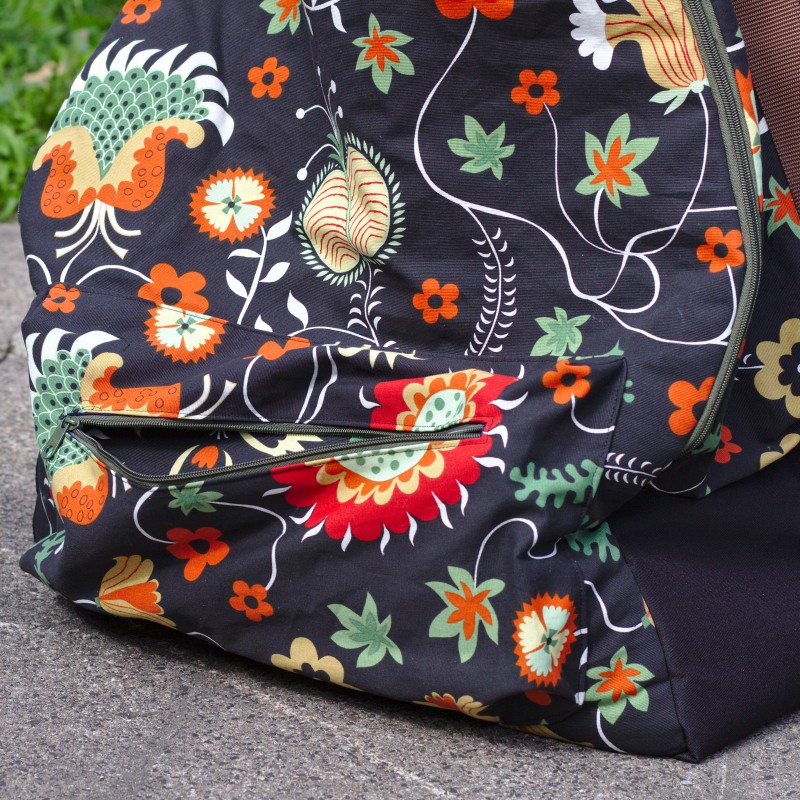
Now let’s move on to the details. I started with assembling the outer front by applying a zipped front bag to it. I simply cut out a rectangle, inserted a zipper, sewed darts and applied the thing. I cut the same sized rectangle for a pocket, that I applied to the inner front lining piece. I divided this pocket into two with a vertical seam down the middle.

I then applied the webbing to the upper side piece in a manner that there is a handle at the center top. I applied the zipper to one side of the upper side piece and then sewed the bottom side piece to the top side piece, so that the pieces formed a circle. I sewed the lining and the side piece to a circle and sewed it right sides together to the outer side piece, so that the zipper seam allowances were enclosed between the two layers, the bottom is left open. Afterwards to front pieces were applied to the side pieces, lining to lining and outer fabric to outer fabric at the bottom and lining front and outer front to zipper at the top.

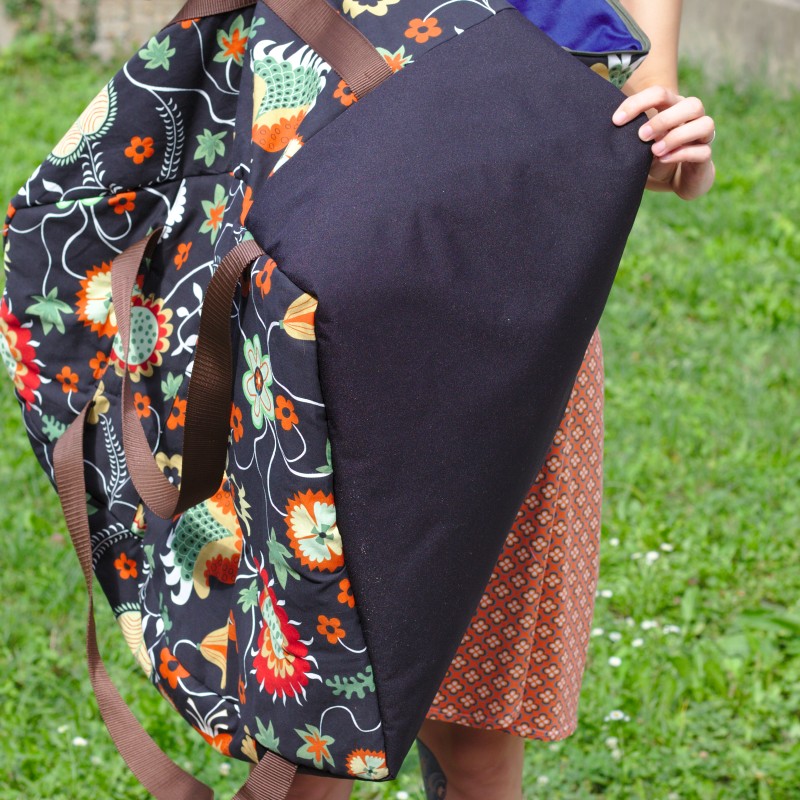
I then prepared the back piece. I wanted back straps, but I didn’t have enough webbing to make them adjustable. So now they are a little long and I cannot adjust them. I will need to shorten them some day. So I applied the back straps to my liking and didn’t do anything with the back lining.

Now all I had to do was sew lining side piece to lining back piece and do the same for the outer fabric. Don’t forget to leave an opening when sewing the lining, so that you can turn the bag to the right side in the end.
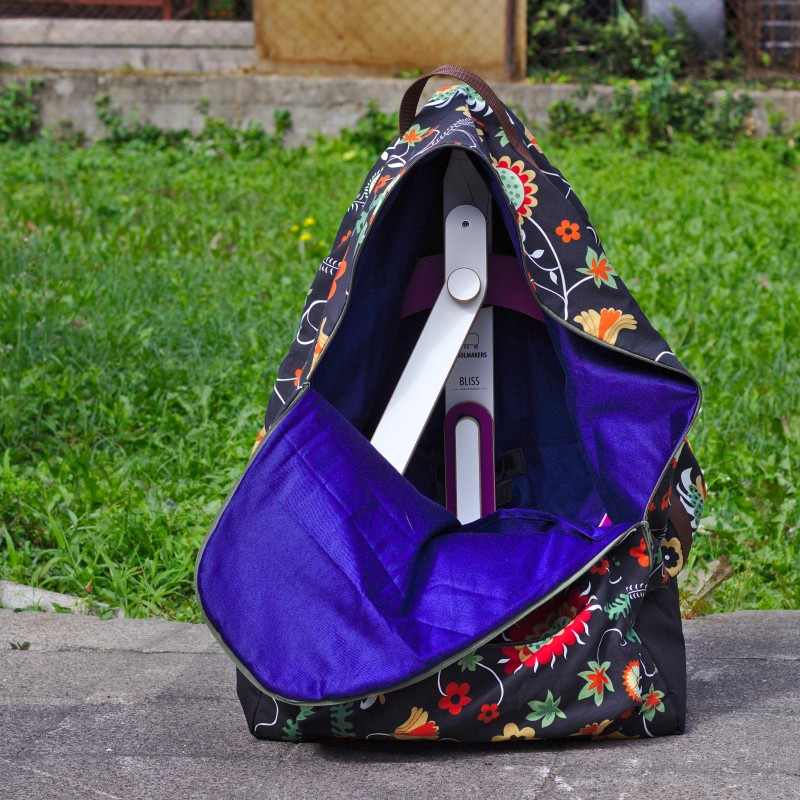
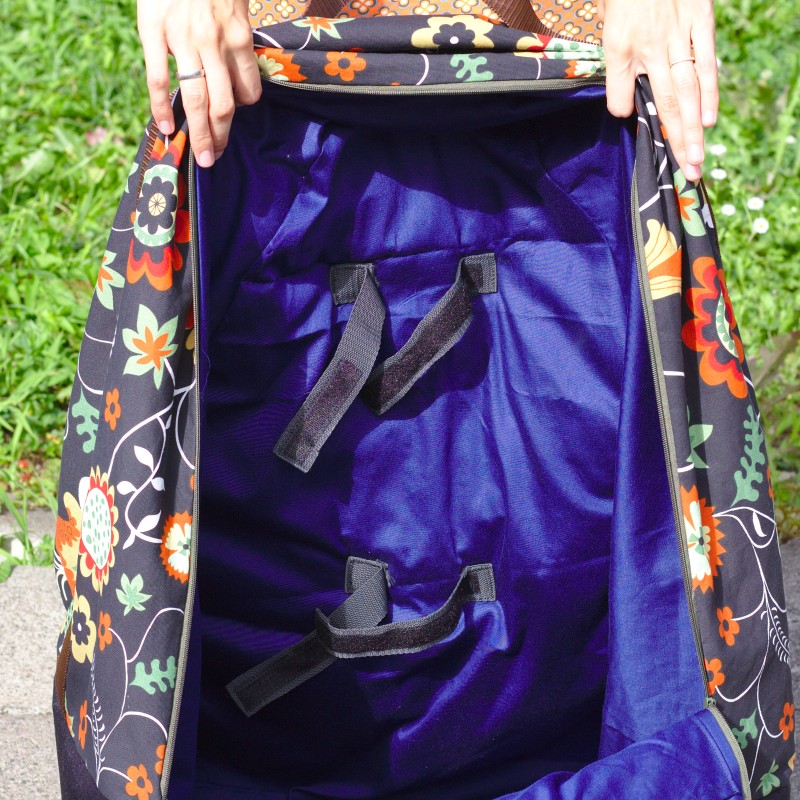
My finishing touches consisted of sewing the lining and outer bag together at several places and apply webbing with Velcro through both layers of the back in order to fasten the the wheel to the back of the bag.
I applied the padding to both front and back and to the bottom piece. I didn’t have enough to apply it to the top piece too. But I think it’s fine as it is and it keeps the wheel save :)
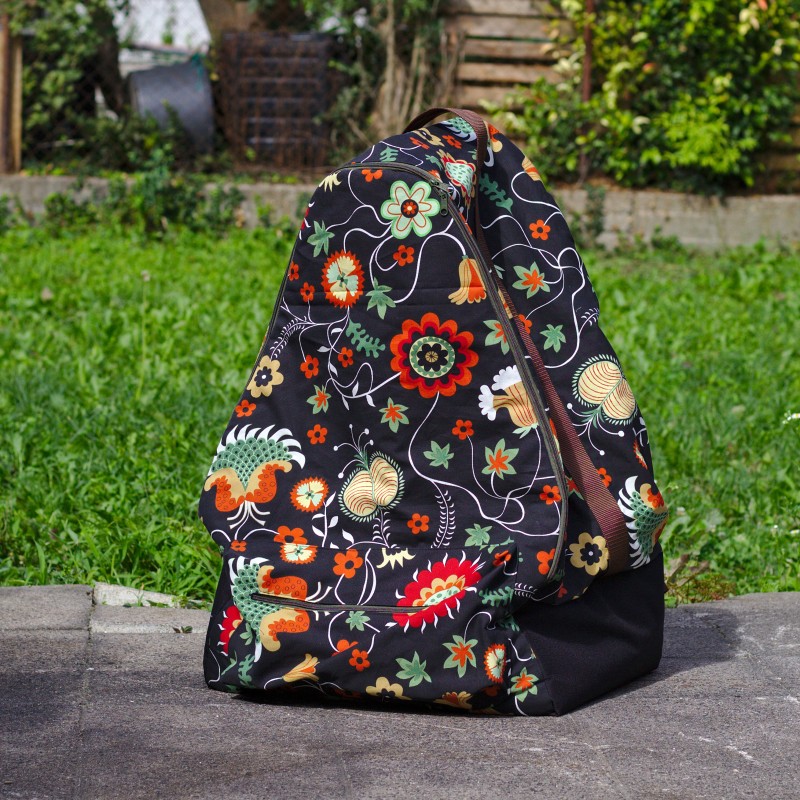
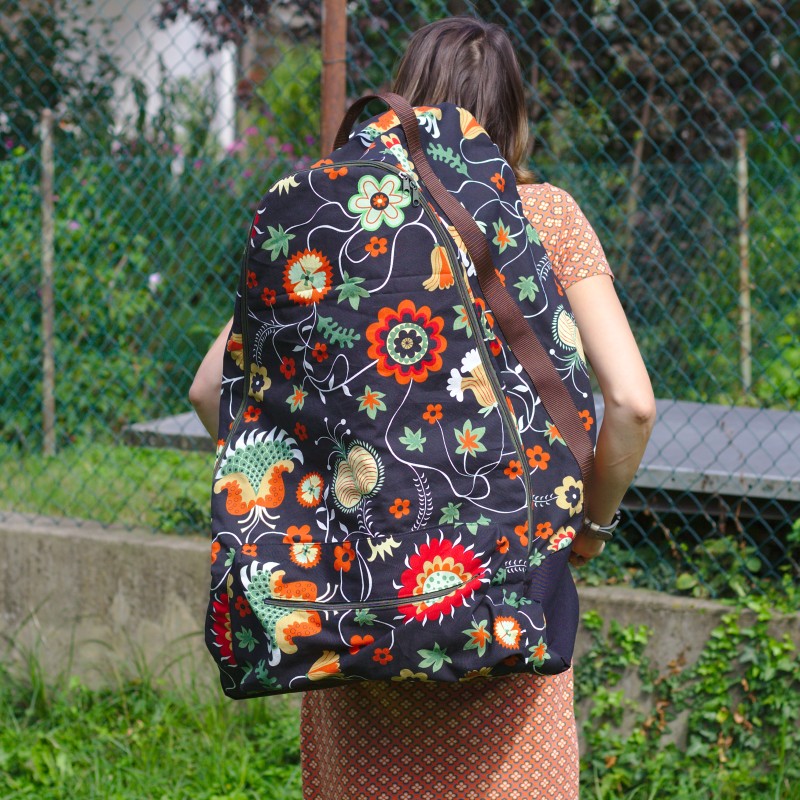
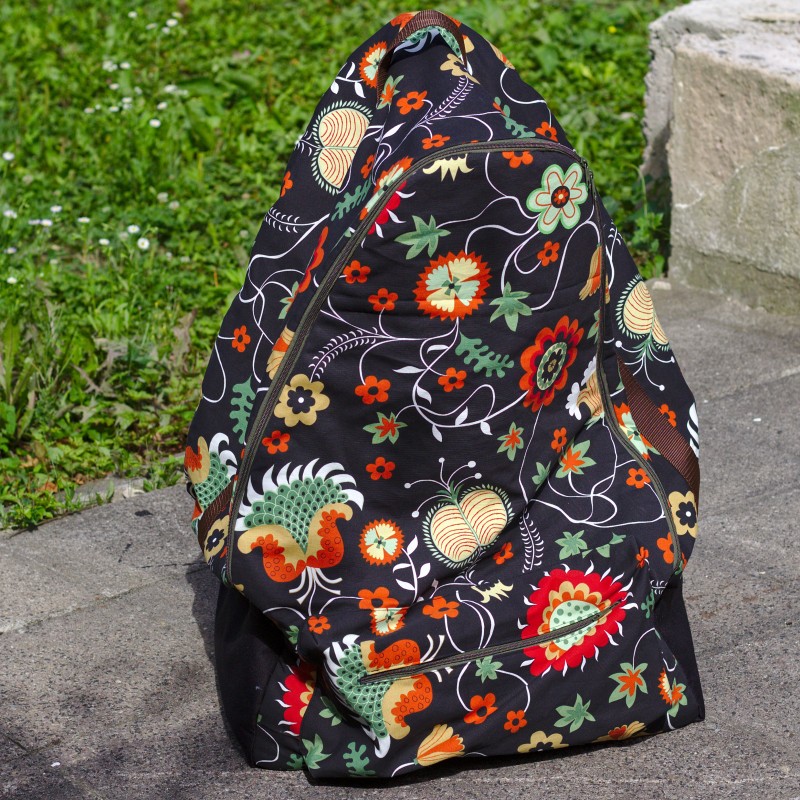
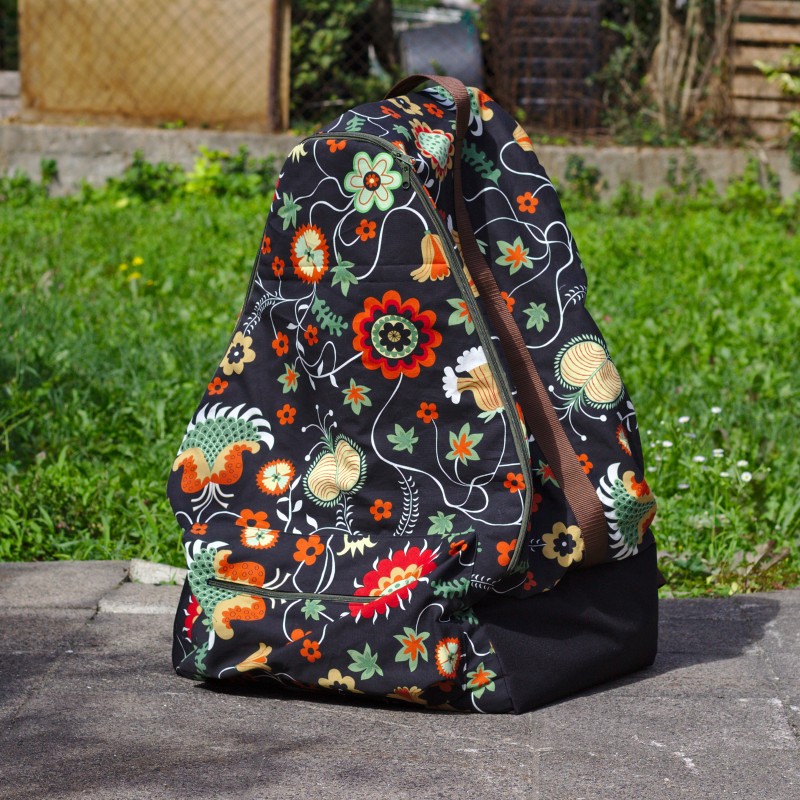
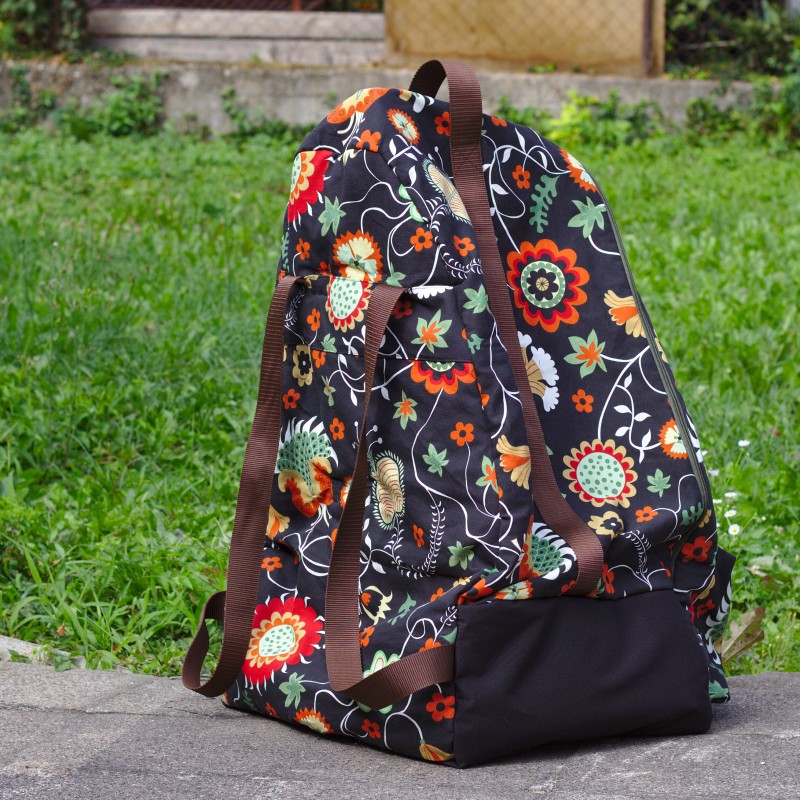
The bag doesn’t stand on its own, which is only logical, because I didn’t apply anything for more stiffness. Apart from that I’m happy with how the bag turned out. I really like the fabric and the bag works. Which means that I can carry the wheel for short distances and have my hands free for other stuff. The bag is also nice to store the wheel in when I don’t use it (which is never, haha). There also is a lot of room in the bag, even with the wheel in it, so I can carry all of my wool in my bag with me without needing another bag.
However, this bag doesn’t transform the Bliss wheel into a travel wheel. As you can see the bag is quite big, it is unhandy and the wheel weights too much, to carry it for too long. It’s not like I’m surprised about these facts, I just wanted to point them out, so that nobody expects too much.
That being said, I’m super happy to finally have mastered this project! And I’m super excited to show off my new bag at my next spinners meeting :)
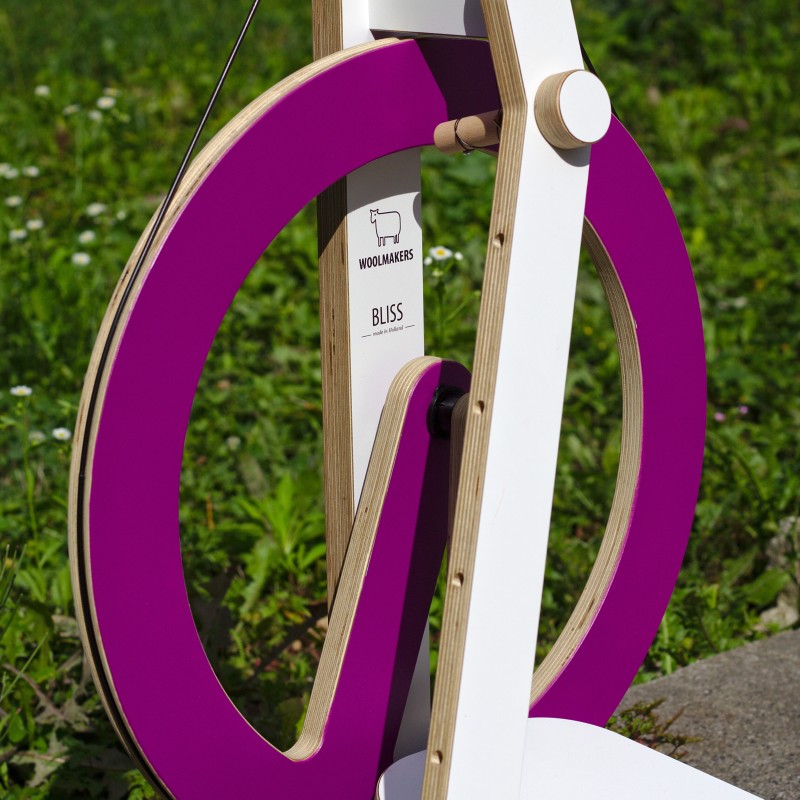
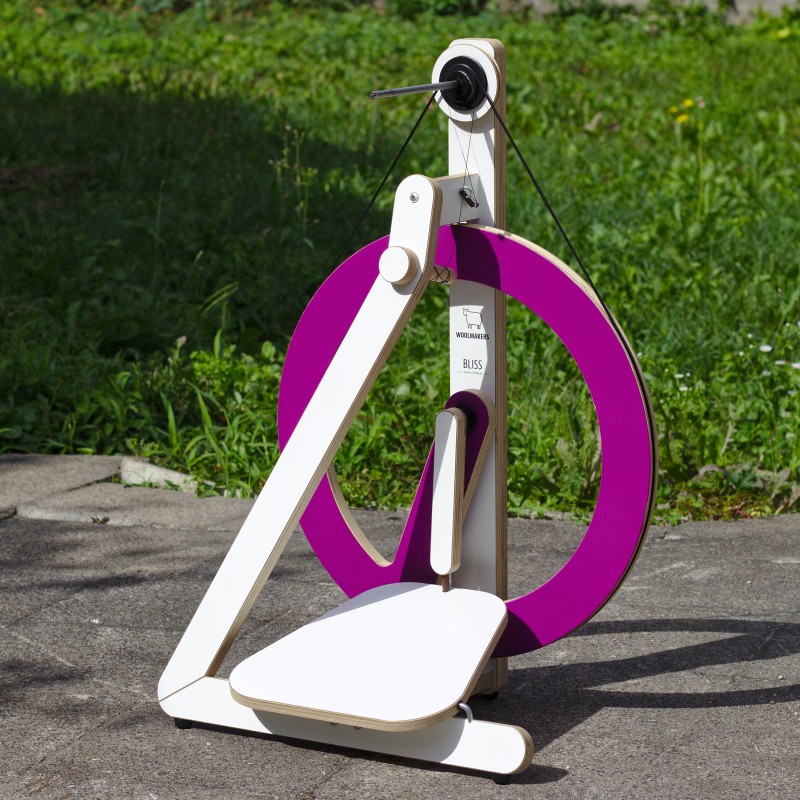
Oh and by the way: I varnished the wheel! It now is berry-colored (how untypical for me, ha!). And to be exact, I only did all the preparations and let Marvin do the actual varnishing, because he is way better with these things than I am (you know, I mean those things, were have to be patient not to ruin everything, haha). He used Edding permanent spray, which is an acrylic varnish, the color is called berry (at least in German it is).
And that’s it! I’m off to sew some dresses now ;) Thanks for stopping by!
Katharina
Wow! This is amazing. It looks so professional x
How awesome is that!!
You are genius!! I love the fabrics you chose for every part of the bag.
Now you can travel with your wheel and spin everywhere you want! ;)
<3
M
Awww, thanks Mon :-*
You are so incredibly clever, this is an awesome bag and your attention to detail is breathtaking. I am embarking on a spinning journey as I have acquired a drop spindle but I’m useless!! I am going to sit quietly when I’m camping and see if I can master it. I do love your spinning wheel – I’ve never seen one like that!
Thanks Sue!
Learning to spin takes time, don’t beat yourself up! I’m sure you can master it :)
What an amazing bag and even more amazing that you self-drafted everything! Wow!
Thanks Lisa :)