
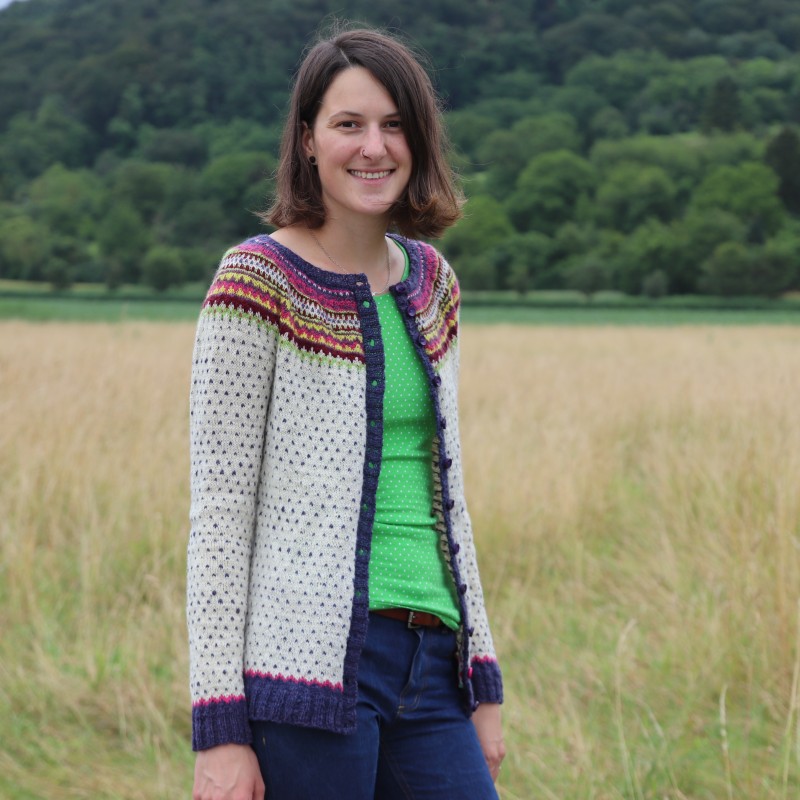
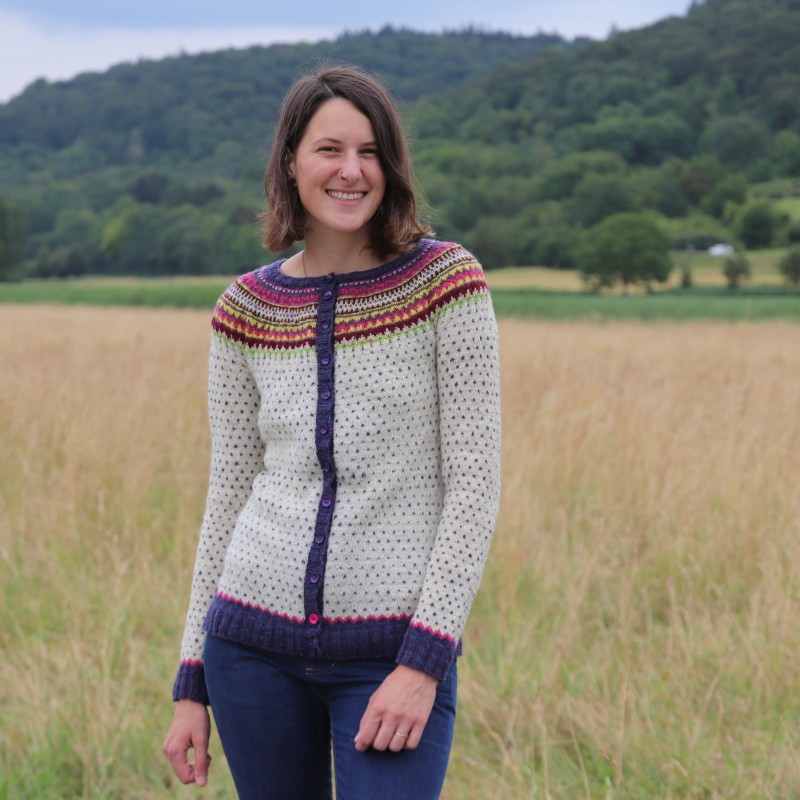
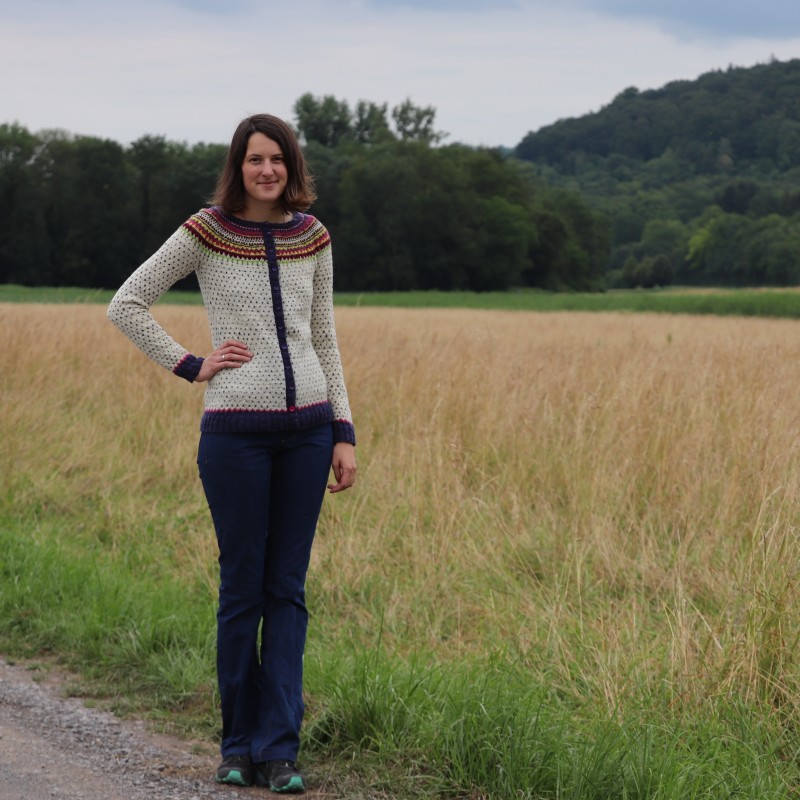
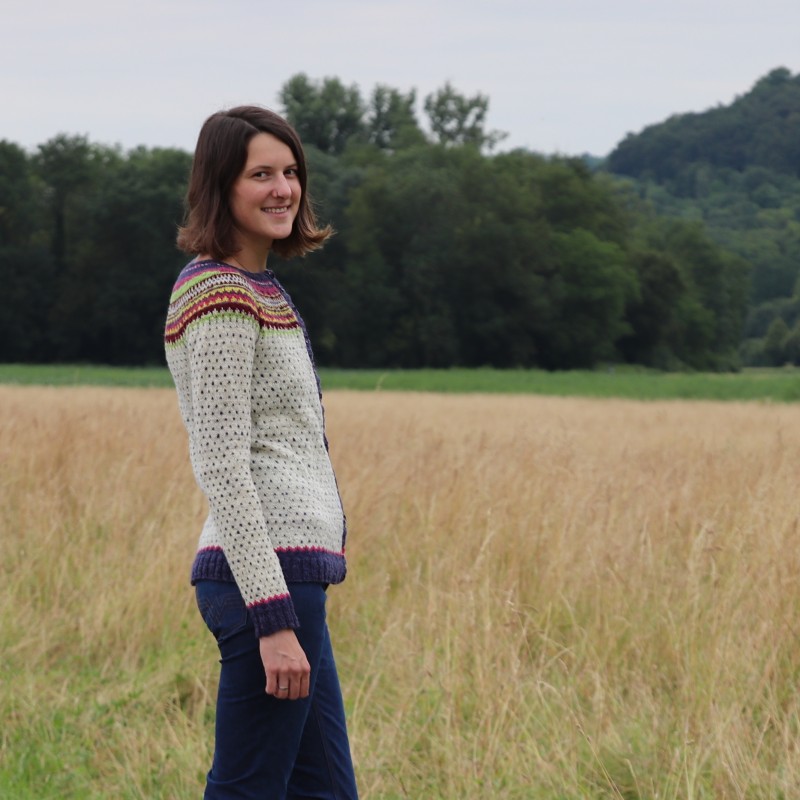
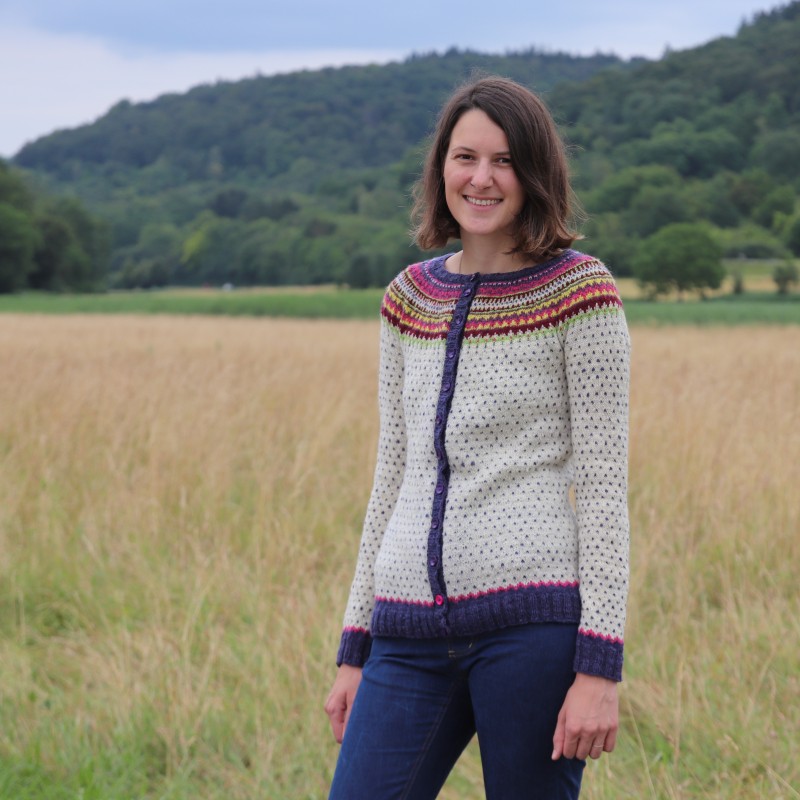
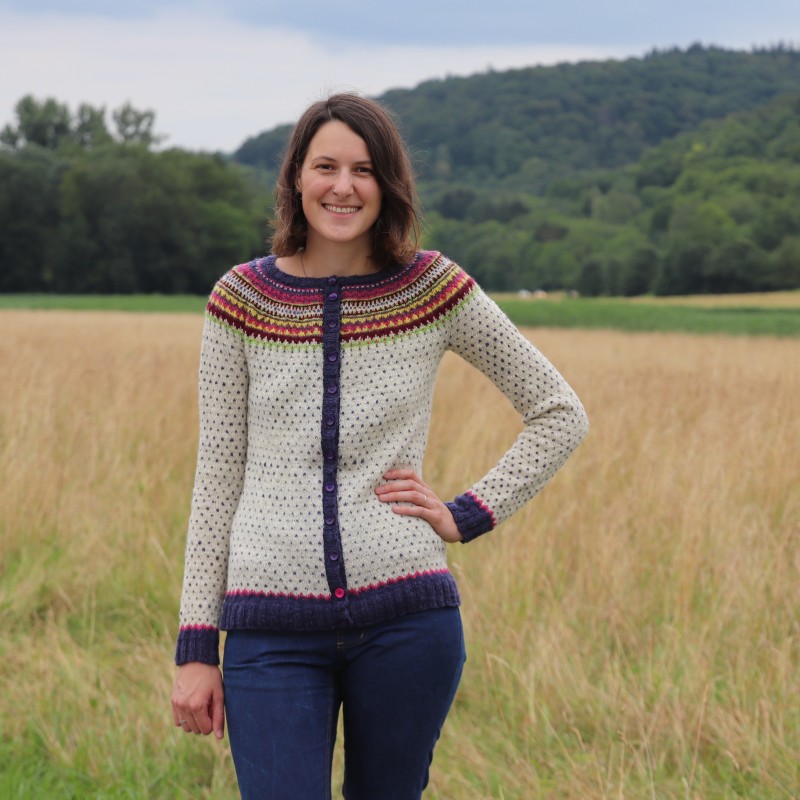
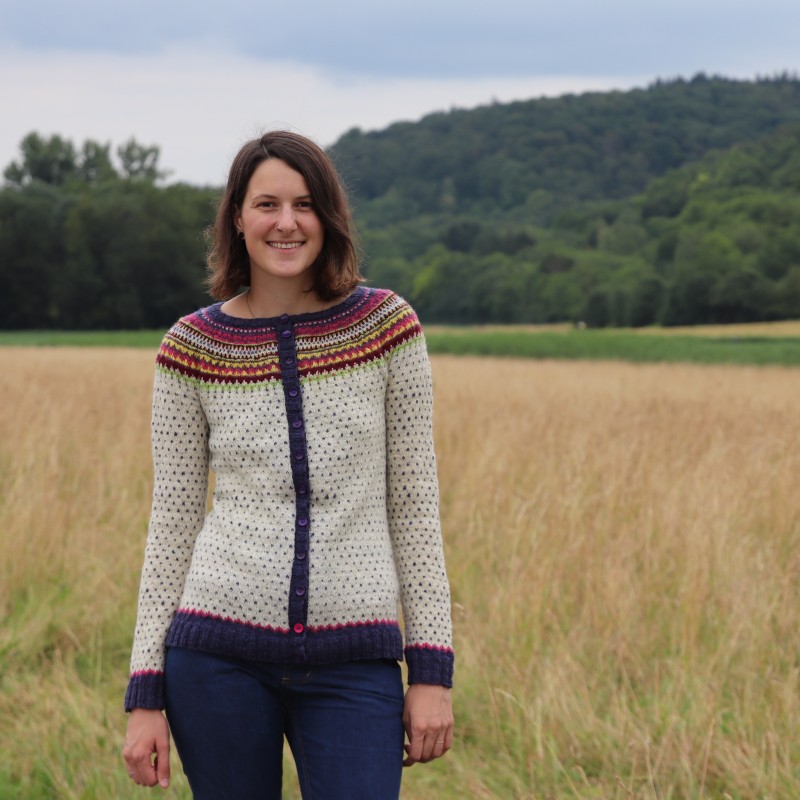
 For a short instance of maybe 4 days it got a little cooler again, hooray! Super practical because that meant that I was able to take pictures in my newest cardigan, I really wouldn’t have wanted to wear it in 32 °C. So yeah, here comes my newest cardigan, my version of the Damejakka Loppa by Pinneguri. Loppa means flea in Norwegian, but as it also means flea in Sweden, so I took the opportunity to show off my rudimentary Swedish, hence the blog post’s title ;) Very suiting because I knit most parts of this cardigan during our trip to Sweden in May. But the story of this garments started way earlier than that. Let’s go back two years.
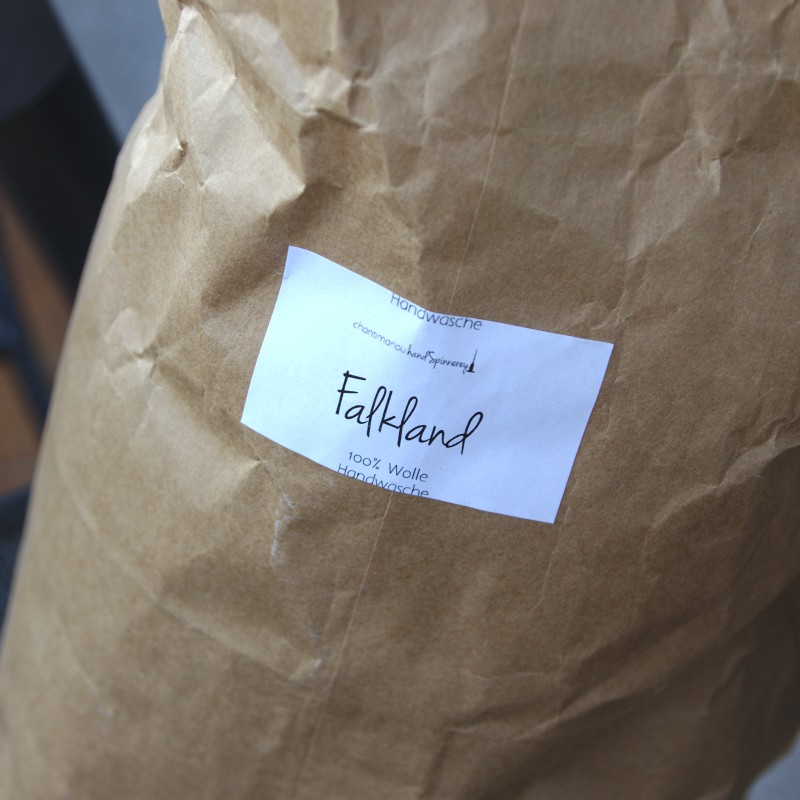
I ordered combed Falkland top at an online shop that has been closed for half a year now. I ordered 500 g with the intention of making the loppa cardigan from it. And so everytime I dyed wool I also threw 30 g of the top into the pot, so that after 2 years I had 6 different colors.
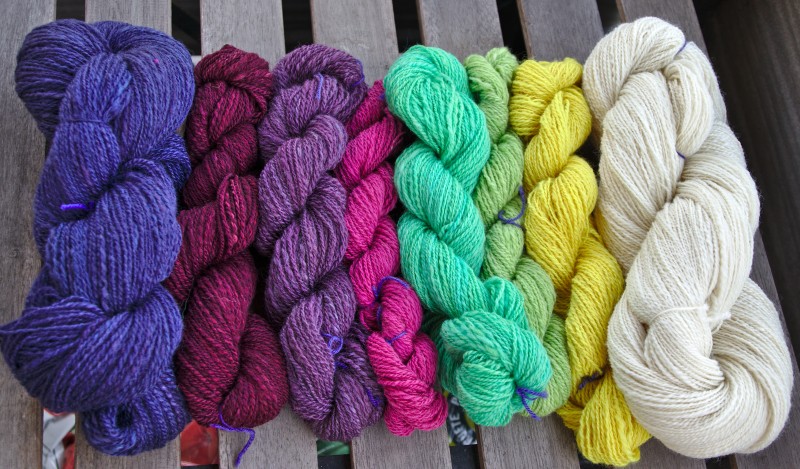
I left around 300g in it’s natural color, to use it as the main color.
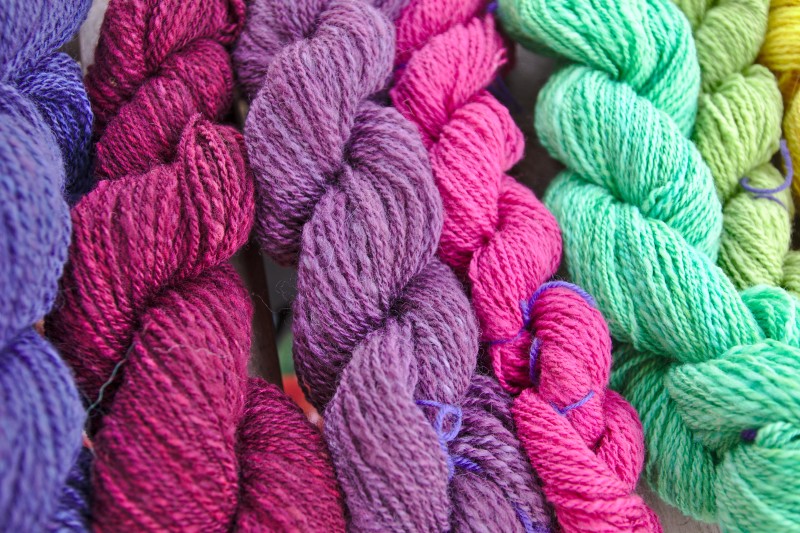
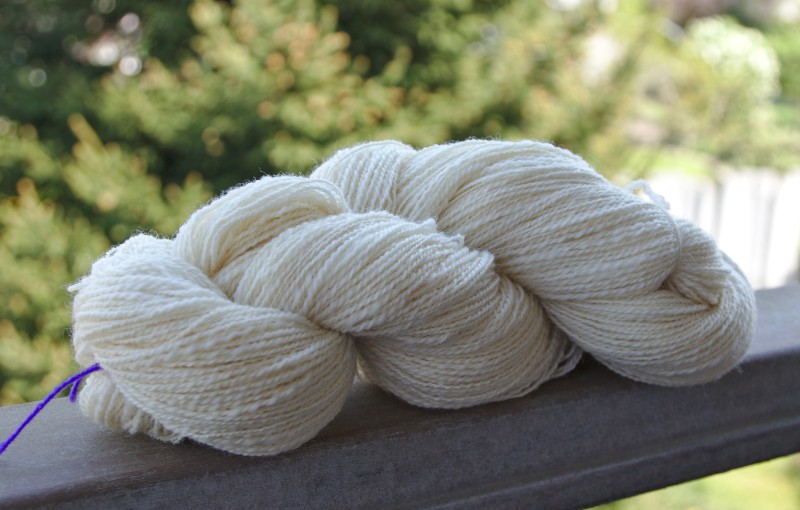
I spun the fiber using the short draw technique. Spinning Falkland was easy and fun, The fibers are sheen but also pretty elastic and springy, which made them easy to spin and beautiful to look at ;) I had to look up where the Falkland-Islands are located, they belong to the UK but the wool was so fine that I knew their geographical location must be somewhere farther south. They are located at the south coast of America. And while reading about those Islands I found out that the inhabitants still live from sheep products, how cool! The Falkland sheep is even part of their national flag! :)
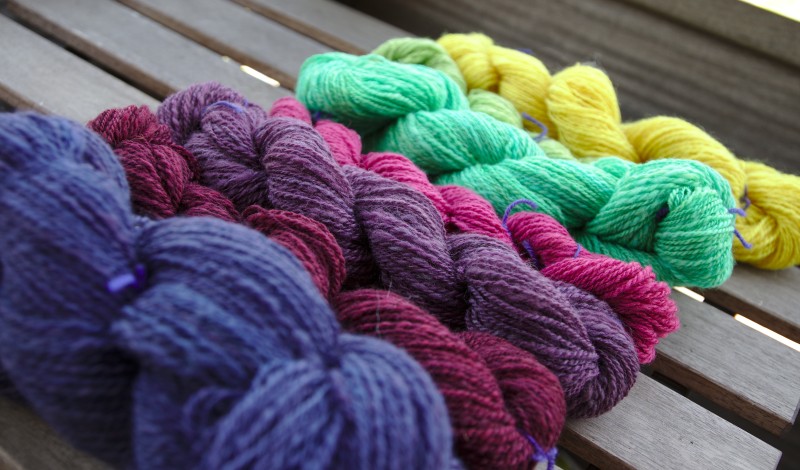
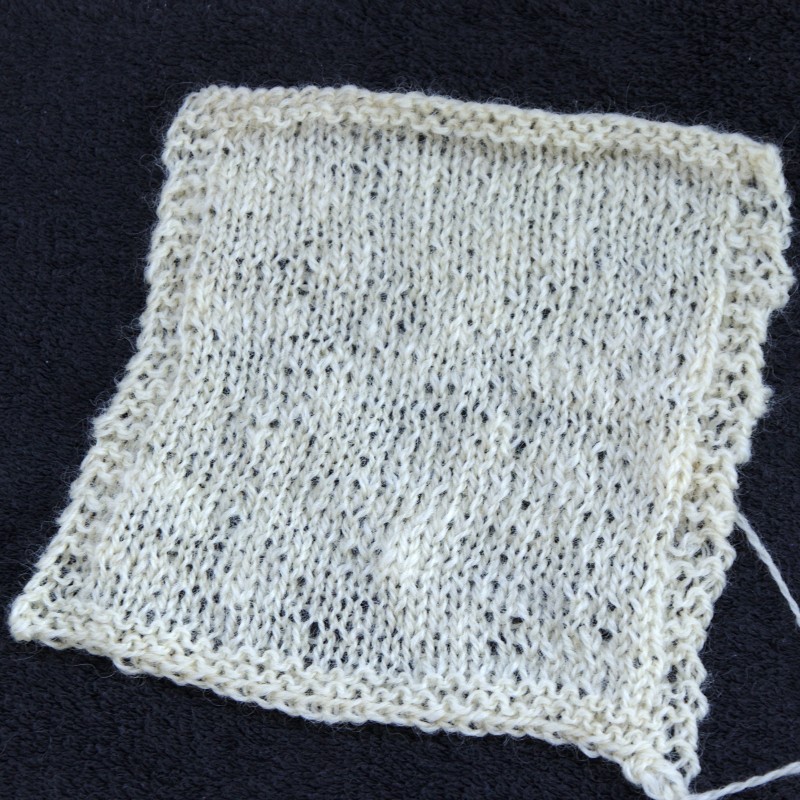
Back to the yarn. I 2-plied it because I wanted it to turn out rather light and thin. The yarn turned out much more inconsistent than I had hoped. The different colors have a different grist. On average the grist is 336m /100g. I measured 14 WPI, which suggest that this is a Fingering Weight yarn. I swatched with 3.0mm needles and my gauge was 26 sts x 36 rows = 10 x 10 cm.
I had the pattern for this jacket on my wish list for quite some time and someone actually gifted it to me lately, thank you so much :) I only had access to the German translation of the pattern, so everything I say about the instructions only reflects my opinion on the German translation. First thing I stumbled across was the gauge. The instruction only says: Gauge 24 sts. What about the row gauge? Every length in the pattern was given in cm and not in rows. The problem with that is, that this makes it much harder to account for different row gauges before and after blocking. Because if the instructions tell you to knit 3 cm, but you know that 3 cm before blocking will turn out to be 5 cm after blocking you have to recalculate everything. Providing the row gauge and giving the length in rows and not in cm is much more practical in my opinion. And also it would be interesting to know the row gauge to get a feeling of how the stranded pattern will look like. If I have a way different row gauge than the designer the pattern might look very different.
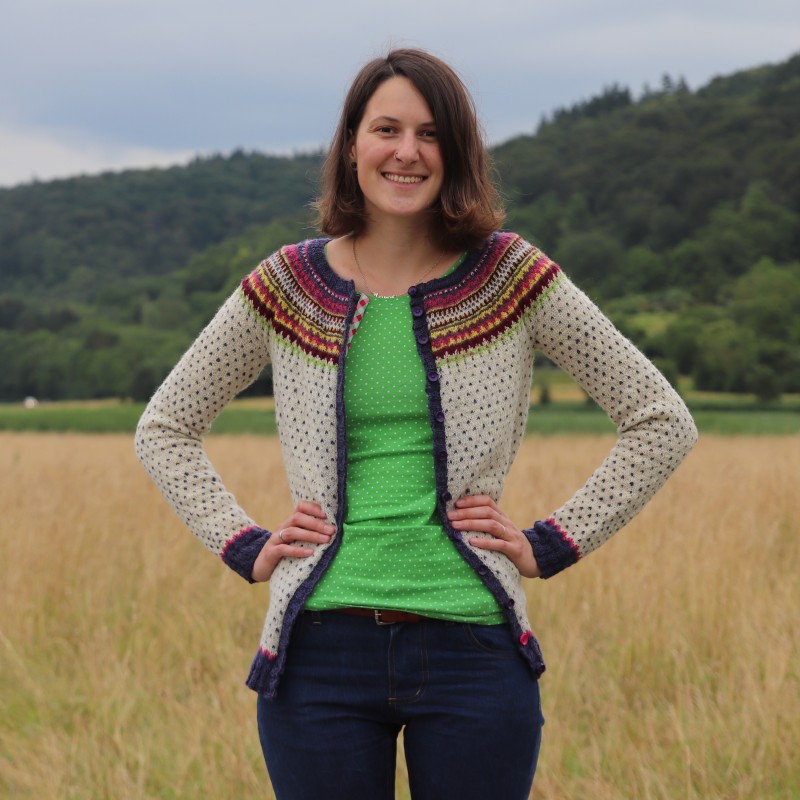
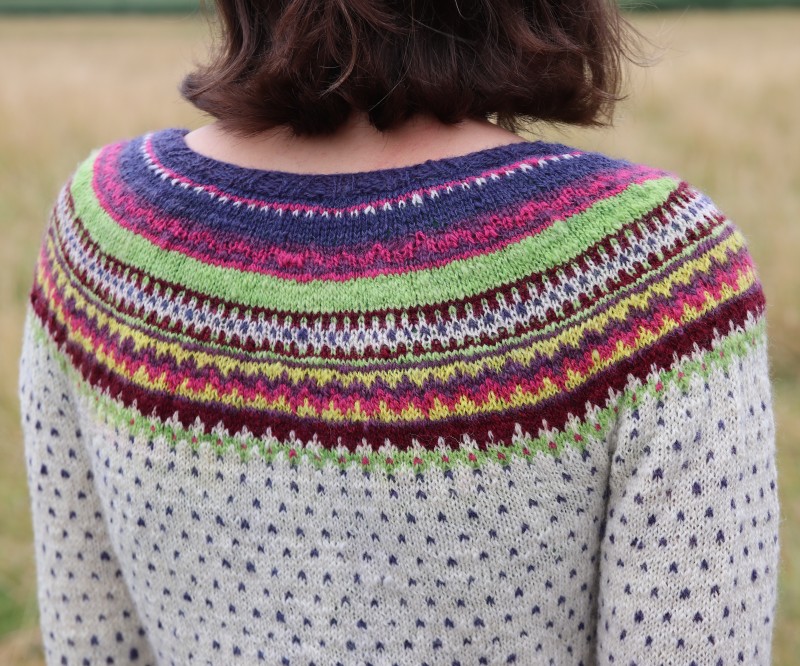
The second problem I had with the gauge was that my gauge was off by 2 stitches. I calculated a little and decided that I could simply knit the cardigan in size M to get it to fit me without any positive or negative ease. The next ‘problem’ was that I had too many colors. So I decided to not stick to the color suggestions but simply change the colors on the go. I only had one constraint: the dark purple needed to be my main contrast color, because I had 100g of it.
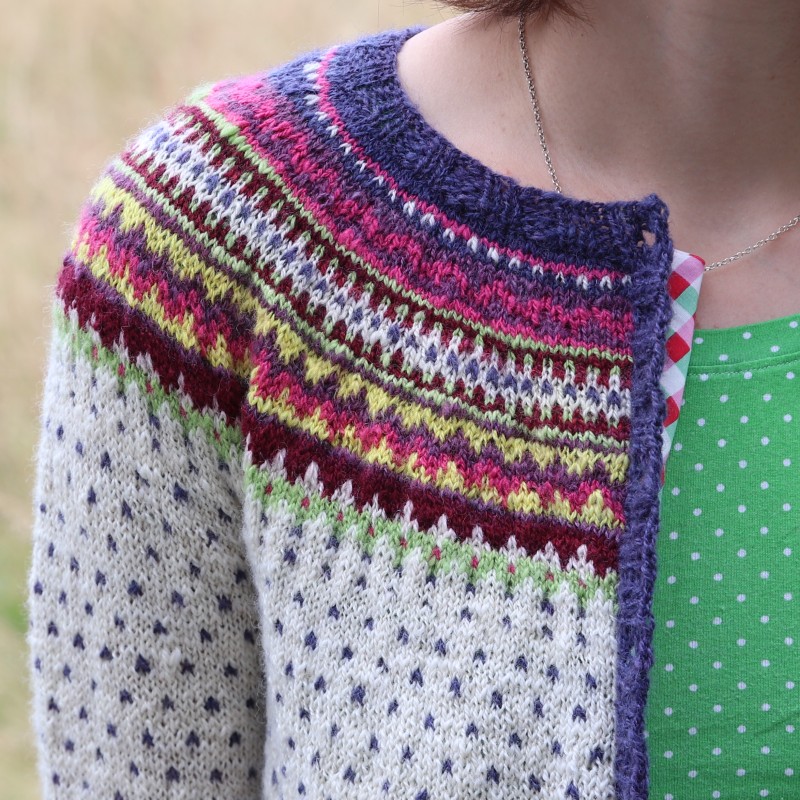
The cardigan is knit in rounds from the top down, which means that you have to steek it in the end. The instructions tell you to start with the neck ribbing. But I like it better when the neck ribbing overlaps the button bands at the top and so I knit the neck ribbing after I had knit the button bands.
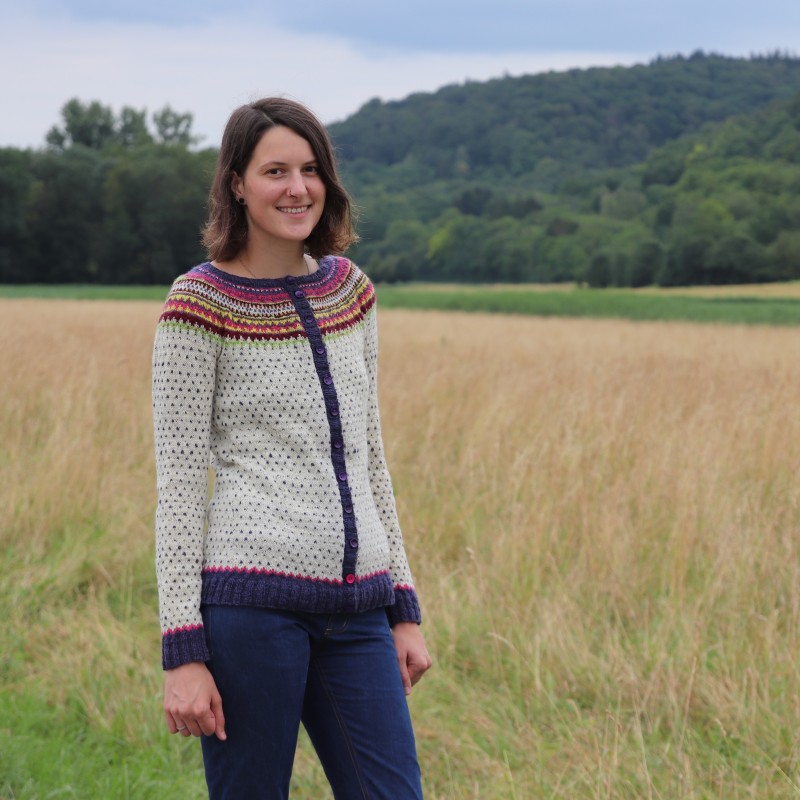
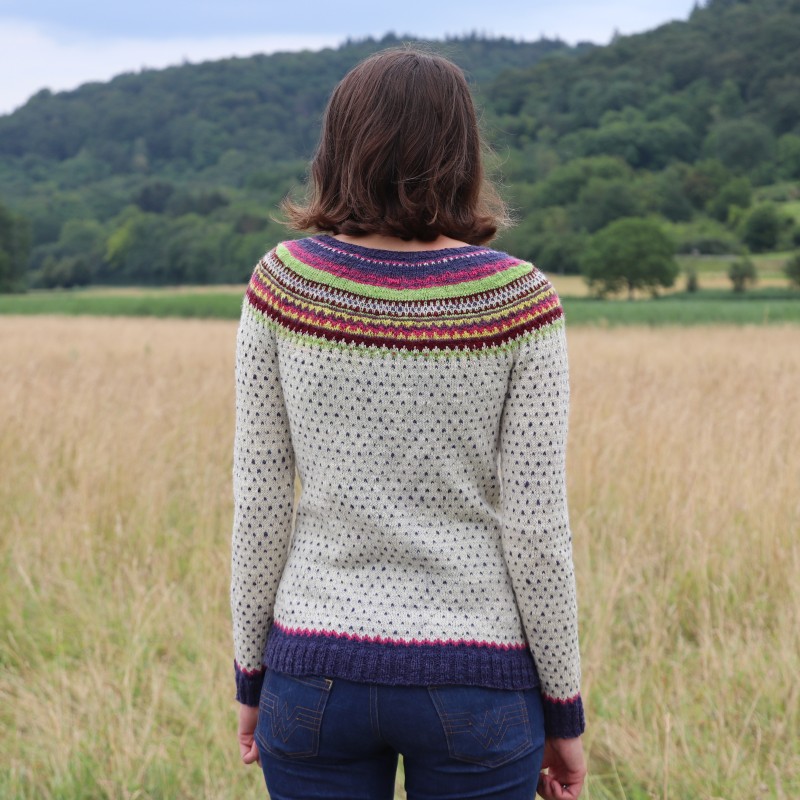
Apart from those rather minor things I worked as per the instructions and simply adapted the length to fit the cardigan to my body. The instructions are well written (apart from those things already mentioned). For example they tell you exactly when to increase stitches and how to (so they tell you k2 m1, instead of increase 36 sts evenly). The short rows are explained well too. Oh yes, the pattern uses short rows in the back to shape the neck, which makes the stranded pattern look a lot different from behind I think.
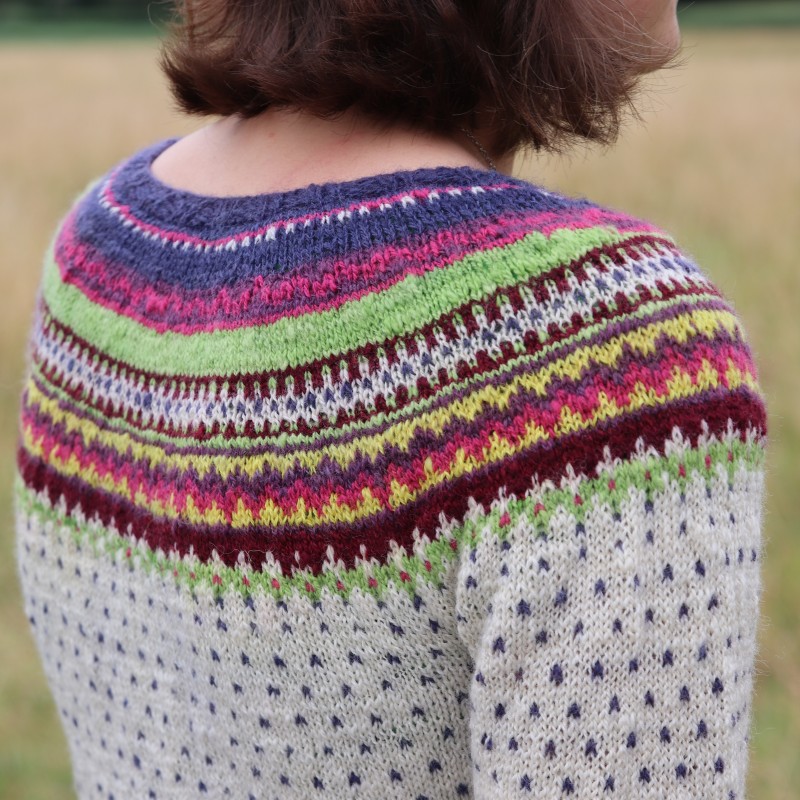
It is not really explained what to do with the flea pattern when you work decreases and increases for the waist shaping, at least not in the German version. The instructions just say the the pattern gets shifted, but not how. It wasn’t hard to figure out, but I found it odd that this was mentioned but then not explained further. I didn’t shift the flea pattern by the way, I simply kept knitting it as before, which makes the pattern irregular at the increase/decrease ‘seams’ (because the distance of the ‘flea stitches’ changes with every decrease).

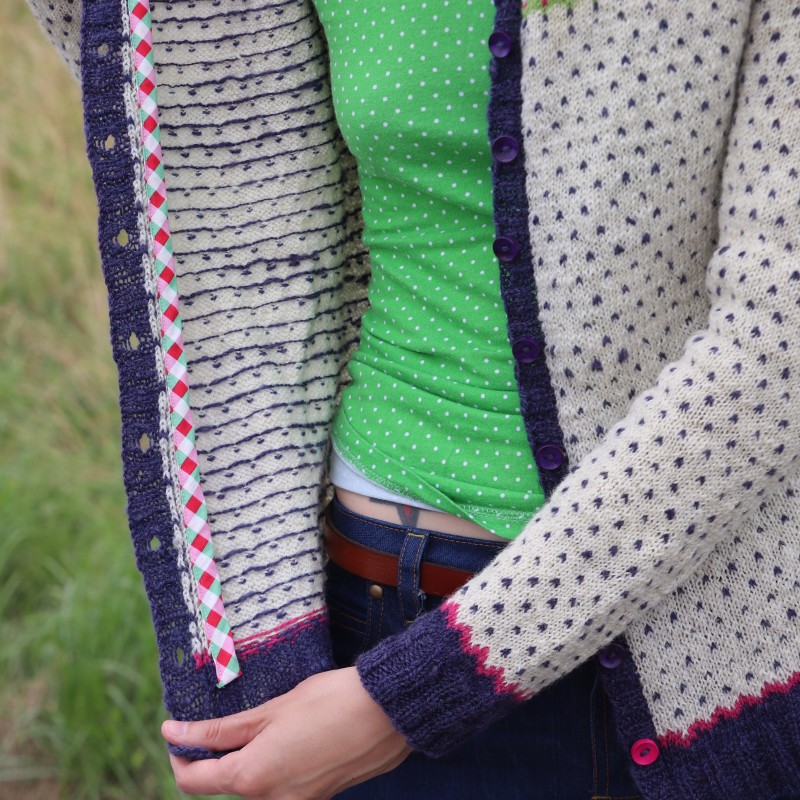
The pattern even contains an instruction on how to steek the center front. As I don’t like to secure the stitches only with crochet I again used my sewing machine, sewed 4 straight lines and cut the sweater open between the two center lines
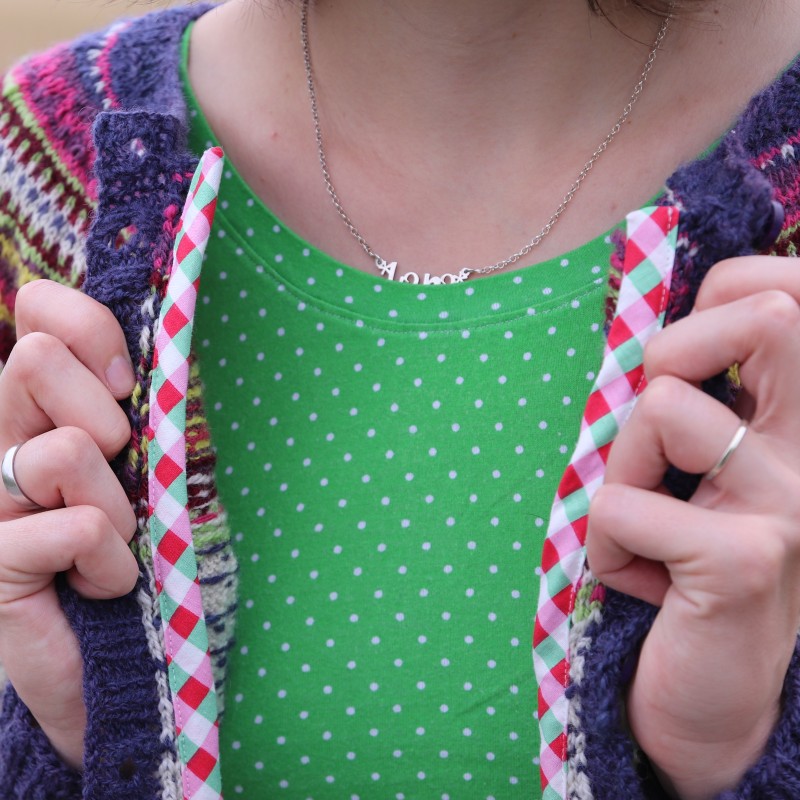
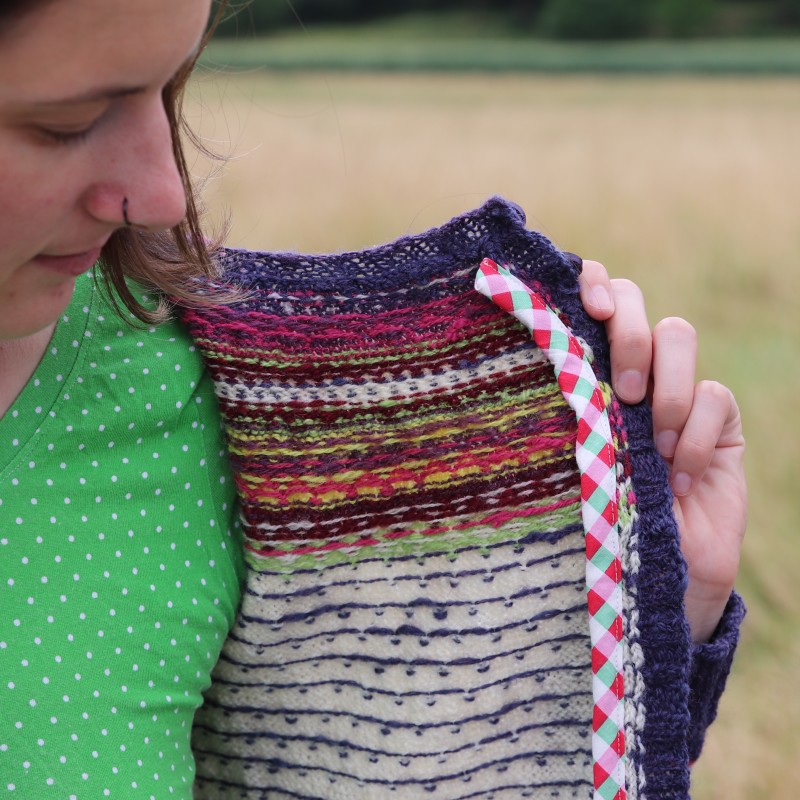
Afterwards I made some bias tape and hid the ugly edges with it :) Super quick and pretty neat I think! This made it super easy to hide all loose yarn ends and secure them without having to weave them in, too.
 This time I knit the button bands before I steeked and I steeked after blocking. I thought that would be wise, because the cardigan could felt a little before I cut it open. However, as you can see in those pictures where I wore the cardigan open, the steek edge sometimes flips to the outside. I’m sure another block will solve this problem.
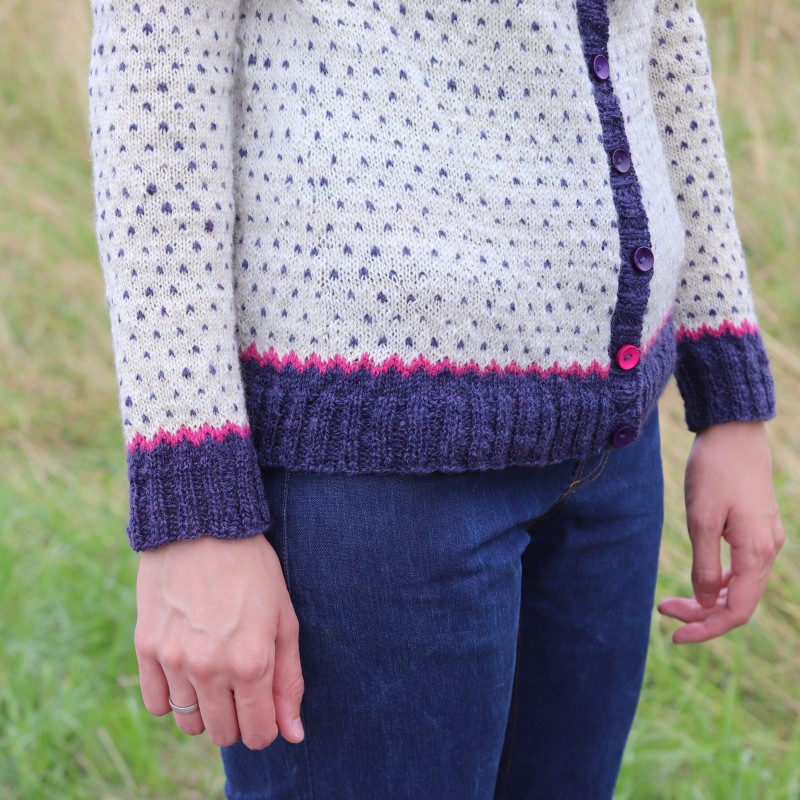
I didn’t reinforce the button bands. The yarn was too fine and I feared that the button bands would get too stiff. I had the buttons in my stash and only realized when I was almost done applying them that I was one button short. So I used a pink button and I will say that this is a design feature if anybody asks ;)
All in all this was a fun project. All the colors remind me of my different dyeing sessions and I like how the cardigan turned out. Though at first I wasn’t sure about the colors, but I grew to like them :) I also really liked knitting the pattern which never really got boring.
That’s it for today, if you want have a look at this project on ravelry :)
Macht’s gut!
Katharina
That is utterly amazing to have spun, dyed and then knitted your cardigan blows my mind! It looks absolutely brilliant!
Thank you Caroline!
Love!! What a great example of ‘slow fashion’!! Your patience and persistence in pursuing your ‘vision’ paid off as this is a spectacular cardi. Reading through your post it is clear you absolutely know what you are doing in the knitting realm! Amazing!! :)
Thank you for your kind comment Lisa :)