
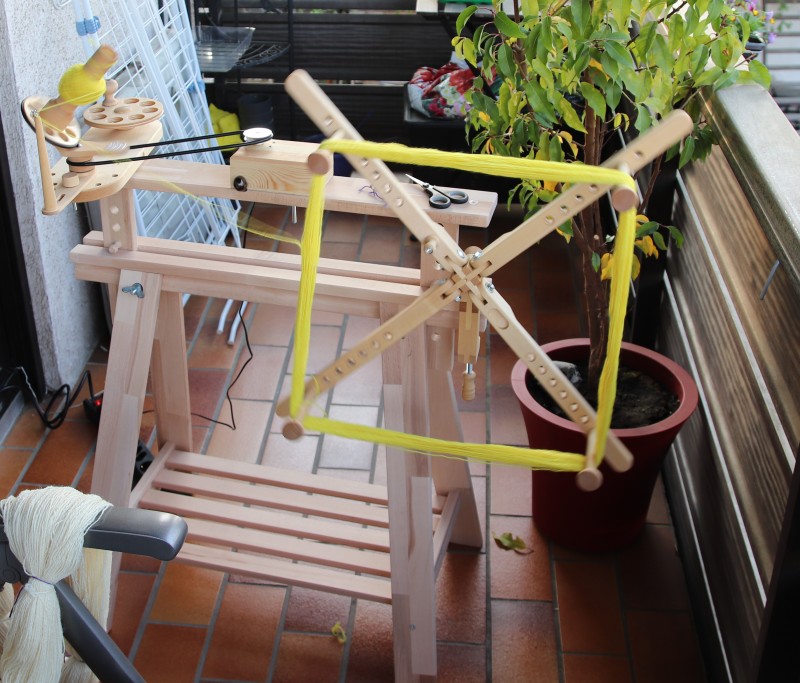
 I finished ‘electric yarn winding station’ project. I already wrote a blog post about the process from idea to prototype and today I want to wrap things up show you how the final version of my yarn winder looks like and how it works. I hope this project will be easy to reconstruct for anyone who is interested.
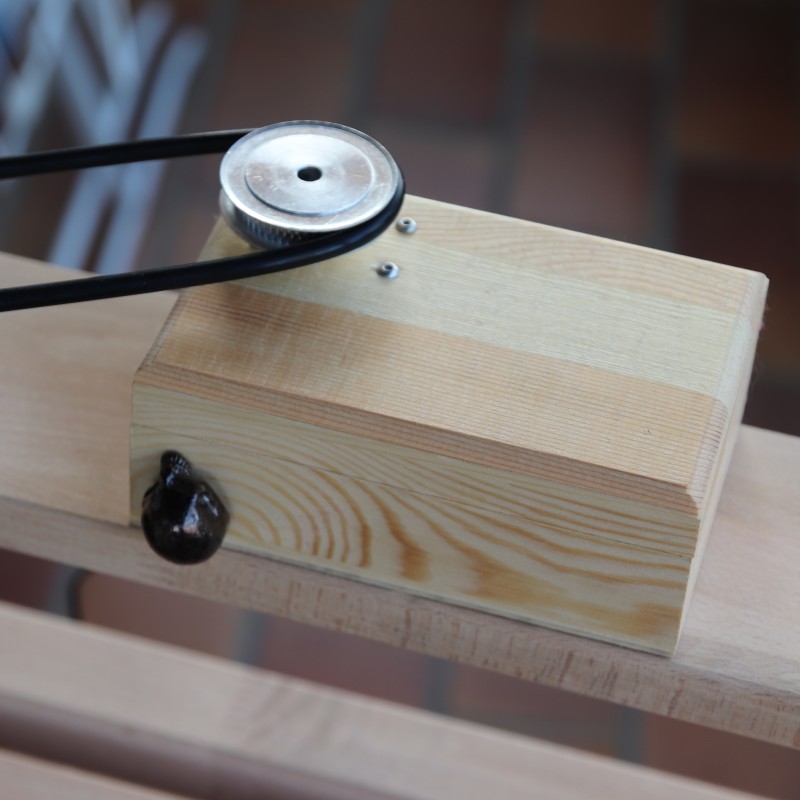
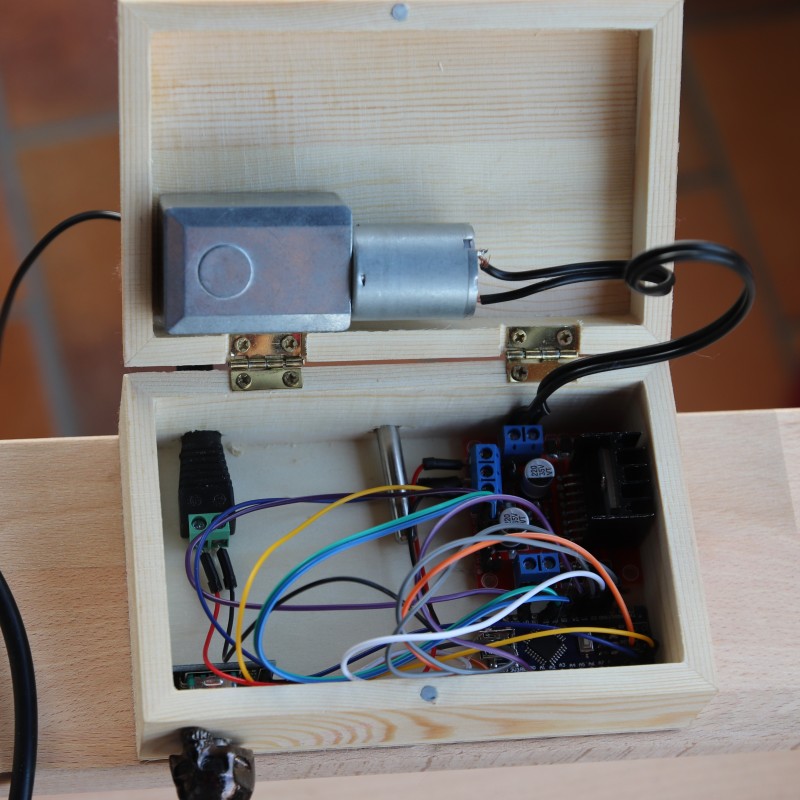
For the final version a ordered a wooden box with a magnetic closure. The box has the same width as the trestle and is just large enough to hold everything. I also ordered another DC motor featuring a worm drive. I found an old rotary knob that I had on my electric guitar for a while, it looks like a skull. 10 years ago I thought that was pretty cool. Okay, I still think it is a pretty cool knob, don’t judge me.

MY shopping list for the final version looks as follows. Please not that I ordered everything from Germany, so the links will lead you to pages in German.
- Wooden box measuring 14 x 9x 5 cm – via ebay
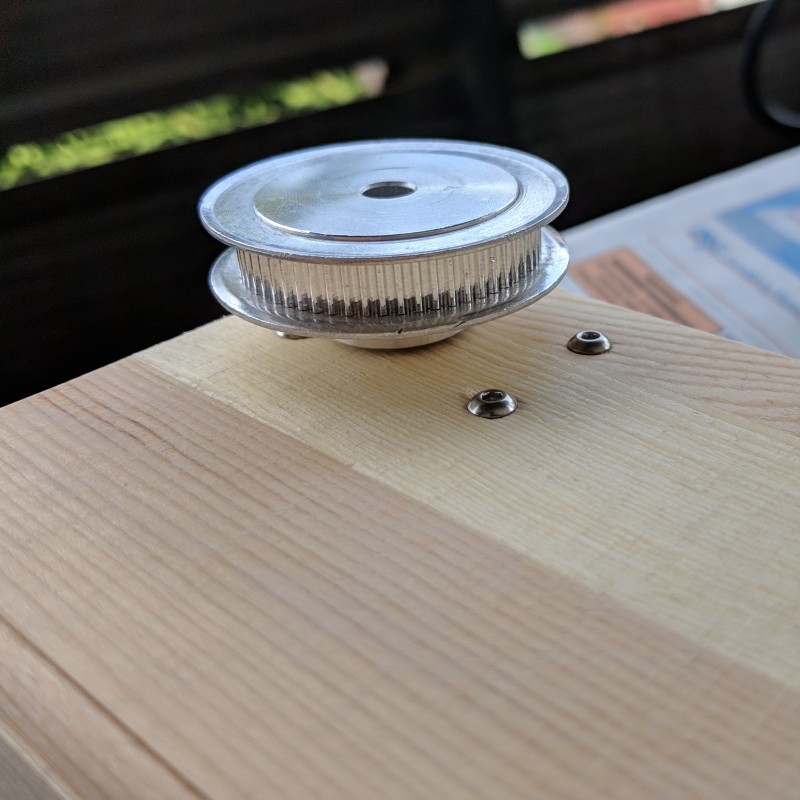
- 1 DT2 Z60 pulley ( = 60 teeth) with 6.35 mm diameter for motors with 6mm hub – via ebay
- 1 L 298N motor driver – via ebay
- 1 12V 200RPM DC motor (worm drive) + screws to fasten the motor to the box – via ebay
- 1 Arduino Nano – via amazon
- 1 12V power adapter – via amazon
- 1 Rotary Encoder (KY-040) + 1 rotary knob
- 1 Ashford table clamp, I used the one that I got with my weaving loom, but those claps can be ordered as spare parts individually, for example here


It is totally possible to use a potentiometer instead of a rotary encoder. The only difference is that the potentiometer is analog, whereas the potentiometer is digital. Plus my rotary encoder also has a knob, that I use to turn the winder on and off. You cannot use the rotary encoder to turn the motor completely off, you can only bring it to its lowest speed. And when you start the motor it always starts with the lowest speed.
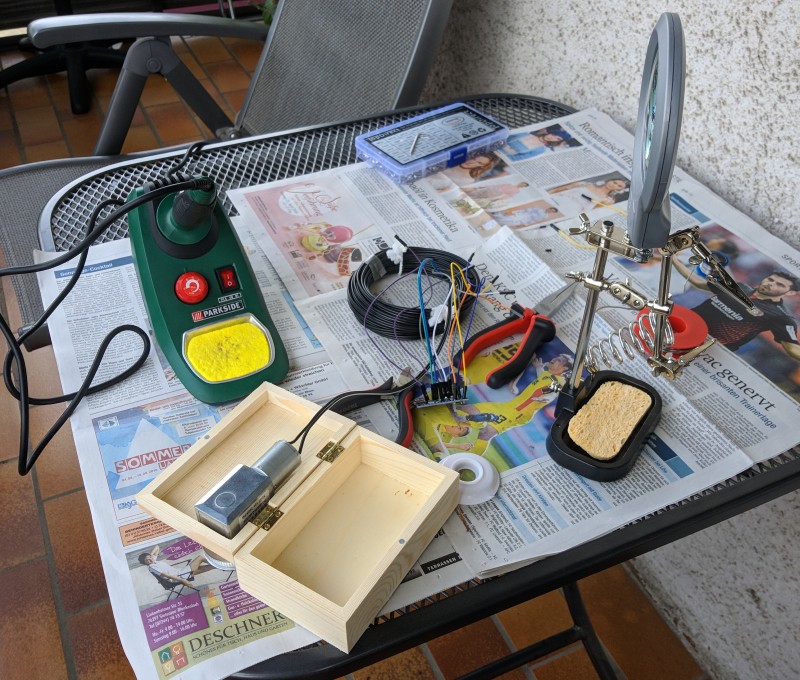
Apart from all of those supplies I already listed Marvin and I also needed cables, a soldering iron and tin solder, a drilling machine, some sanding paper and a hot glue gun.

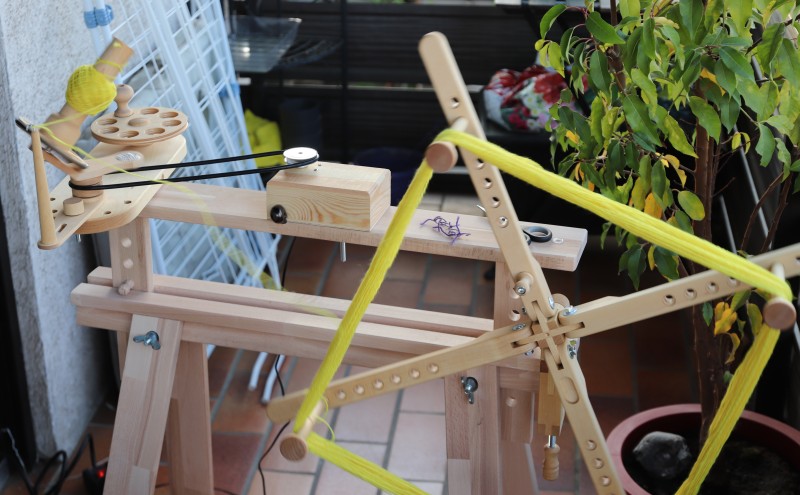
The trestle I used is from Ikea and it is called Finnvard, swift and yarnwinder were made by Ülle.
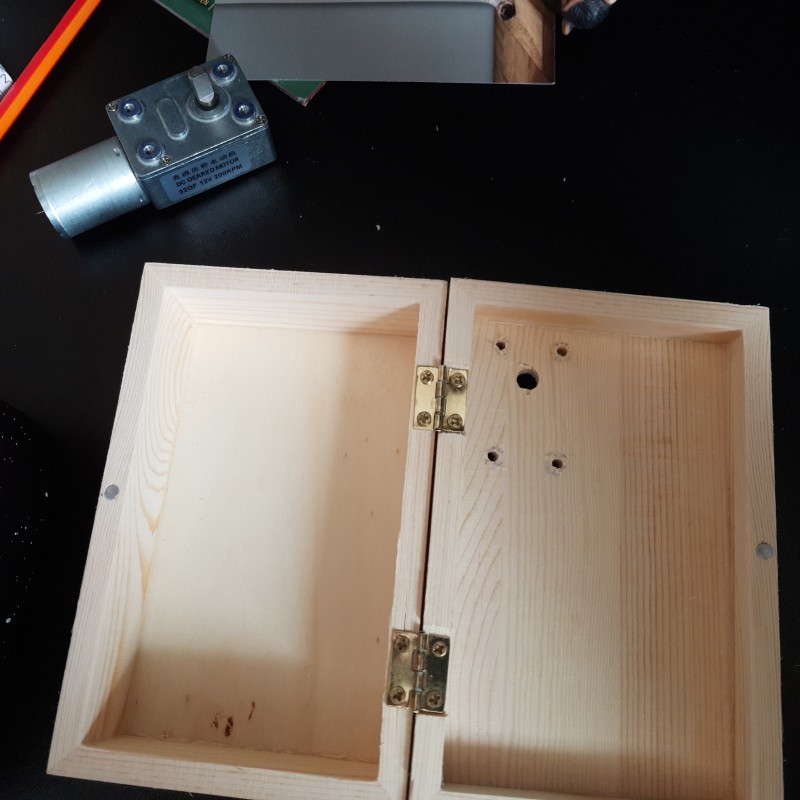
Marvin drilled the holes for the motor, the rotary encoder and the power adapter into the box. The motor had screw threads and was thus easily screwed to the box. We simply pressed the power adapter and rotary encoder into the holes and fastened them with some hot glue. Marvin also fastened the micro controller and the motor driver with some hot glue to the box.

All the electronic parts are connected as you can see from the circuit diagram I made:
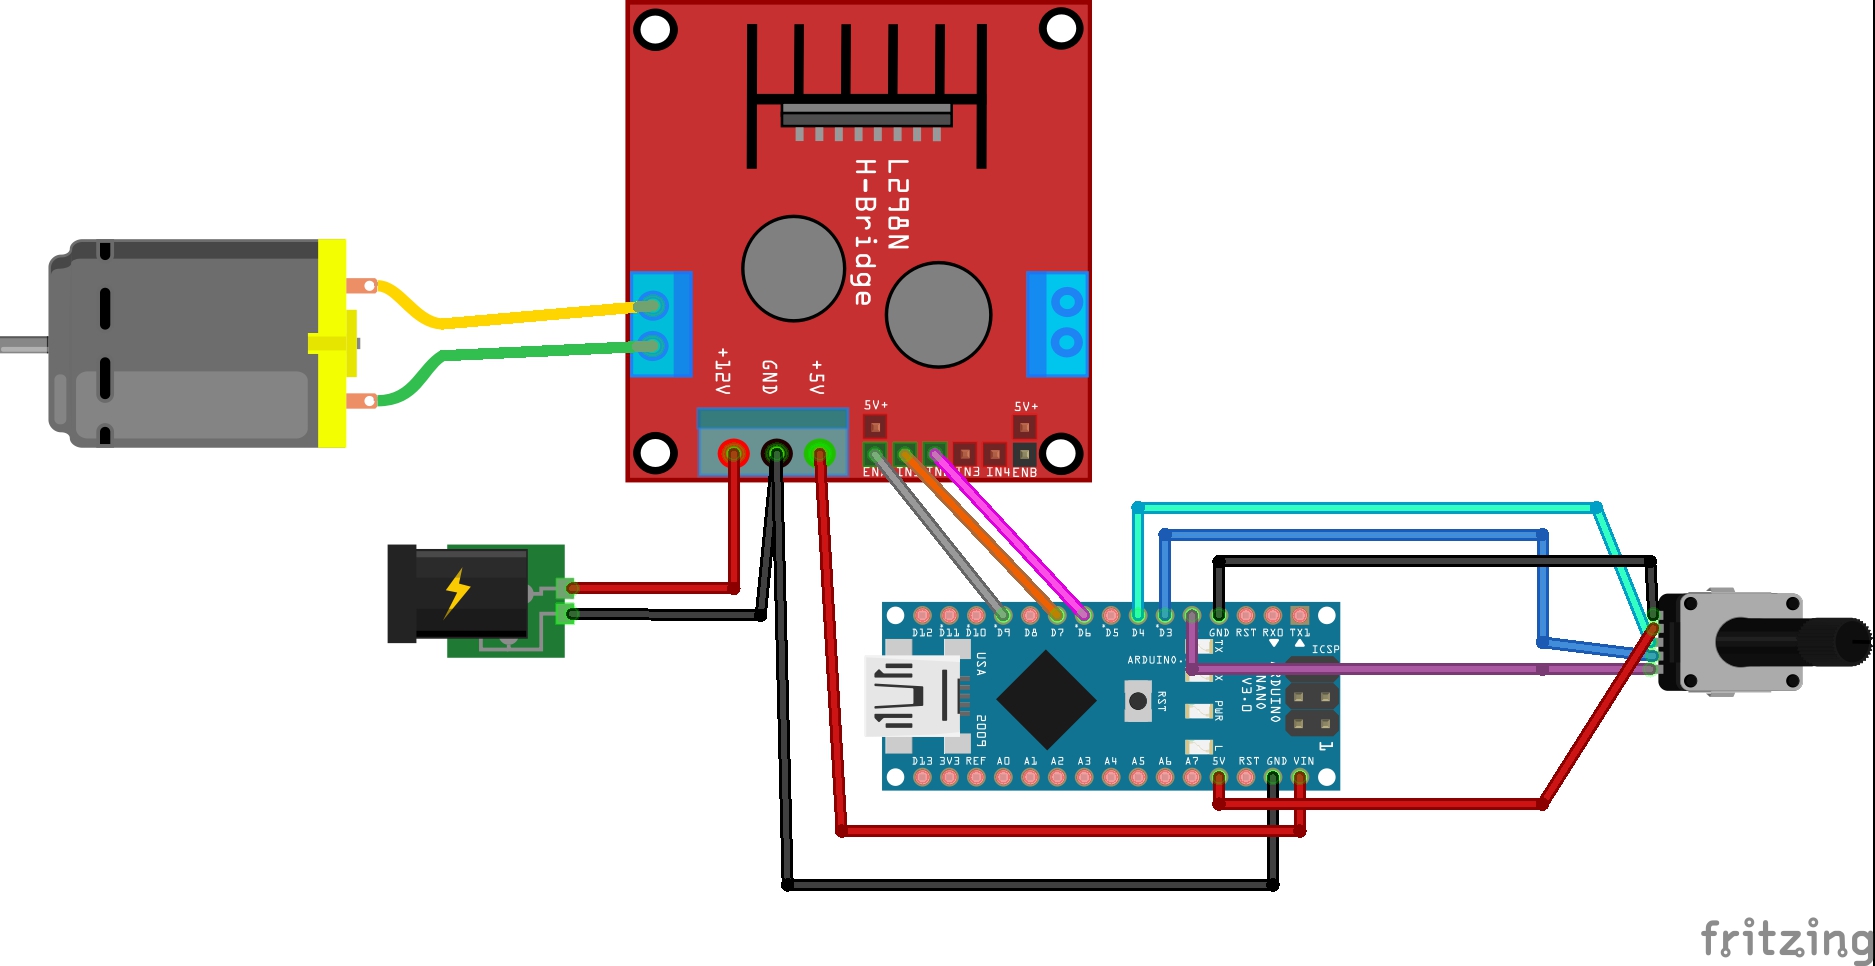
I used Fritzing for this diagram. A real nice and open source program. It didn’t take me too long to create this diagram, even though I’m a total noob :) Sadly I think the development of this application has stopped and I had troubles getting it to run under Linux Debian.
And last but not least here comes my code, to get the whole thing to work:
#define enA 9
#define in1 6
#define in2 7
#define cLK 2
#define dT 3
#define sW 4

volatile boolean turnDetected;
volatile int clockwiseRotation;

int startSpeed = 105;
int endSpeed = 255;
int speedStep = 5;
bool isRunning = false;
int currentSpeed;
int buttonState = 0;

void isr(){
  if (isRunning) {
    if (digitalRead(cLK))
      clockwiseRotation = digitalRead(dT);
  else
    clockwiseRotation = !digitalRead(dT);
  turnDetected = true;
  }
}

void setup() {
  pinMode(enA, OUTPUT);
  pinMode(in1, OUTPUT);
  pinMode(in2, OUTPUT);
  // Set rotation direction of motor
  digitalWrite(in1, LOW);
  digitalWrite(in2, HIGH);
  // Set initial motor speed to 0
  analogWrite(enA, 0);

  pinMode(cLK, INPUT);
  pinMode(dT, INPUT);
  pinMode(sW, INPUT);
  // initialize rotary encoder
  digitalWrite(sW, HIGH);
  attachInterrupt (digitalPinToInterrupt(cLK), isr, CHANGE);
}

void loop() {
  int buttonPressed = !digitalRead(sW);

  if (buttonPressed && buttonPressed != buttonState) {
    if (!isRunning) {
      currentSpeed = startSpeed;
      analogWrite(enA, currentSpeed);
    }
    else
      analogWrite(enA, 0);
    isRunning = !isRunning;
    buttonState = 1;
  }

  if (!buttonPressed)
    buttonState = 0;

  if (turnDetected) {
    delay(5); // debouncing
    if (clockwiseRotation) {
      currentSpeed += speedStep;
      if (currentSpeed > endSpeed)
        currentSpeed = endSpeed;
    }
    else {
      currentSpeed -= speedStep;
      if (currentSpeed < startSpeed)
        currentSpeed = startSpeed;
    }
    analogWrite(enA, currentSpeed);
    turnDetected = false;
  }
}
The drive is much much quieter now and it looks so much prettier :) So nice and clean. It also works like a charm. I have wound several skeins with this thing thus far and I also use it to get spun singles from my spools into cakes to get the spools free. The force of the motor and it’s speed are just right.
This was such a fun project! Working with Marvin was fun too it is so nice to build something with someone else :) Plus this thing is super practical as well, which is great plus. Now I’m keeping my eyes open for an old used spinning wheel that I can transform into an electric spinning wheel. I’m no wood worker and Marvin isn’t easy, so we have to buy at least the flyer.
As usual: you are welcome to ask any questions you have and I will try to answer them as best as I can :)
Macht’s gut!
Katharina
This is beyond clever! I am pleased to say that I can still understand the code – even though I haven’t done programming for a very long time. Well done!
Thanks Sue!I didn’t know you’ve done programming, very interesting :)
Awesome project Katharina!! Everything looks so tidy and professional. You and Marvin must be engineers.
I look forward to seeing your electric spinning wheel some day! :)
Thank you Lisa. We are indeed both engineers :)