
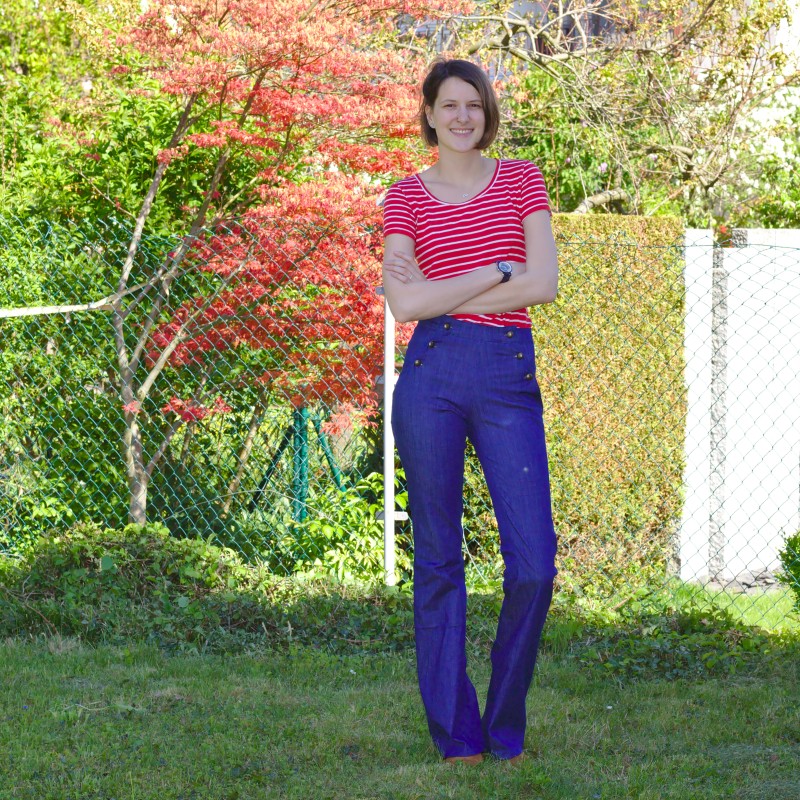
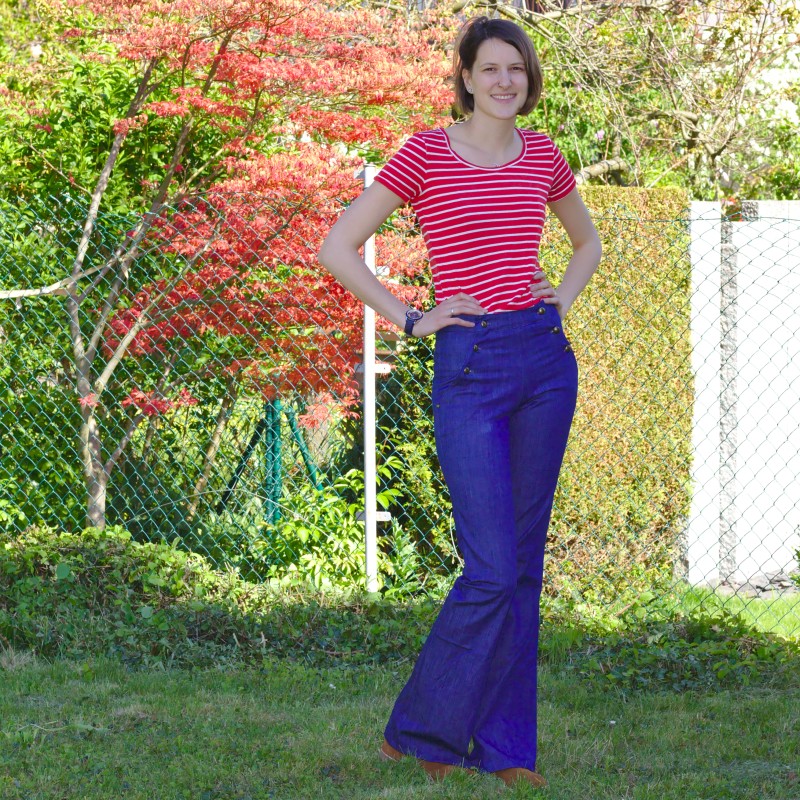
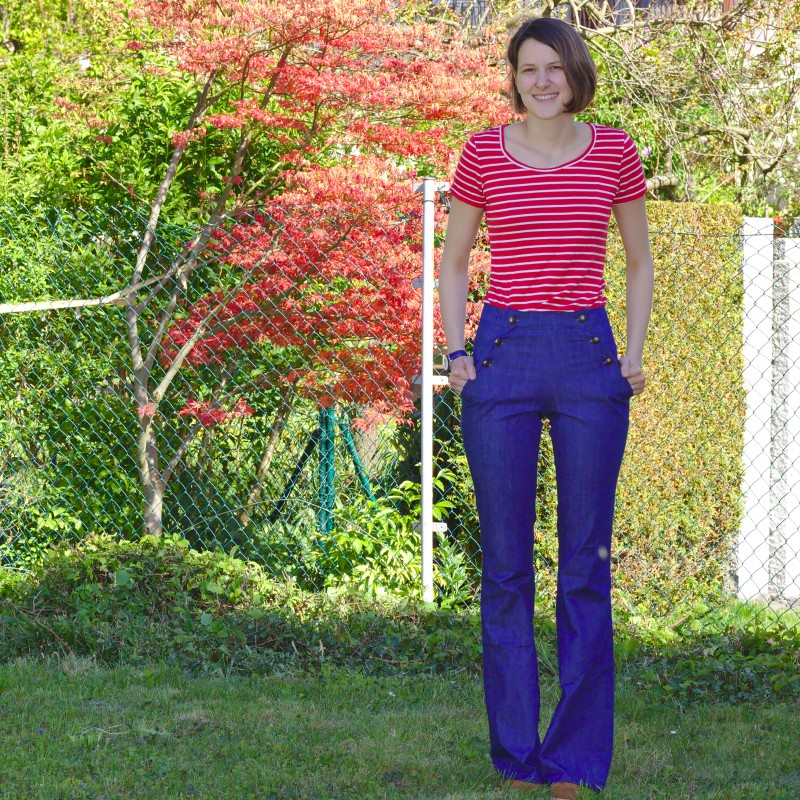
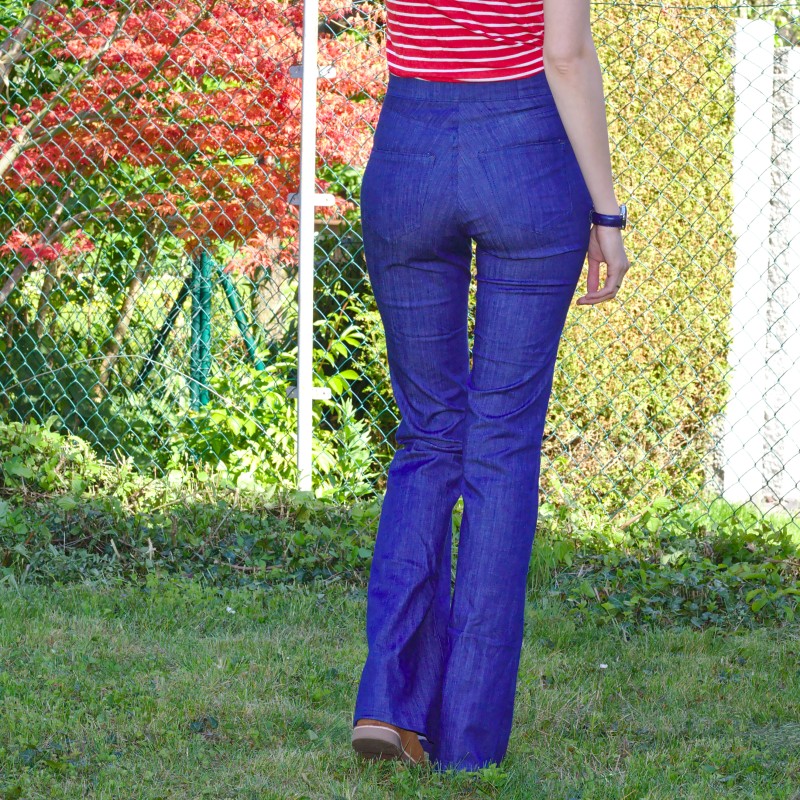
 Last weekend I had a revelation. I have been thinking about sailor pants for while now, because I frequently get asked about a pair of Sailor shorts that I made a while ago. They didn’t fit properly and the pattern was a little shitty too. So when people asked me about it, I always advise against the pattern and suggest trying this Burda pattern instead. I have this pattern at home, but I never tried it. The pants are a little too tight and also a little too short for my taste.But still, I was planning to give this pattern a try in summer. It seems like my brain had made other plans without me knowing. And once it was done planning I had that said revelation: I wanted to make flared sailor jeans! I was so excited by that plan, oh man! I had to start right away, push all those other projects I had planned aside and CUT INTO THAT FABRIC!

Well, first I needed a pattern. I have a flared leg jeans pattern: the Baste + Gather Birkin Flares Pattern.I have made this pattern twice before, in a long version and in a short version. I sewed three different sizes, like in one pair of pants :D 27 at the waist, 29 at the hips, 28 at the legs. The leg inseam length is 34 ” in the original pattern and I lengthened the legs by 6 cm. I also deepened the crotch by 1 cm in the back and the front, and when you look at those Birkin Shorts you can see that that was not enough, so I extended the crotch depth by a another 0,5 c at the front and the back this time. I also lengthened the crotch seam length, all typical modifications to get my body to fit into pants. Then I traced the front leg pattern piece and added the part that was cut out because of the front pockets. I also omitted tracing the front fly, because I didn’t need it.

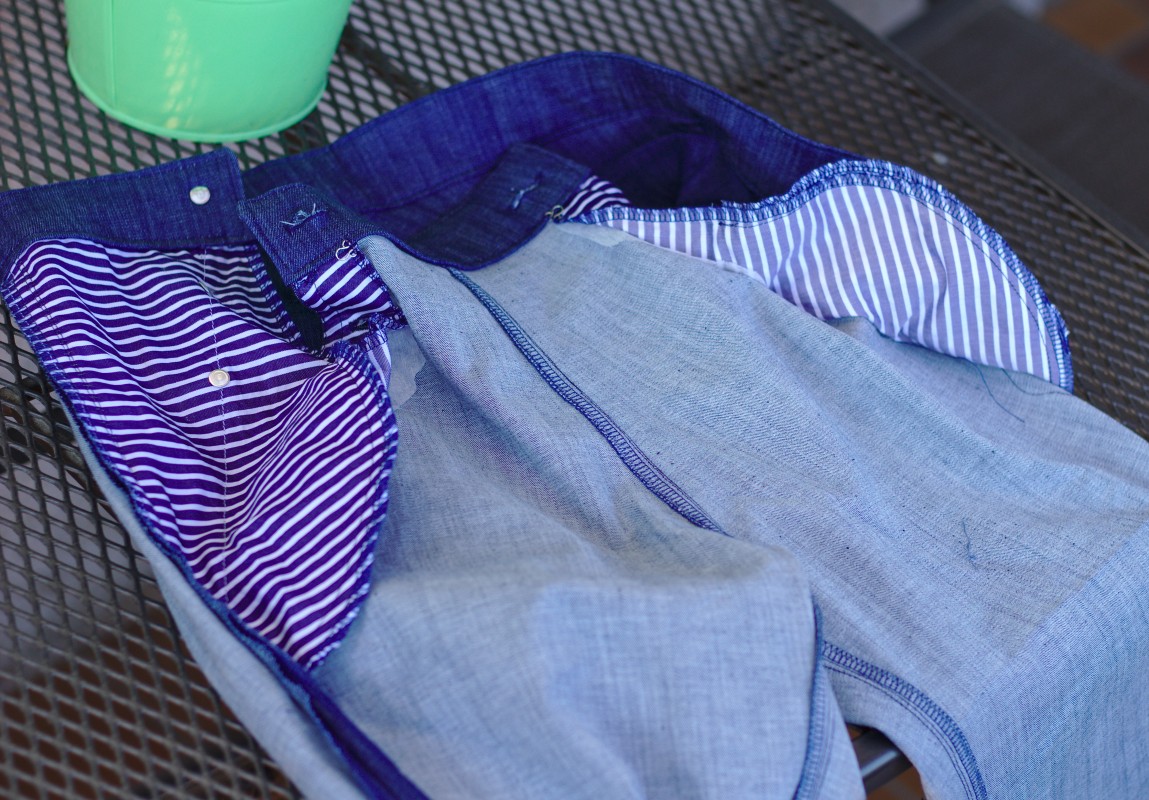
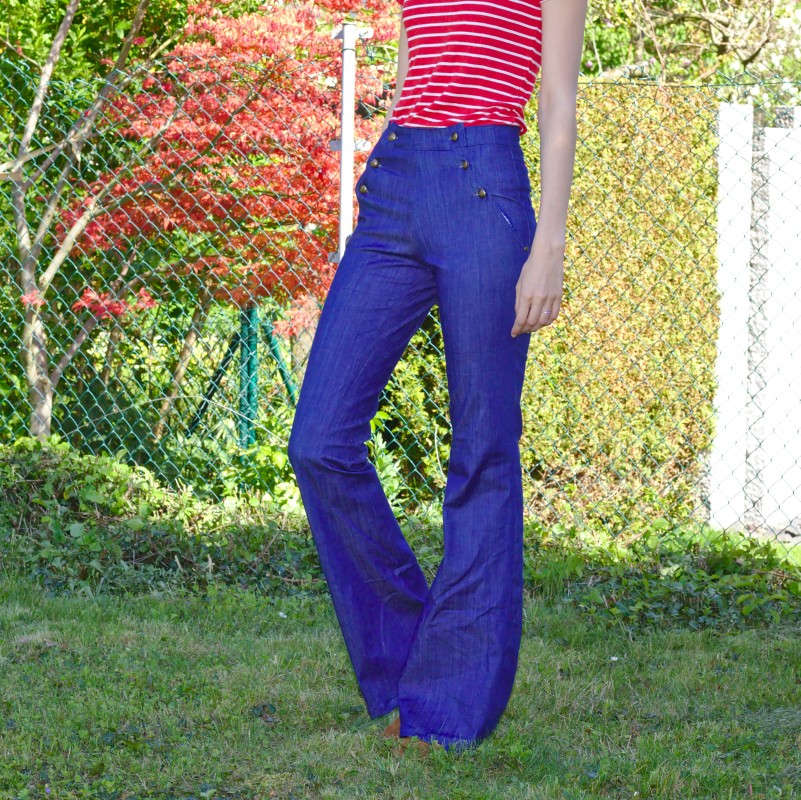
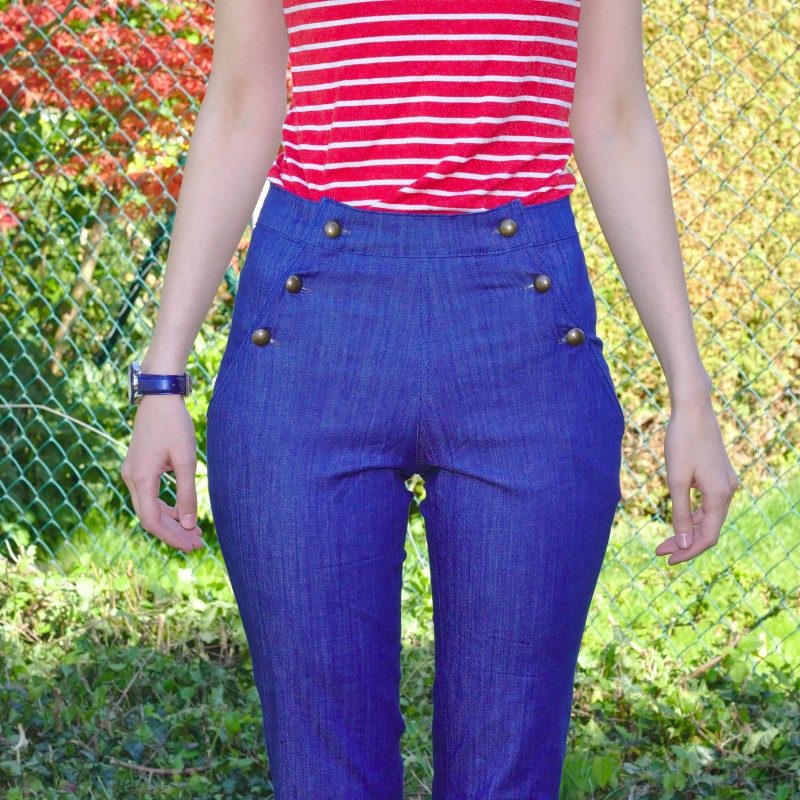
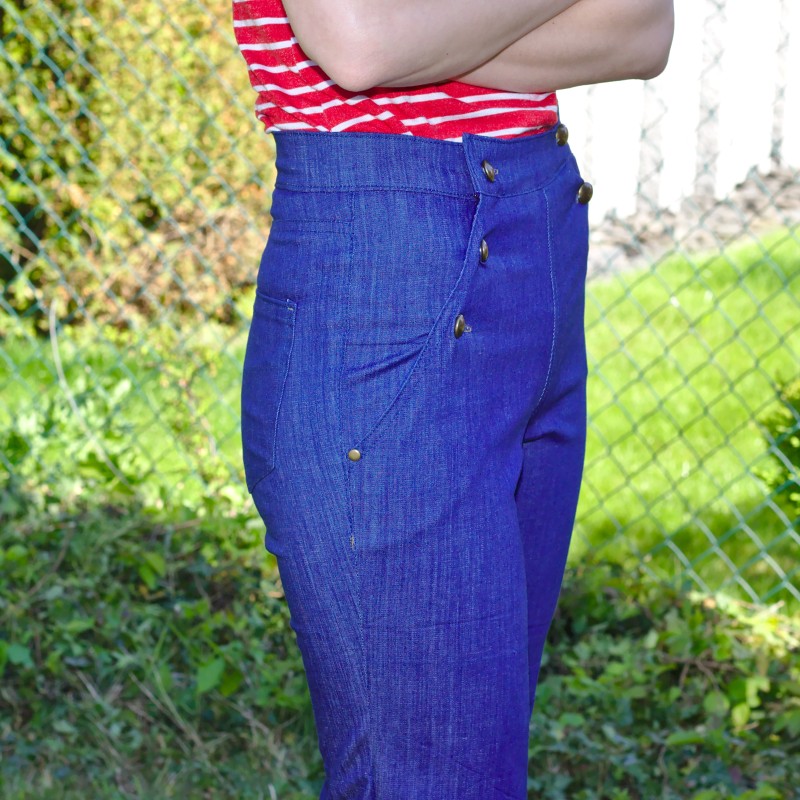
Than I studied the sailor flap (or whatever it is called, in German it is sailor flap fyi) I looked a the Burda pattern and I looked at my old shorts and decided that the finished width of the flap should be 20 cm and that the flap should extend to the widest point of my hips.

I simply connected those two points by a line, I curved it a little, but it is a straight line in the Burda pattern. The positioning of the buttons can be done when the jeans are finished, so I didn’t bother with that then. The front leg pattern piece was finished after this little modification.
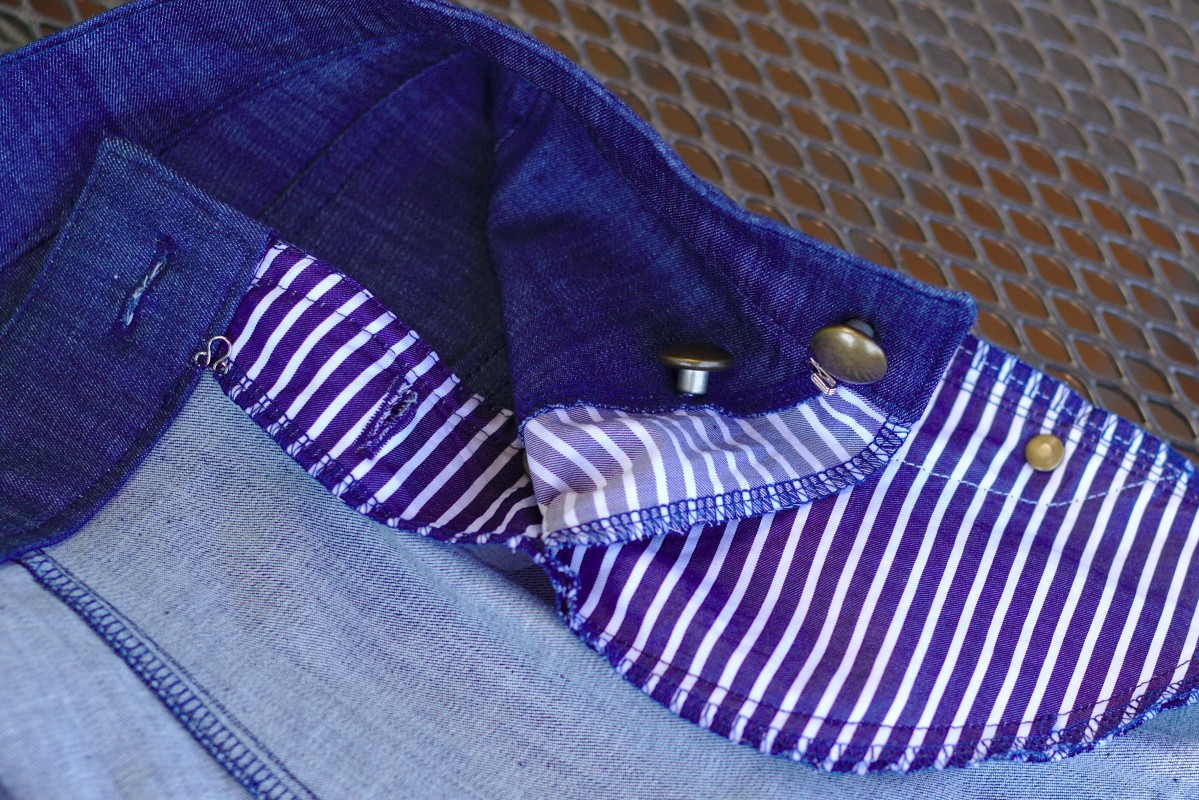
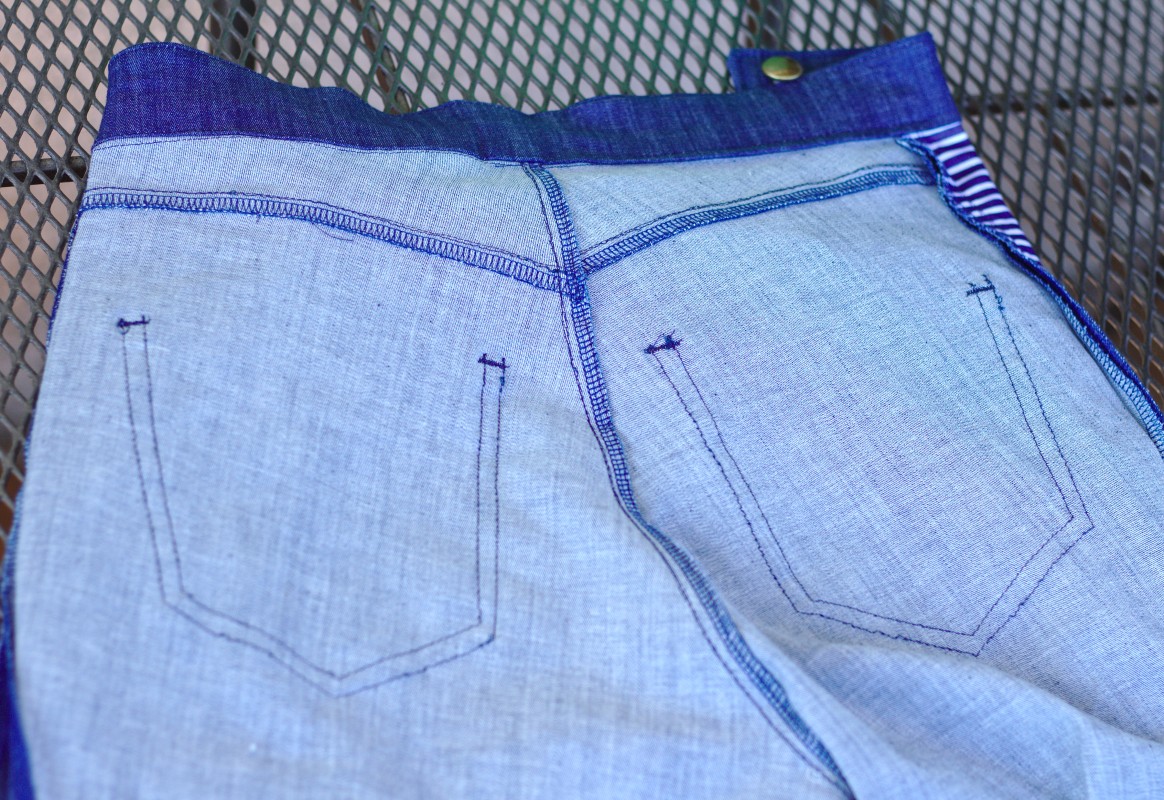
 Now I needed pockets. So I used the part that I cut off the front leg and extended it, so that it became the backside of the pocket. For the front side (or pocket facing or whatever you call that) I copied the part that I just extended (without the leg cut off part) and added seam allowances to the upper line.
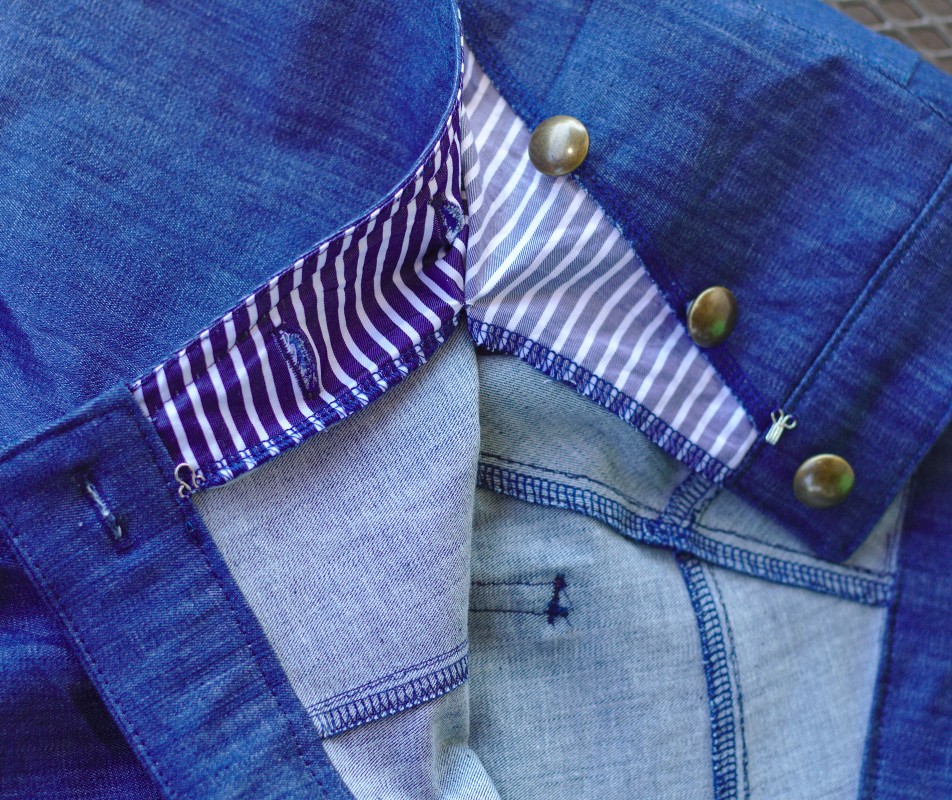
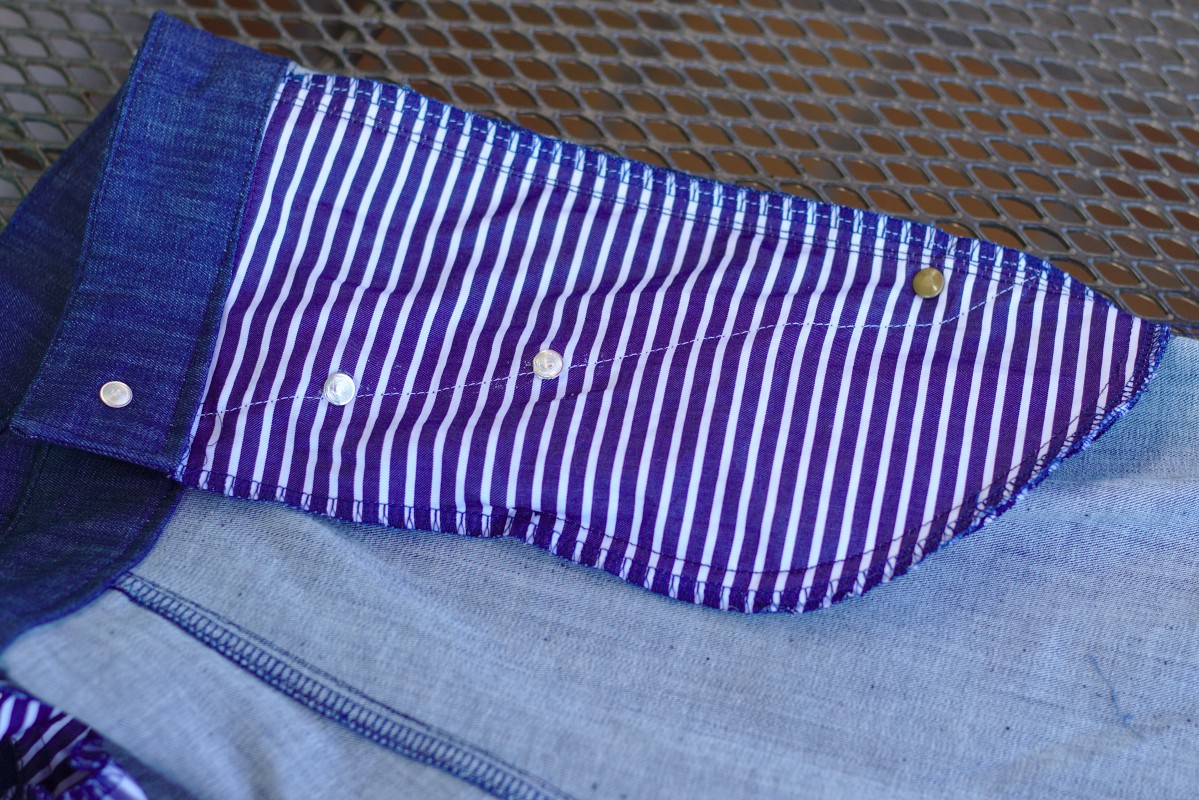
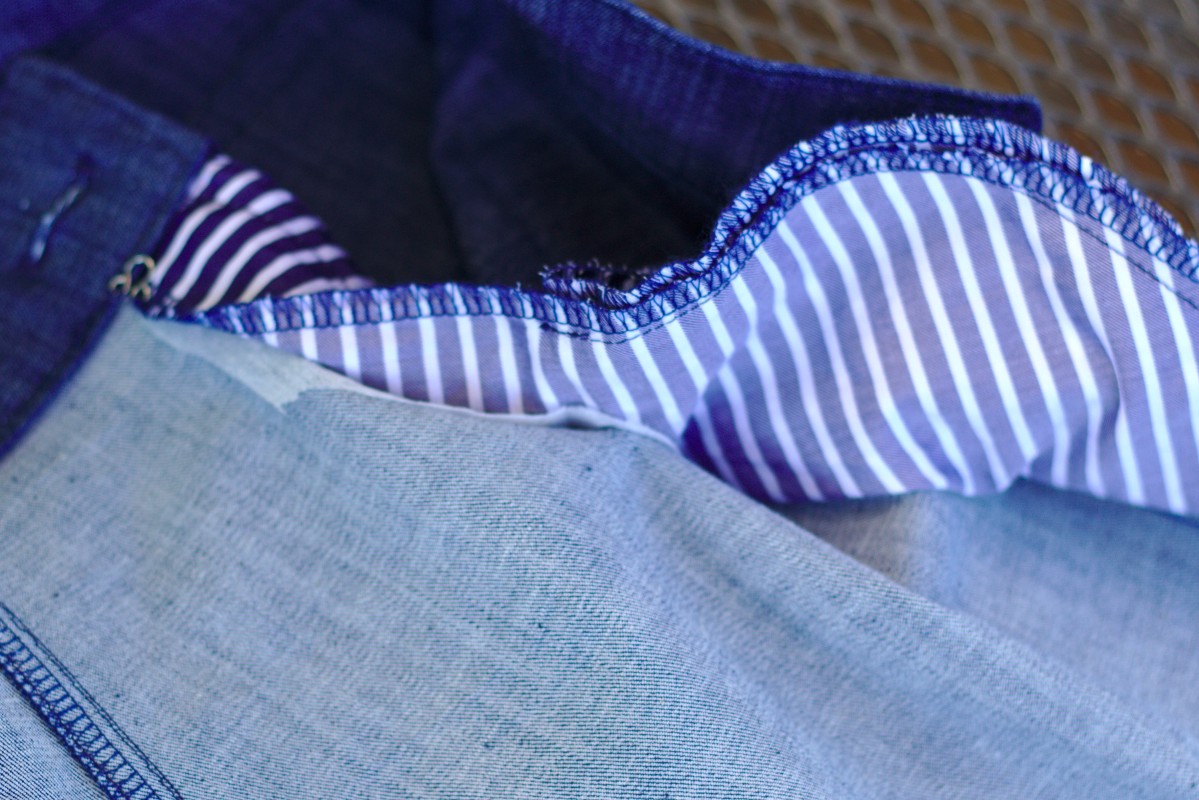
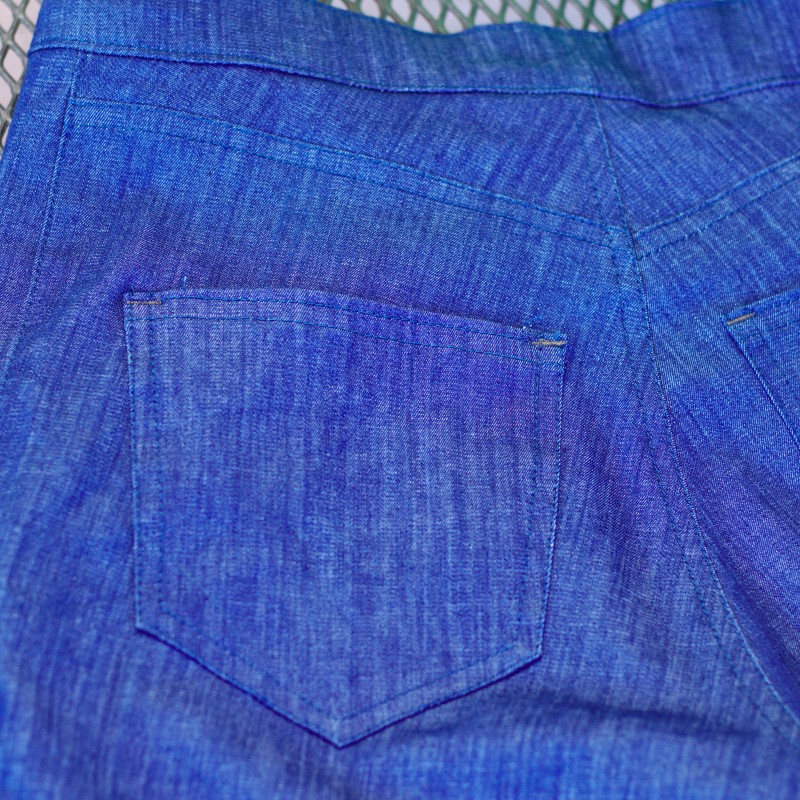
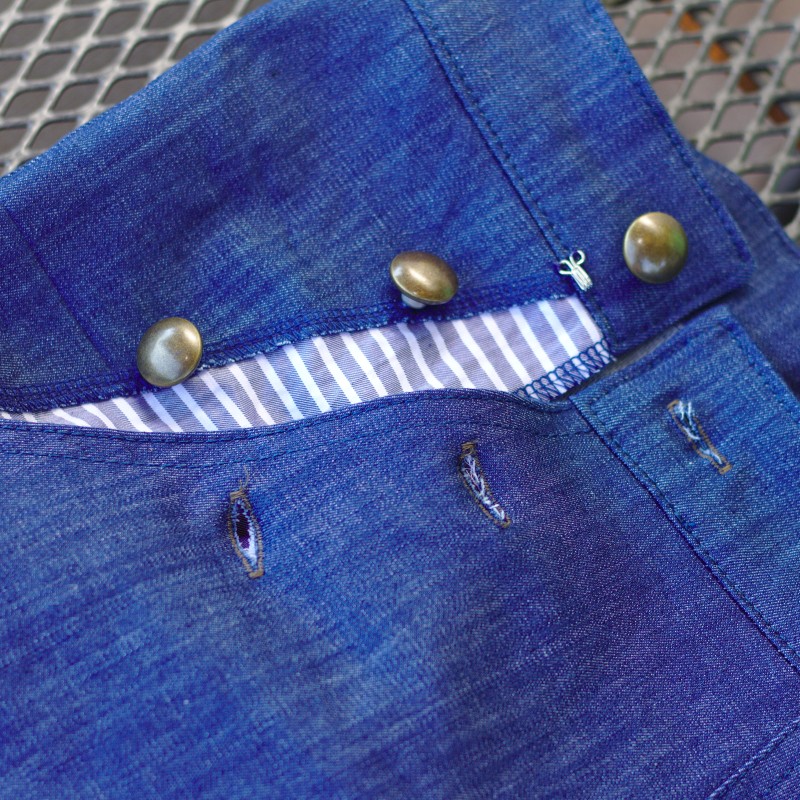 I cut the back pocket once from denim and once from lining and just like you do it with a normal jean pocket, I cut away a part of the denim piece, which in retrospect was a bad idea. First of all, as the pants are super stretchy, the lining sometimes shows from the outside. Second I didn’t want to apply the button solely to the lining, but to a part where there is lining and denim and that was difficult as I had cut off too much to do that. That is why there is a lot of tension on theses buttons now, I applied them to both layers and thus not were their placement would have corresponded to the button holes. For the next version I would still double the denim pocket piece with lining for stability, but I wouldn’t cut anything off the denim. I interfaced the area of the front flap where I wanted to place the button holes, which was a good idea I think.
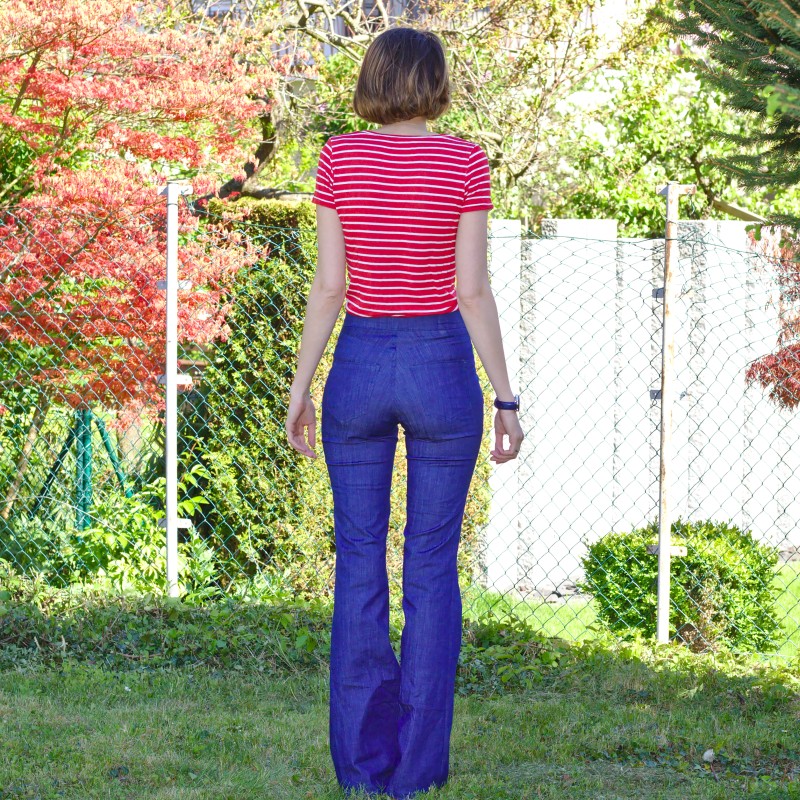
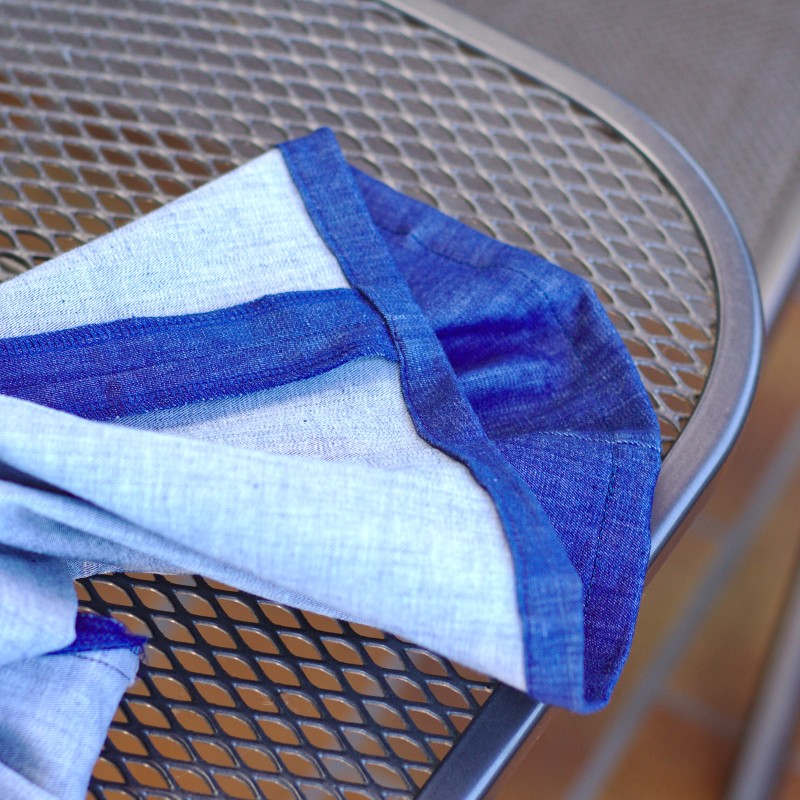
 There is one last additional change I made to the pattern: I had to cut more waistband pieces. I simply cut some too wide pieces and shortened them in the process, no problem. And in exchange for the extra waistband pieces I could omit all the front fly pieces.
When sewing the pockets I had to think a little. You cannot sew them shut all the way up to the waistband or otherwise you won’t be able to get into these pants. Luckily Megan Nielsen just published a tutorial on how to sew those pockets. How convenient :)
The fabric I used is super stretchy. I bought it a local fabric market, and I think I bought it because of its strechyness. Super comfortable I’m telling you! But also not too ideal for a pair of pants like these. The button closure does not excuse any tension at all and I think this kind of closure would have worked a lot better with a non-stretchy fabric and a pattern for a looser fitting pair of pants. Now, as you can see the fabric distorts in the closure area (which is also due to the slightly off button placements). Applying some hooks and eyes made that a little better but I’m hoping that the effect will go away a little more the more I wear these pants. And next time I will use a less stretchy fabric. Live and learn.

I used blue topstitching thread because I didn’t want my thread to steel the show. The color of the bar tacks is as close as I could get to the buttons’ color. I didn’t even decorate my back pockets!
And all for those buttons. They are real jeans buttons, can you believe it! They are perfect! I found the on ebay.


The inner seams are all finished by serger. Because, you know.. me and flat felling seams.. I topstiched the seams in the same manner I always do with jeans and in the same manner it is suggested in the Ginger Jeans Sew Along.
Everything went smooth until I had to place those buttons. They are three dimensional which means: no hammering. I know that because I tried it. Didn’t work, destroyed the button ;) So I looked through all my hardware to find something that could help me. In the end I used tools I had for applying 22mm eyes. As already mentioned I didn’t want to place the buttons on the lining alone and thus had to deplace them a little. When the buttons were in, I realized that the button in the middle sits only a little bit away from my pelvic-bone, and can bee quite uncomfortable when I make a wrong move. I simply didn’t think of that, but it is something I would definitely consider next time. I think I will create a new problem then, the flap will gape at the pelvic bone. I have to think about that a little longer.
Sooo, I think I’m through! I hope my descriptions and pictures will help those who want to hack a pattern into a sailor pants pattern. As always, if you have any question at all I’m happy to answer them as good as I can :)
Oh, and the tshirt I’m wearing is a Renfrew Tee that I think I didn’t show in this blog before.
Macht’s gut!
Katharina
My oh my, these look sensational. What a great pattern hack. What more can I say? Well done!
Thanks :-*
These are awesome. What a great pattern hack and very helpful advice for those brave souls that want to make their own Sailor jeans. They look fabulous paired with your new stripy red t-shirt too.
Thank you Caroline :)