
 Maybe you’ve heard of ‘solar dyeing’, maybe you haven’t. However, let me tell you that ‘solar dyeing’ is just a very fancy word for a a very simple technique. Instead of fixation dye with warmth electrically, you let the sun do the work. Instead of using a microwave or an oven or a hotplate you put your wool and dye into some kind of transparent container and make sure the sun keeps shining on it for some time. The process takes longer but the result is the same. And I personally make much less of a mess and there is almost no chance that the wool will felt (which always happens to me with the other methods). The big disadvantage is that you can only dye small portions, as the water does not get hot enough in too huge containers.Except if you use something flat, that has a huge surface. But even then the amount of wool that you can dye at one time is limited and you would need a lot of space and peculiar flat containers, which I both don’t have. So here’s what I did:
This story begins at the annual dye meeting of my spinning group. Yes, we have a dye meeting and it is so much fun. Everybody brings their dyeing stuff and we were able to dye 4 lots parallel. In the end you can go home with a lot if differently colored yarns or roving tops or whatever you wanted to dye. However, I didn’t just go home with some beautifully colored yarn but, as usual with a lot of tips. I’ve gotten so many tips from my spinning group this past year and I highly recommend to everyone to find themselves a crafting group. It is so much fun and so helpful to talk to other people that share your interest, especially when you start a new craft. One of the ladies mentioned that she recently solar dyed with acid dye and she even showed me pictures. I was instantly won over :)
I knew about solar dyeing, but it is always associated with dyeing with plants, never with acid dye. I don’t know why. The principle is the same, if plant dyeing works, acid dye should work too and it is a lot less fuss.
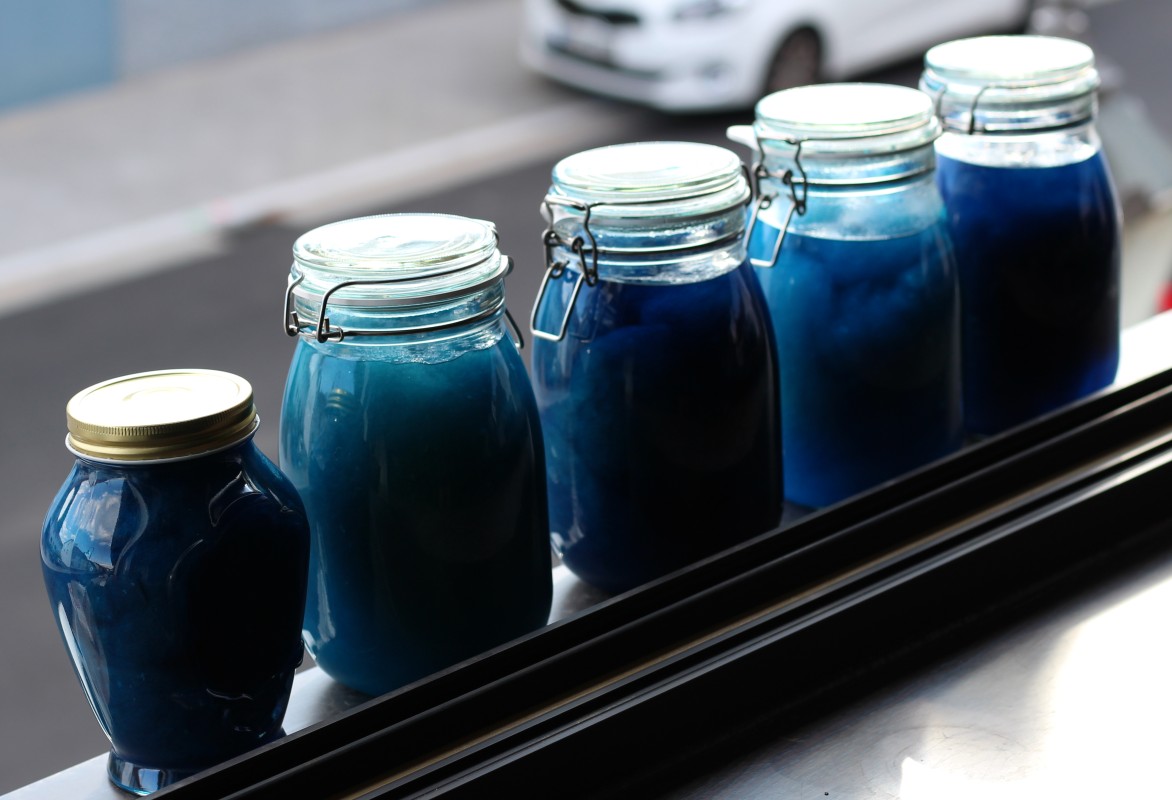
After the meeting I went home and ordered 4 1.8l jars from Ikea. I had one jar here and so I immediately started the first experiment. I liked the Ikea jars a lot better, it is super handy that they don’t let water get out, so that I was able to mix everything up by shaking it once in a while. I couldn’t do that with the non-Ikea jar. I fit 45 g wool into one jar. I could have gotten more into it, but there wouldn’t have been enough room for the wool to fully spread, so that the dye can reach every part.
I just finished my recent dye and thought I’d share my experiences with you, here’s my summary of what I did:
 I poured water into a jar, so that it was about half full. By the way, the amount of water has no influence on the intensity of the dye. What is important is simply the ratio of dye and wool. However, if you want a solid dye, there should be enough water in the jar so that the wool swims and the dye can reach every part of it. Now you need something acid. I like to use vinegar essence, I don’t mind the smell. If you do however you can also use citric acid for example. I gave about one teaspoon of vinegar essence into each jar. The rule here is: better too much than too little. Afterwards I gave a few grams (like 1 or 2) of dye powder into the liquid and mixed everything so that the powder completely dissolved. You can however do what you want here, if you don’t want a solid dye you can for example first put part of the wool into the water, then a little dye, then again wool and maybe another color. That is what I did with the roving top below.
 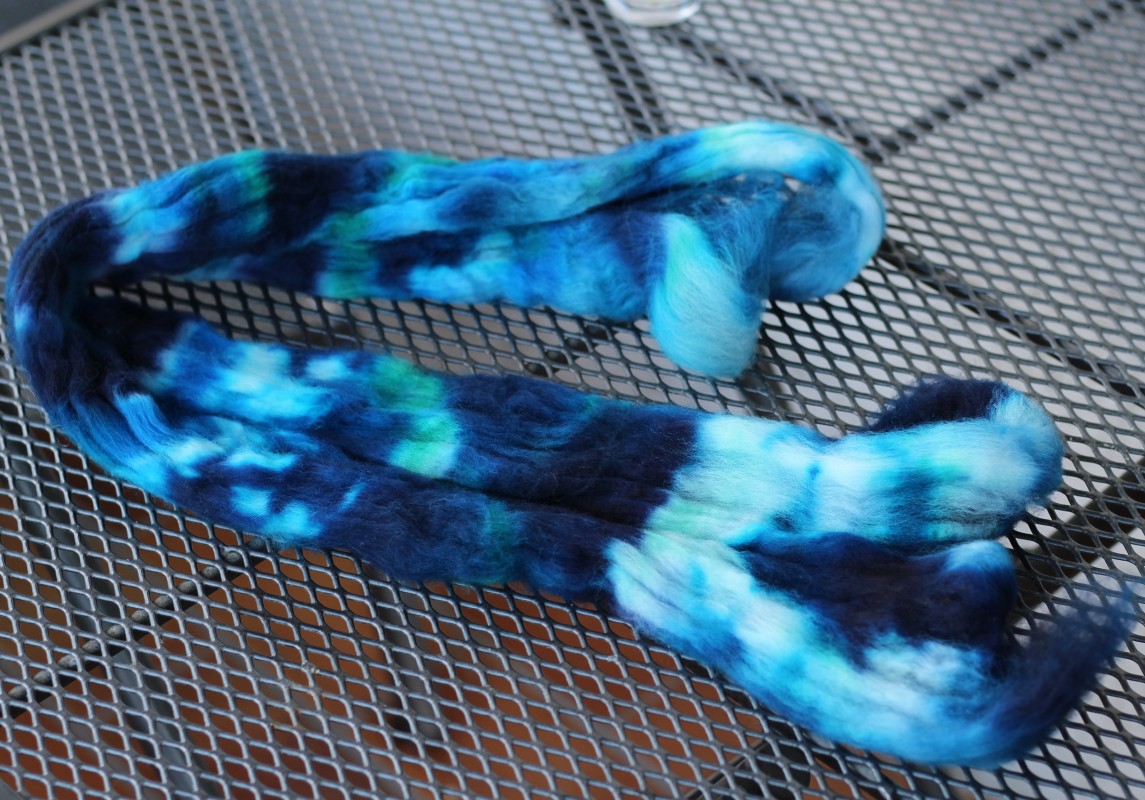 Before putting the wool into the jar I always let is soak for about 30 minutes in water. Some folks let is soak in acid water, but I’ve never done that. If you don’t soak the wool before putting it in the jar, the air that is still in the wool will prevent a solid dye.
After the soak, the wool is ready for the jar. As already mentioned: there are no rules on how to distribute dye and wool :)
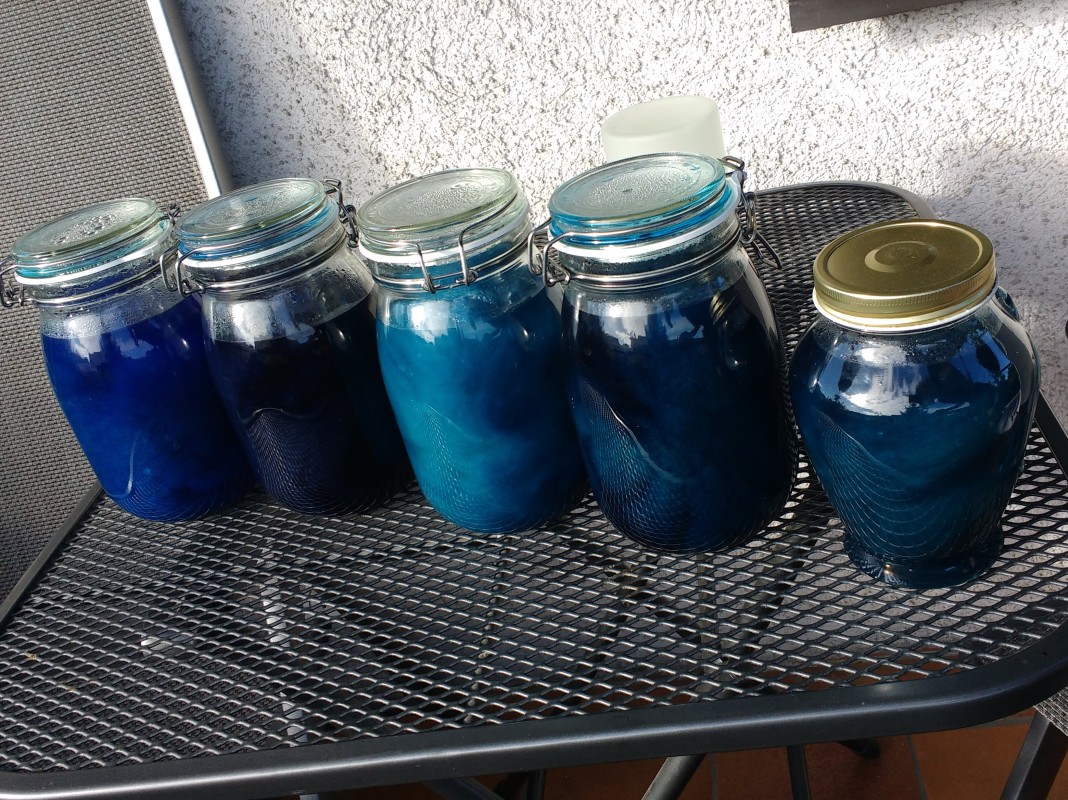
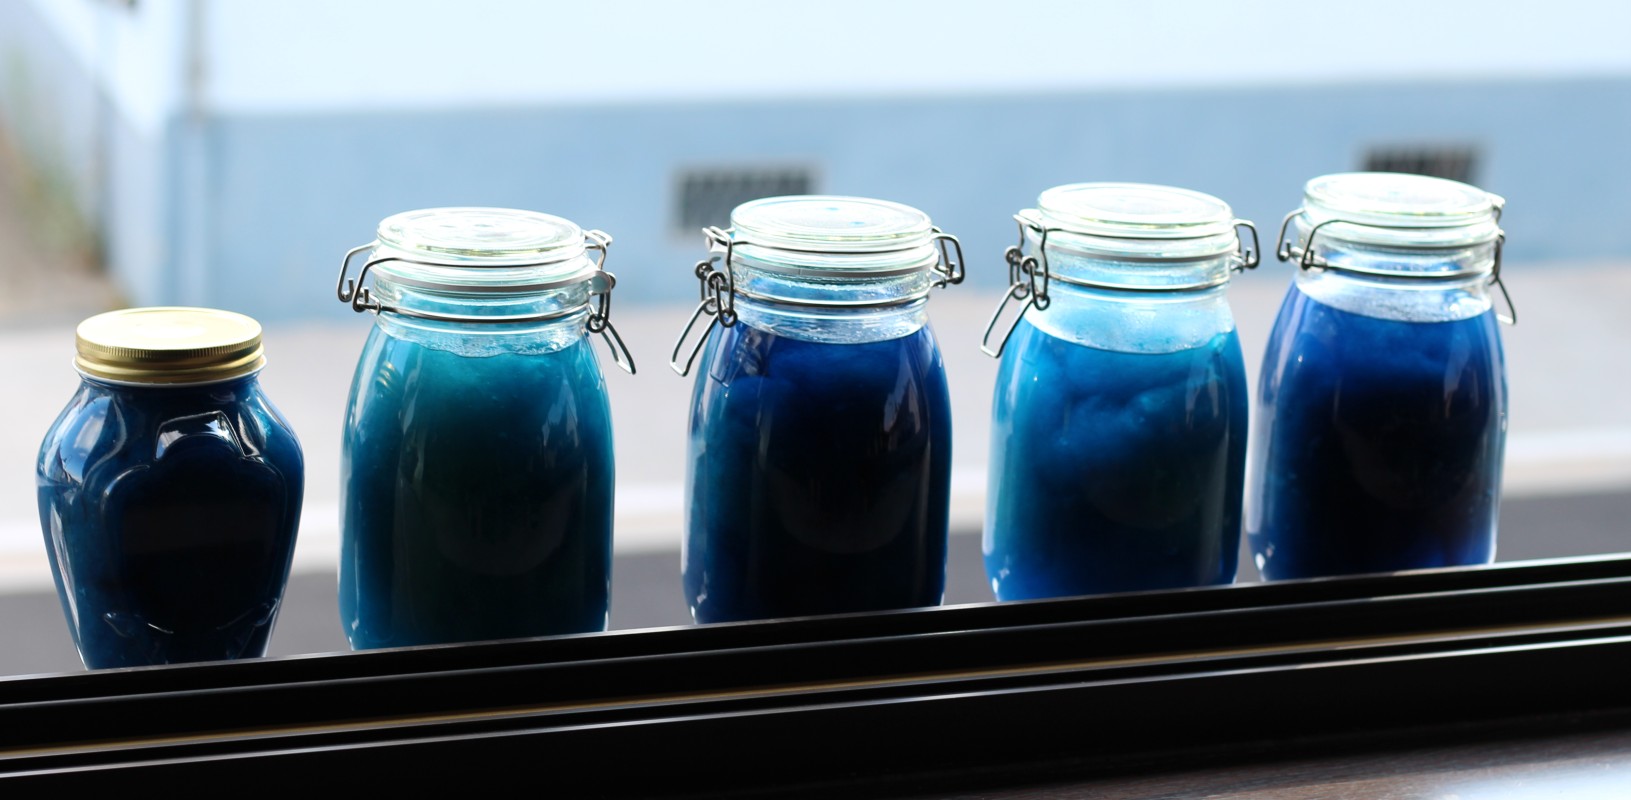
 When you’re done you can fill up the jar with water and put the jar in the sun. In my case I put the jar on our window sill. My first lot took about 4 days until it was finished, the second one was ready after only one day. You can tell whether you’re done from the amount of dye that is still in the water. Once the water is clear you’re good. When you’ve put too much dye for the wool to take up in the water, he water will never get completely clear. However it will get clearer and then stop getting clearer at a certain point. So when you stop seeing progress it’s time to get the wool out of the jar.
If you want to continue dyeing you can reuse the water, so you need less acid and less dye.
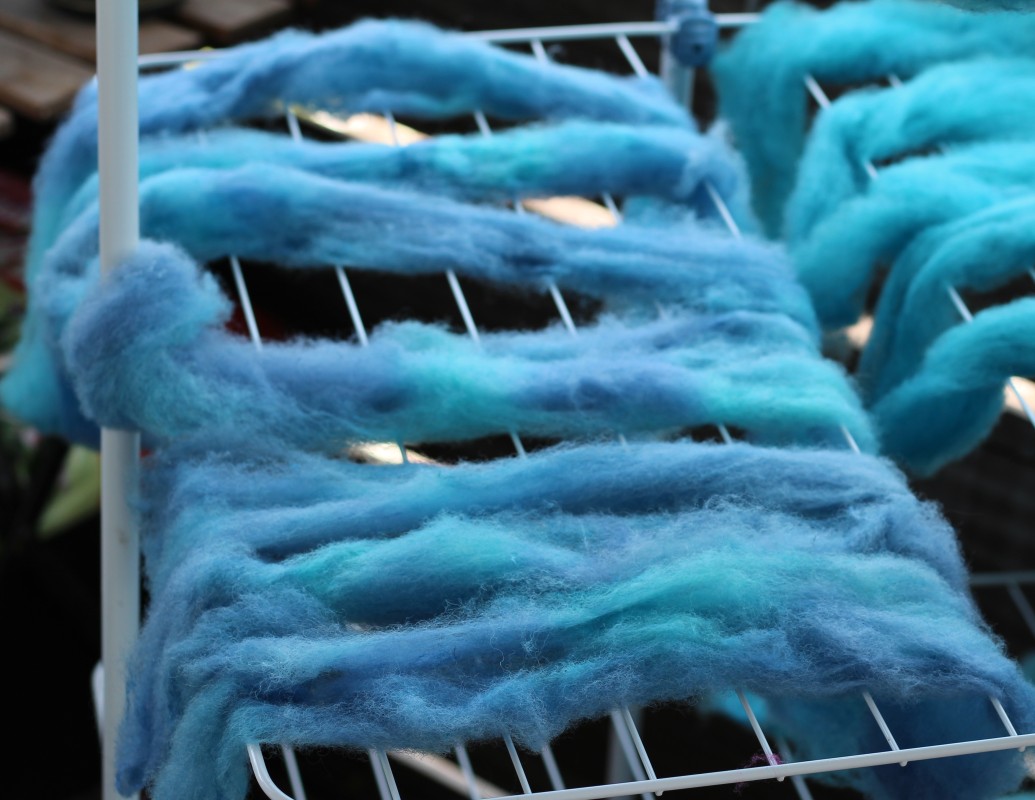
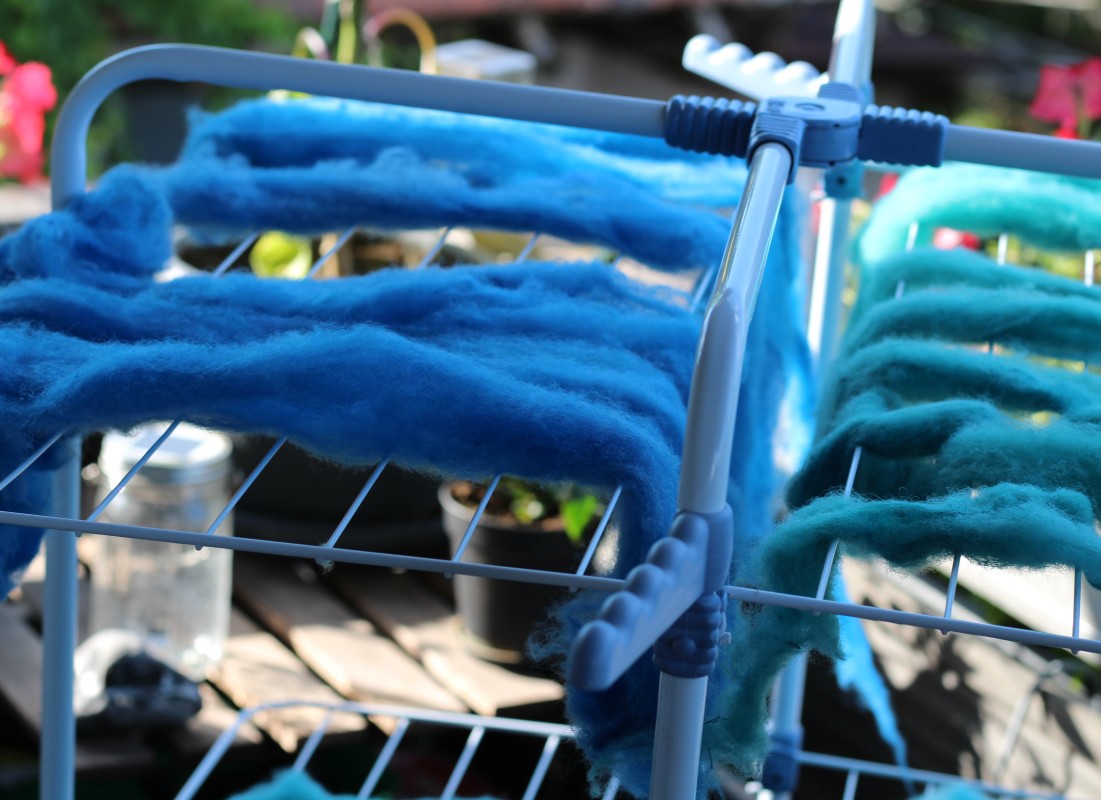
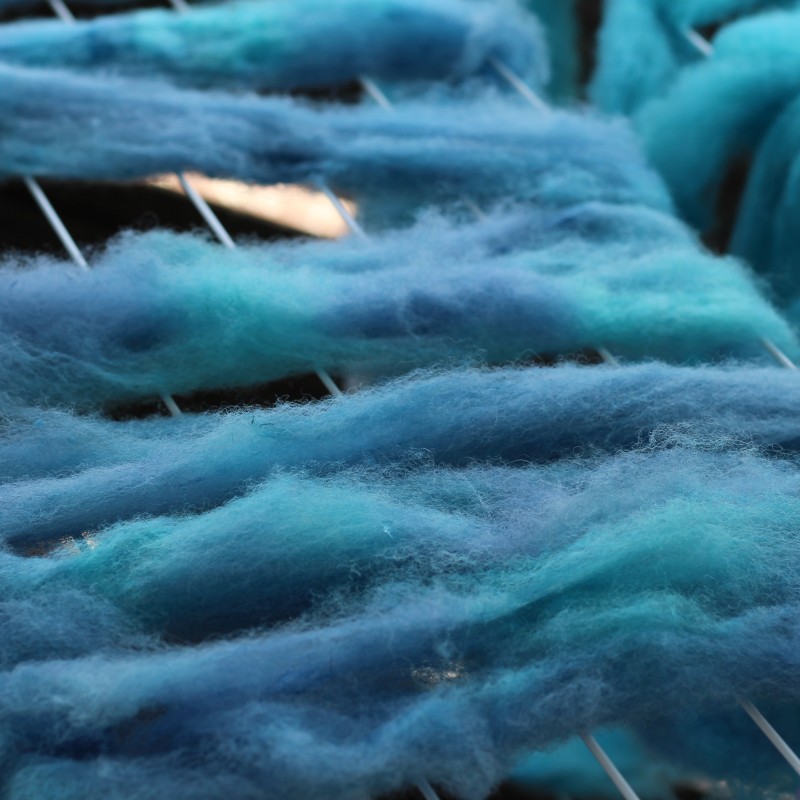
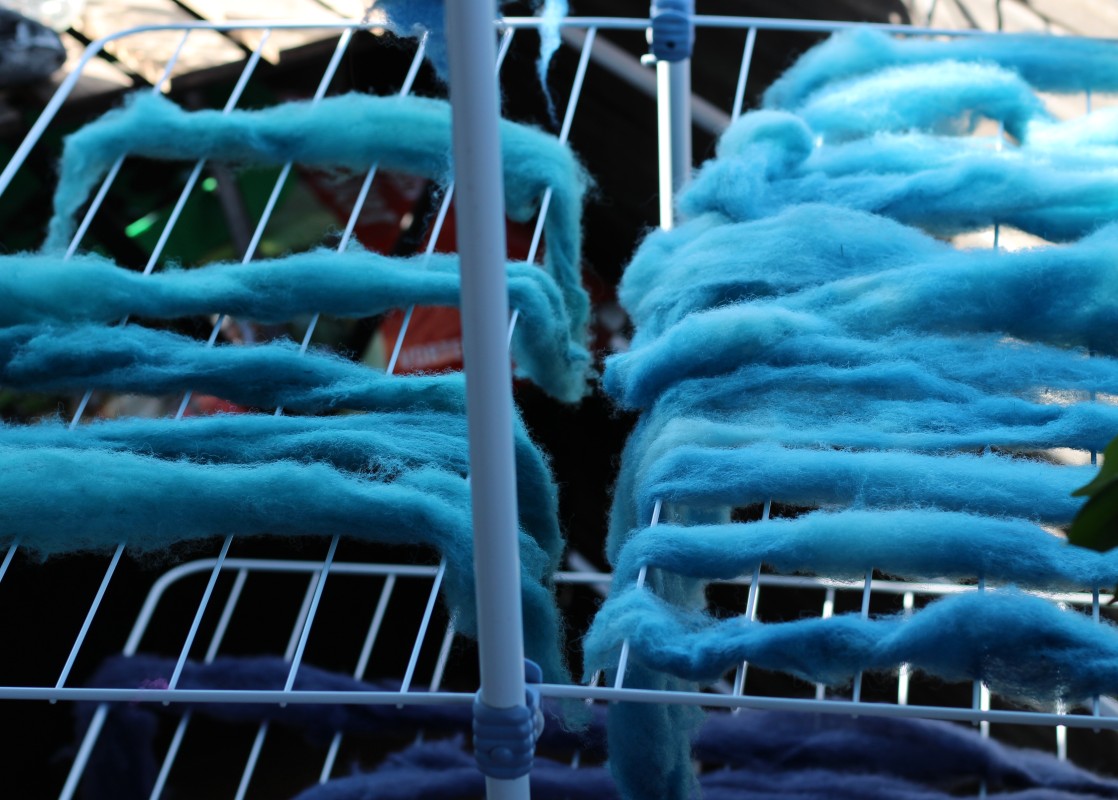
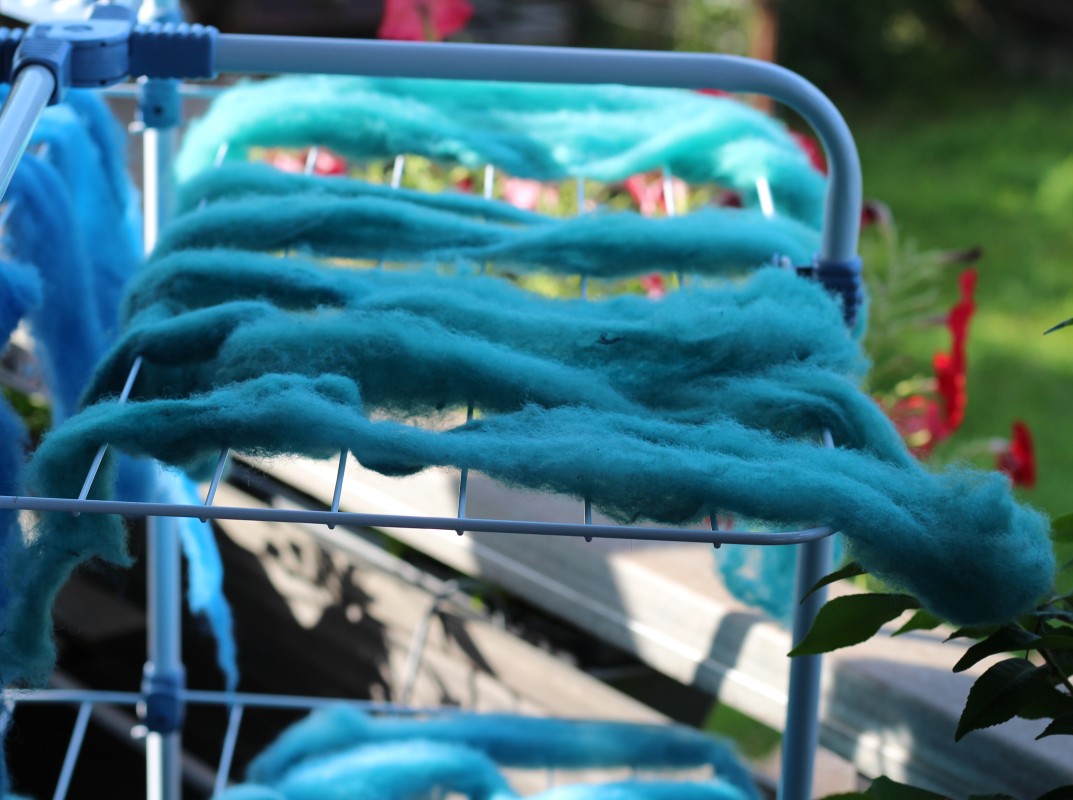
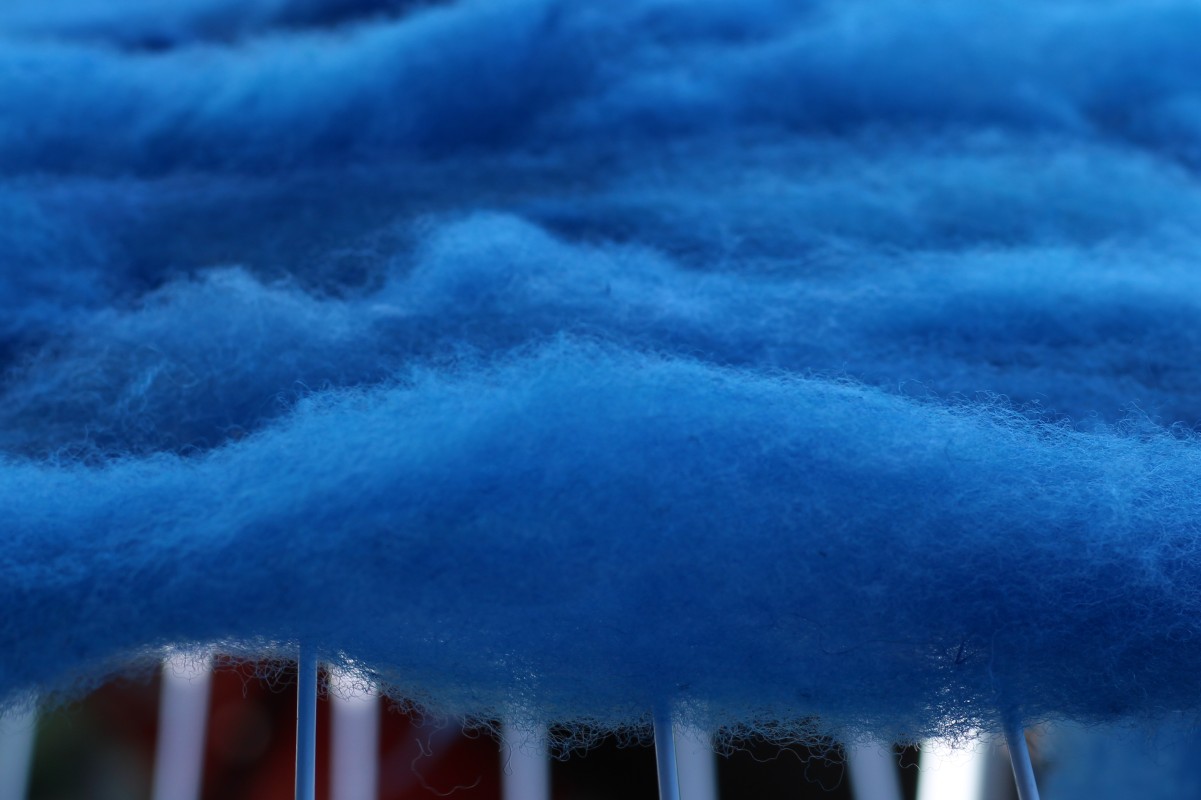
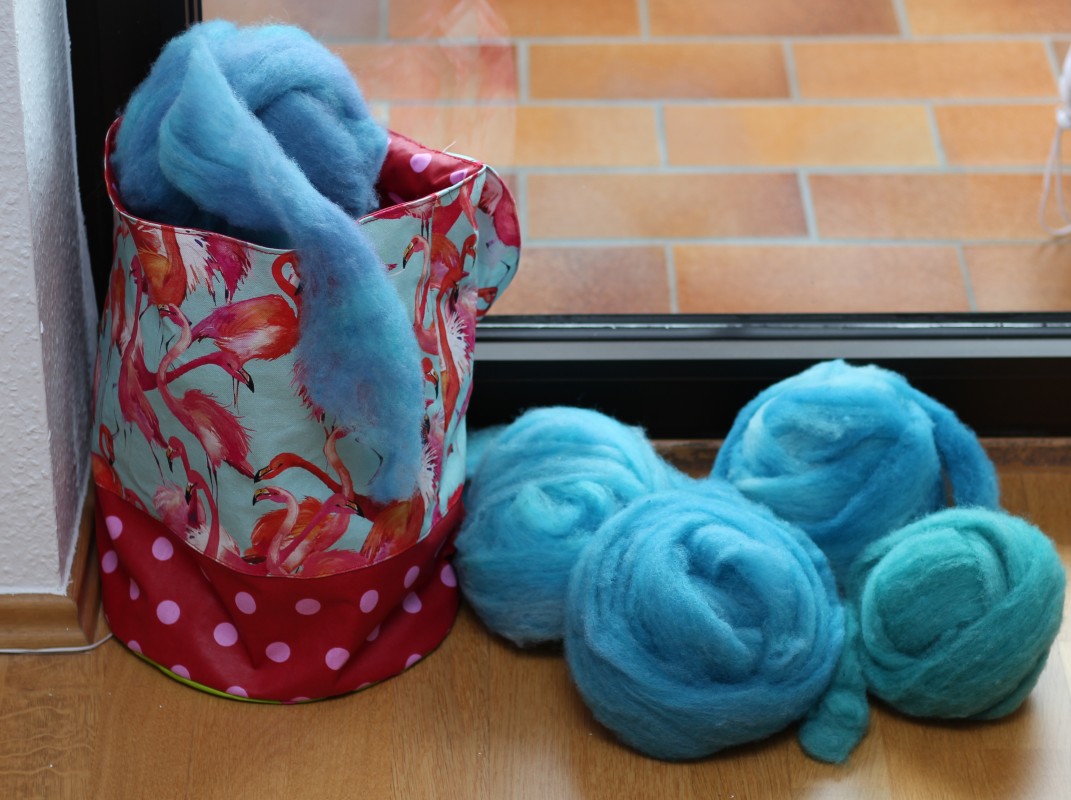
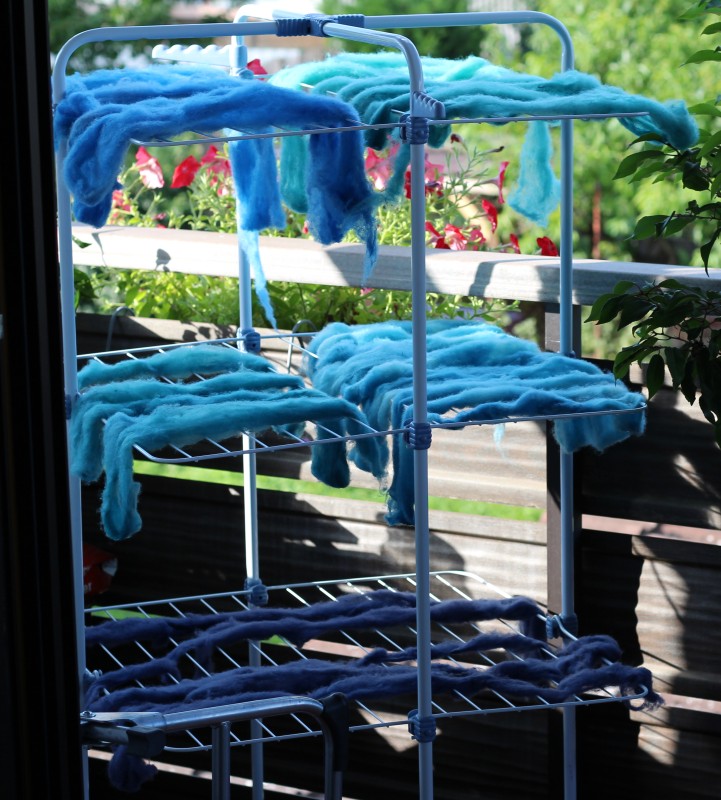 All you need to do now let the wool cool down and rinse it. You’re done when the water is clear. Be careful and use cold water, the wool could felt otherwise. As you can see in the picture below the dyed wool didn’t felt at all in the dyeing process. I’m still amazed :)
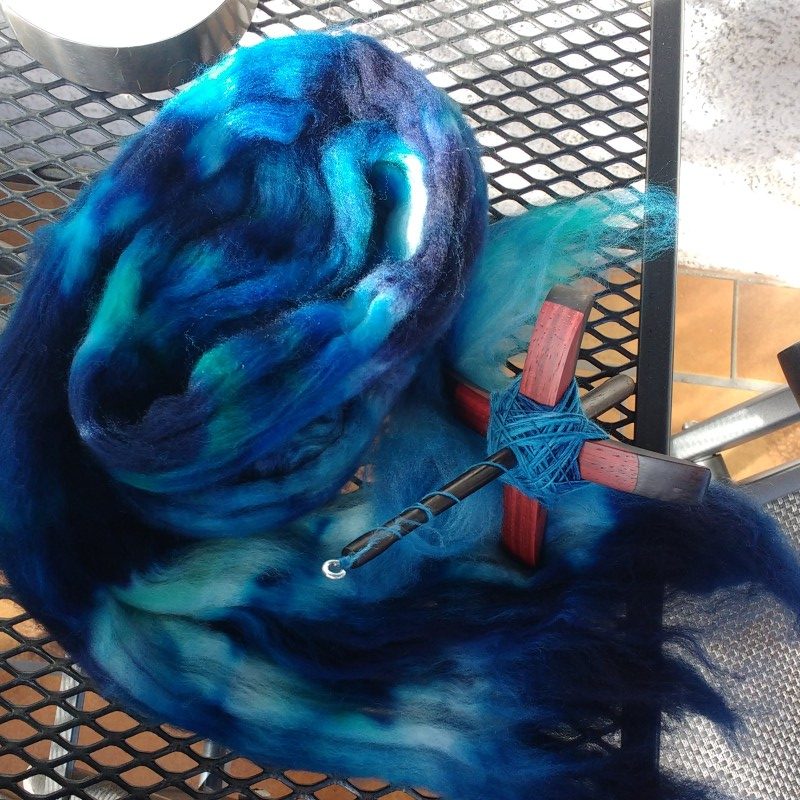
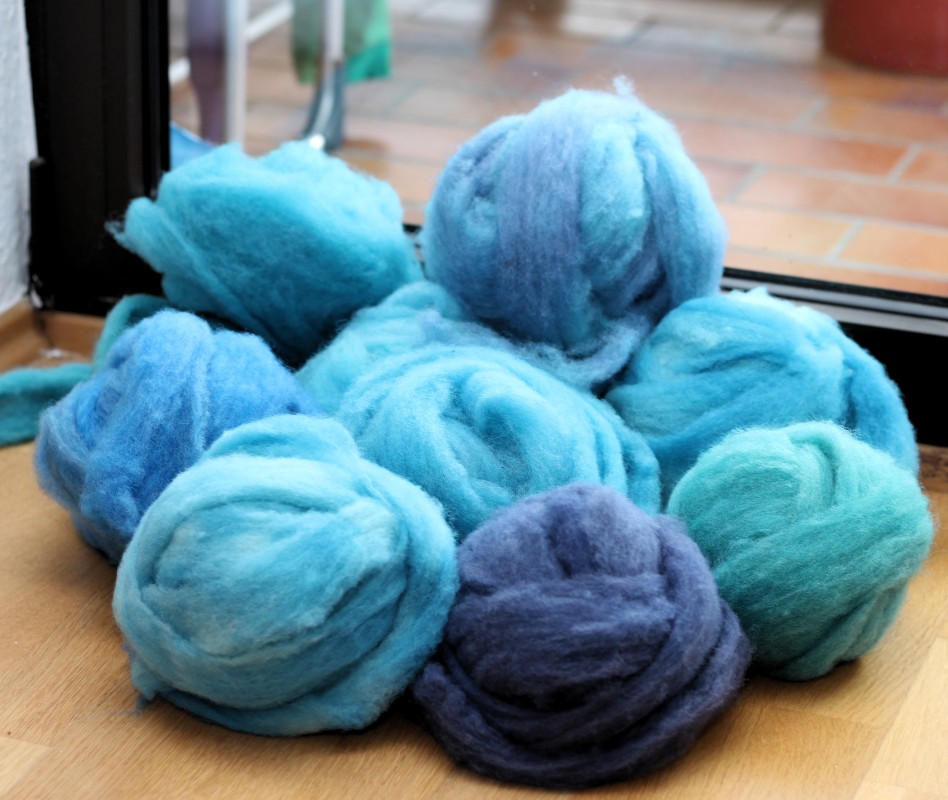
The problem, that you can only dye small amounts at once, remains. My solution to it is to dye different shades of blue on purpose and afterwards spin them together, so that I will hopefully get a nice variegated yarn. There even is a name for this: combo spin. This technique seems to be super popular right now, so I’m glad I’m totally on trend ;)
If you don’t want to do a combo spin, or if you dye yarn you could always try to note how much wool and how much dye you put into one jar. If you’re precise you should get about the same color in different jars. But that’s not how I roll. I have the most fun when I just put dye in a jar and see how it the color develops over time :)
By the way: the woman from my spinning group managed to dye 100 g of wool in a transparent oven dish. She dyed a color blend which worked great and looked beautiful on her pictures :)
And a word of caution: once acid dye has touched something you shouldn’t eat from it again, that’s not healthy. When you dye you should always wear plastic gloves and a breathing mask.
There are different manufactures of acid dye. I have tried Ashford and some much cheaper acid dye. I liked the Ashford Dye much better, as the wool seemed to take it up completely much more quickly. The cheaper dye never disappeared completely there was always still color in my water no matter how long I simmered the wool. I had to rinse it much longer then, what led to more felting.
So, that’s it from me for today, I have a huge amount of alpaca fiber waiting for me to card it ;) More on that another time!
Macht’s gut!
Katharina
Fabulous post. I am waiting for sunshine to do some natural dyeing but I love your blue. I have done indigo dyeing on wool but can never get the water to run clear so will finish up with blue hands when I knit it. I might need to try some acid dyes.
You’re advancing to a natural dyeing expert and I always love reading your posts! When I have a garden some day I will definitively try that too.
What fun experiments. I love the final colours of the wool tops. Such great tips here.
Have fun carding, spinning and knitting with your wool x I can’t wait to see what you make with it…… a cardigan or sweater or hat or scarf……???
Thanks Caroline :)
I will spin the blue wool for my mother in law and she is planning on making a cardigan from it, I think. But I recently finished some yellow yarn and I can’t wait to make it into a cardigan and show it off here :)
This is super interesting. I love the idea of using the sun, and especially the idea of less mess! I have raw wool here waiting to be dyed, so I might have to try this.
Thanks Kirsty! It is a lot of fun and I would love to see your results :)
Interesting to read about the process and look forward to seeing the colorway when the wool is spun. :)
those colours are magnificent!