
 I said I would build an electric spinning wheel, and here it is :) In my post about the electric yarn winder I got some very good advice concerning the flyer I could use to build one. So first I wrote Woolmakers to ask if they sold the flyer of the Bliss spinning wheel individually. That would have been nice since I already have a lot of bobbins and other accessories. Unfortunately I never got an answer and so I ordered Ashford parts.

Ashford offers a lot of spinning wheels and even more accessories and spare parts and sooo many different flyers. You can even buy the flyer as a whole (this one for example), so the only thing you would be required to build yourself is the drive. But I didn’t want to spent so much money and I was also looking forward to building everything myself. For me it was never about owning an electric spinning wheel, but about building it.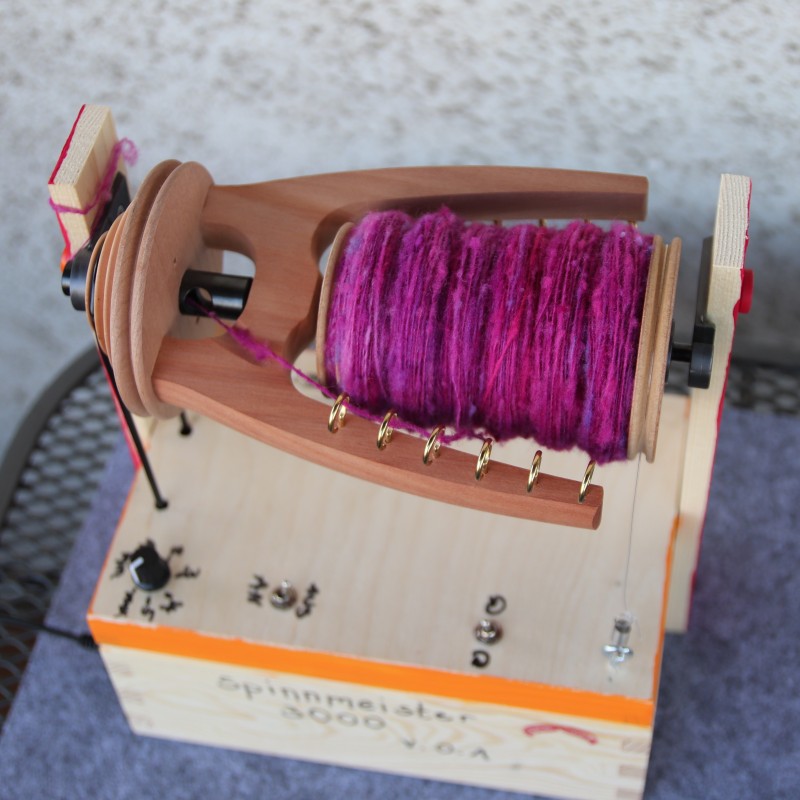 So I ordered the Ashford single drive standard flyer. One bobbing is already included and I ordered two more. Additionally I ordered the standard flyer bearing set, the brake band set (the standard flyer works with scotch tension, the flyer is driven and the bobbin is braked) and a standard threading hook. I paid a total of 64.30 €. I didn’t order a drive band as I had one here that I ordered as a spare part from Woolmakers some time ago.
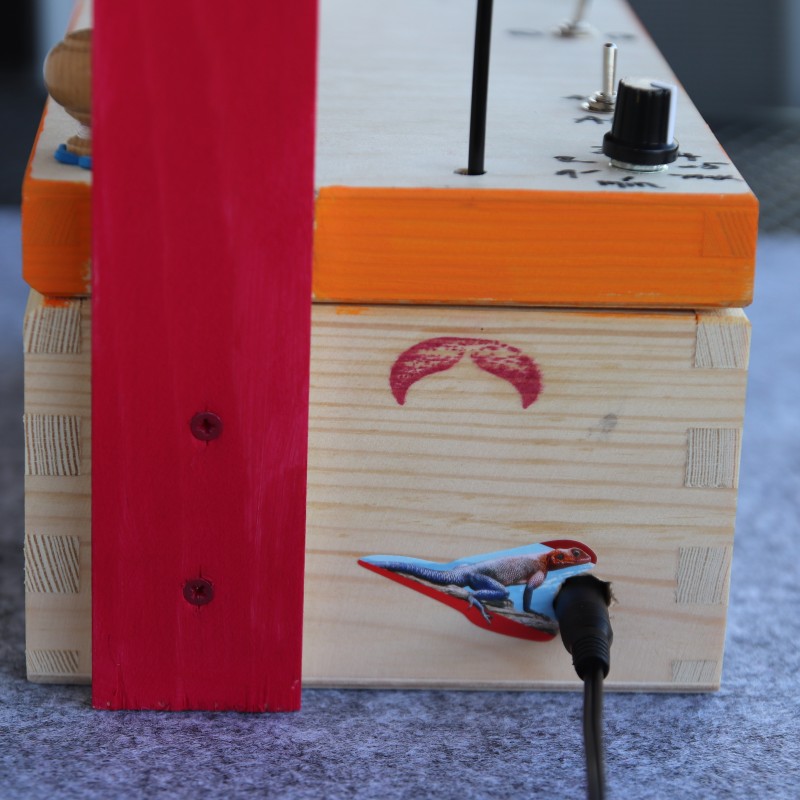 Afterwards I ordered the electronic parts I needed. I still had the Arduino Uno Cotroller that I used for the last prototype. Last time I ordered a starter kit and the controller as well as cables and smaller stuff was included and I didn’t need to buy it. I also had a 12 V power adapter and a 200 RPM 12V DC motor. I still needed to buy flip switches. One to turn the wheel on and off and one to switch the rotation direction of the flyer (because you need to ply in the opposite direction). I also ordered a potentiometer to regulate the speed of the drive. I thought about using a rotary encoder again. Usually when you spin, you set a speed at the beginning and you keep that speed for the whole time you spin that yarn. Sou you need to be able to store the current speed, which is done easier with a potentiometer. The Arduino reads analog input pretty easily, so I could use the potentiometer as an analog input instead of connection the potentiometer directly to the output. Every part has its own circuit now and the Arduino reacts to changes and controls the parts.
The motor is regulated via a L298N motor driver. I used the exact same part last time and I was very happy with it. It is easy to use, drives motors with 12 V and even supplies 5V power to the Arduino, so I only need one power adapter. It is also pretty easy to change the direction of the motor with a motor driver.

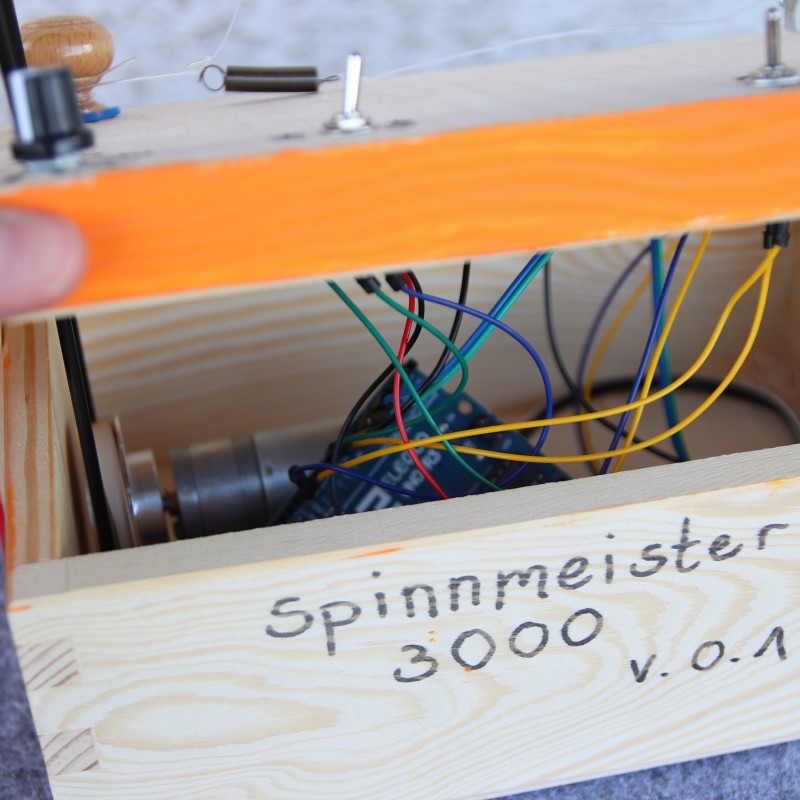
Programming the controller was a little more work than last time. I wanted the drive to start and stop slowly, otherwise the yarn you’re spinning might break the second you start the motor. I also made sure, that if someone toggles the direction switch, when the motor is running, that the motor performs a soft stop, changes the direction and then starts again slowly.
I quickly realized that the 200 RPM motor I had was way to slow and I ordered a faster one with 770 RPM for 12.49€. I bought a set of 5 potentiometers for 4.50 €, also also bought a set of 5 flip switches for 4,69 €. The motor driver cots me 4.49 €. All the other parts (including the pulley) I already had. Sums up to a total of 90.47 €.
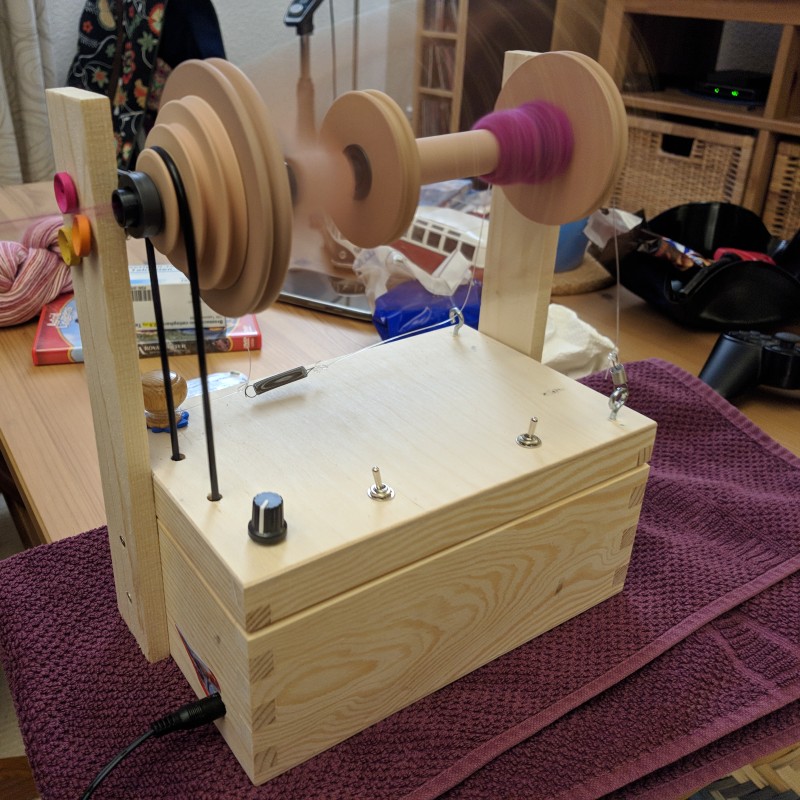
After consulting Marvin, who would do all the soldering, drilling and sawing again, I bought two wooden boxes with dimensions of 13.8 x 21.5 x 10 cm. I bought two so that we could use one for the prototype and one for the final version. One box cost 5 €, so we are at 95.47 € now.
Then i went to the hardware store. I bought several different wooden battens. I also bought two new saws and screws for the brake. I paid around 25 €. But I didn’t use all the wood I bought and the saws were the most expensive part, so let’s add 10 € to the calculation and we are at around 106 € now for the whole prototype.
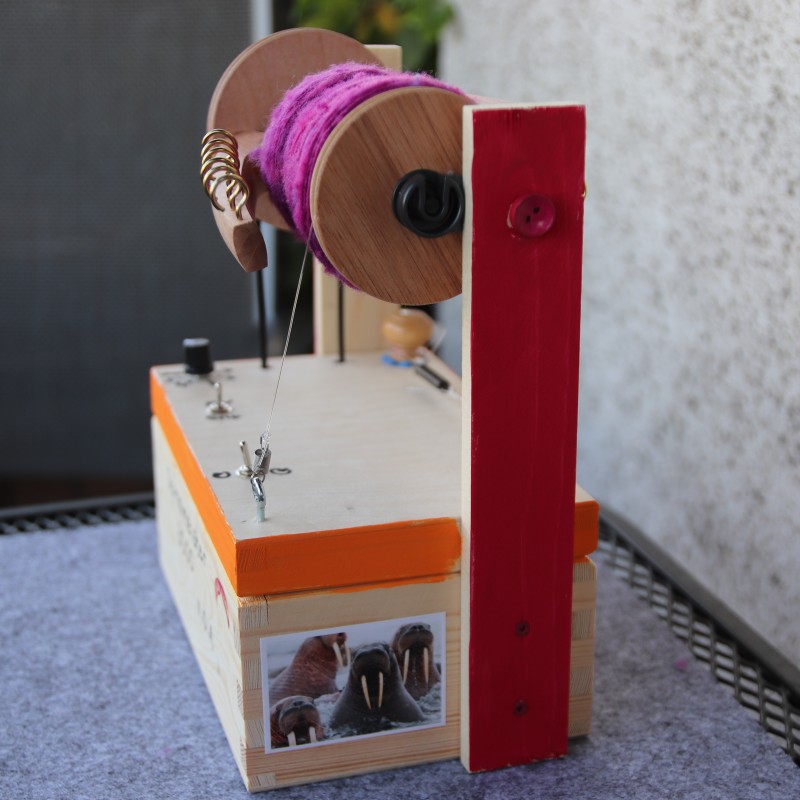
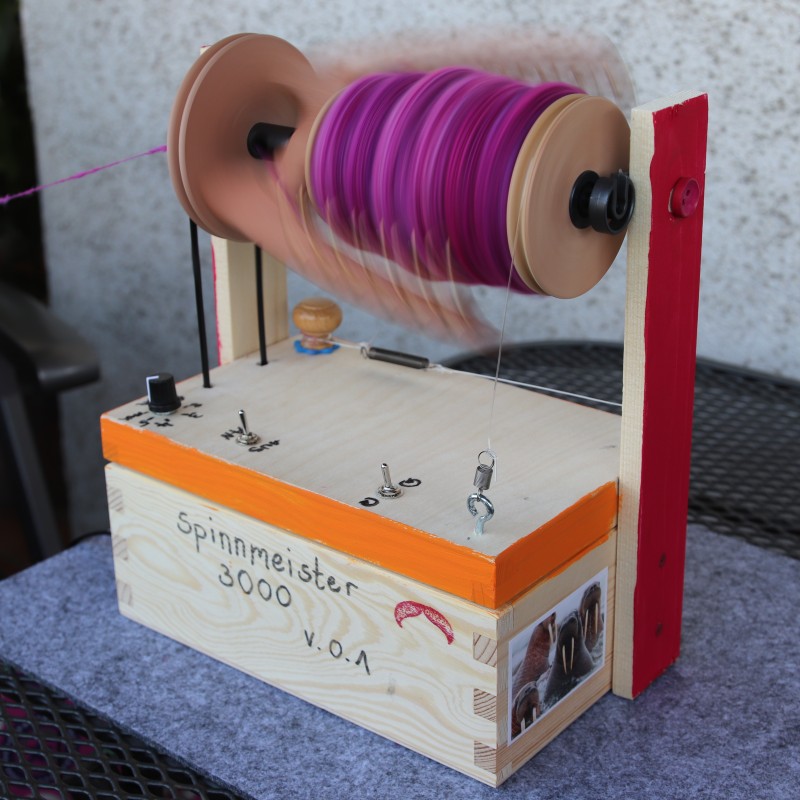
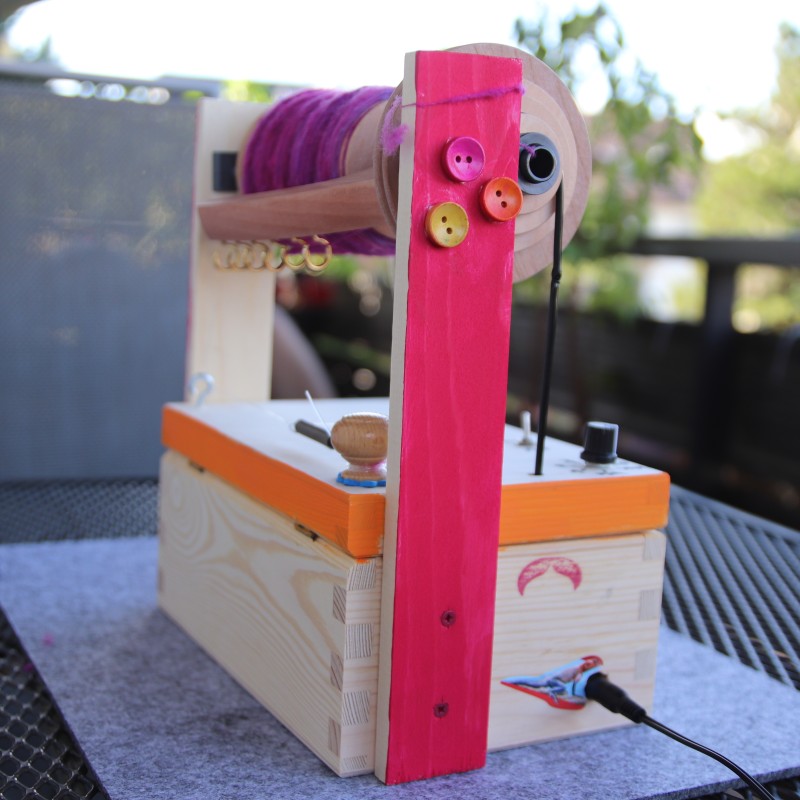
Assembling all the parts was done in one afternoon. It was a fun project Marvin and I did together. Most of the electronic parts are still only plugged into the Arduino, but Marvin already soldered the wires to the motor and to the switches and potentiometer. Positioning and fastening the motor was the hardest thing. Marvin screwed the motor to a small block of wood and screwed the block to the box so that the pulley is directly underneath the smallest whorl of the flyer. The flyer has different whorls, so that you do not have to treadle slower or faster in order to change the speed of the flyer and thus the twist in the yarn. But as we do not treadle but let the motor do the work, we only need the one whorl. The drive band runs though two drilled holes. I cut it the right length and then welded it with a lighter back together.
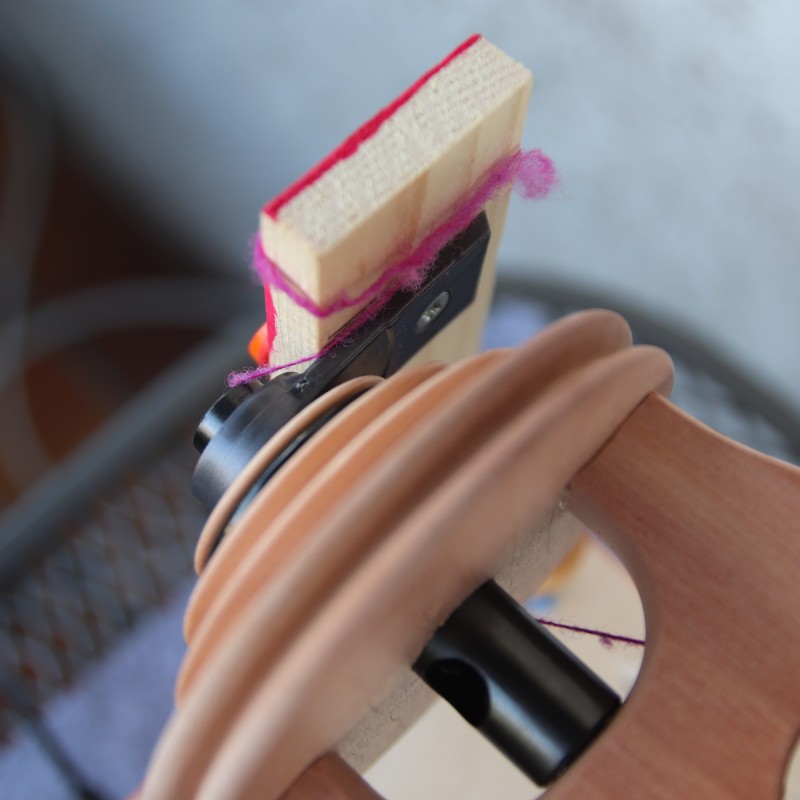

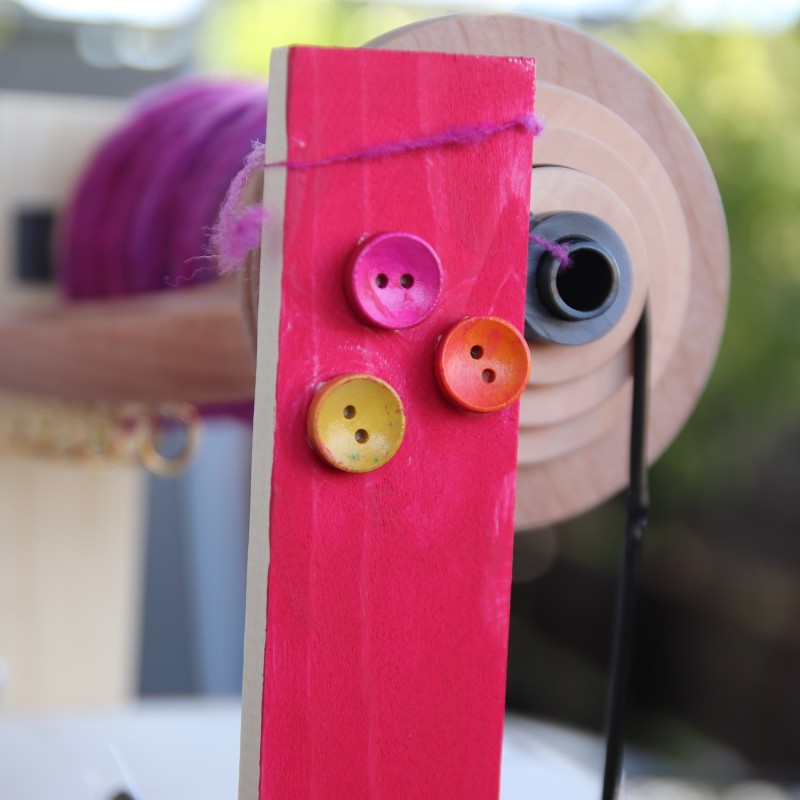
We chose to use the thinnest 1 cm batten and sawed it into two 25 cm long pieces. I screwed the front and back flyer bearings to the battens and Marvin screwed the battens to the box afterwards. The box could be a little shorter, the distance between the front and back bearing is about 0.5 cm too long, but it still works, because the brake bands holds the bobbin in place.
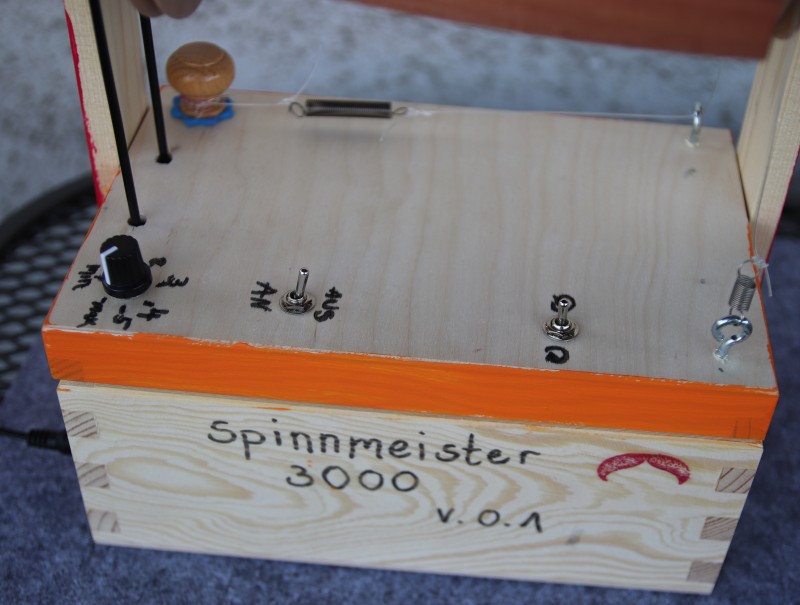
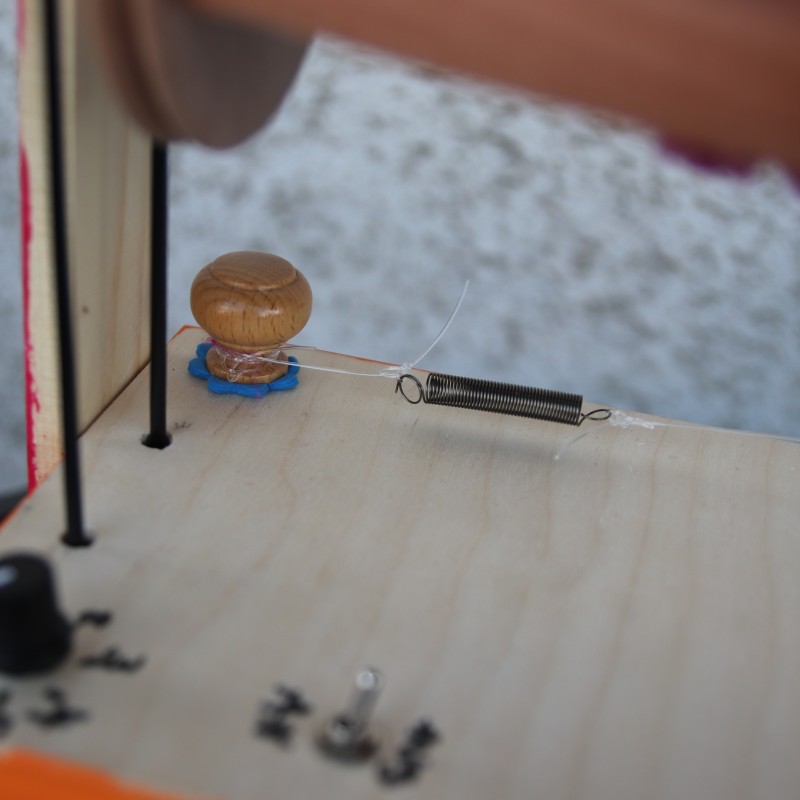 Initially we wanted to apply the switches and the potentiometer to the front side of the box, but the wood was too thick there and so we attached all three of the to the top of the box, which works nicely too. The power supply jack was long enough to fit into the front, so we used the hole Marvin had already drilled to stick it into there. The last thing I did was to build the brake system :) I used the brake set for it and an old drawer knob for tension regulation which works pretty good. I didn’t realize the brake set only included one tension spring. I would have bought a second one when in the hardware store otherwise. Luckily I found another one somewhere in my Bliss spare parts box, now I do not have to change the brake when I change the flyer direction.
Before I started painting the box like a mad woman
Soooo! What a long post! I’m glad I wrote it! It was fun and maybe it makes the next post about the final version a little shorter ;) I’m planning on changing the Arduino Uno to an Arduino Nano and soldering all the parts together. I’m going to buy two tension springs that look the same, shorter screws and I already ordered another motor. 770 RPM is still too slow. It is rarely fast enough to spin when the power is completely up (although it works as you can see :)). The motor I ordered also is without a gear and I hope that will make it less noisy. Otherwise I will have to spend some more money and buy a motor that is more silent.
I’m not sure whether we can improve our wood work on the next version. We don’t have the tools and we don’t have any experience. I’m thinking about painting the parts before assembling them. Maybe even varnish them in some crazy color, because I think that might distract from our wood work ;) I still think the prototype looks pretty good for a prototype. Our first prototype of the yarn winding station didn’t nearly look as good. I think we have improved! And more importantly: the e spinner works as you can see! And I had a lot of fun building it and Marvin did too :) Such a nice thing to do as a couple if you ask me :)
Once the next version is done, I will blog about that with more specifics on what I bought and a circuit layout and my code. As usual you are welcome to ask me any questions you might have :)
Macht’s gut!
Katharina
So impressive! I love that you made this together.
Thank you :)
What a marvellous thing to do! I think I’d buy one though!!🤣
I totally understand ;) Thank you Sue :)
What a fun project!! Kind of like competing one great big puzzle. I think it looks awesome the way it is. You will enjoy using this so much!! :)
Thank you :)