
 Until lately I used my Cooper Backpack to transport all my work stuff and it definitely wasn‘t made for that. It looses its shape so much, I’m missing pockets, it is not comfy and most annoying of all: just not big enough. I also had to repair some seams and it just looks like the whole thing is going to fall apart in the near future. So I thought about buying a backpack, because obviously I cannot sew a backpack that is sturdy and big enough to take with me to work almost everyday.Buying something I could also sew seemed like a waste of fun to me, so I searched the Internet really hard, but all I could find were patterns for Kindergarten backpacks. Or patterns for fancy looking backpack but none for sturdy, that I can put all my stuff in without destroying it.
I almost gave up searching when Lauren published a Post about the Freedom Backpack by niizo . She received a sewing kit for that backpack and it looks just great. Plus it looks like exactly what I needed. The kit included some fancy stuff like a Foam Sheet and water repellent cotton canvas. Laurens review is very positive, and was very much convinced that I needed this backpack sewing kit :)
Now to the downside. The kit is being sent from Taiwan and it is always stressy to deal with customs. So before I bought the kit I made sure that nothing similar can be bought in Europe, I couldn’t find anything. There are kits available but they‘re all for fancy backpacks or kindergarten backpacks. So in the end Marvin bought the kit for me, because I couldn‘t decide ;) he‘s nice :)
But even though I didn‘t pay for the kit itself it was me who had to pay the customs office a visit. I hoped that the parcel service would drop it at the nearest office, but they didn‘t, and I ended up driving 20 km /30 min for one way to get the package. I had to open the beautifully packed package up, and after another 30 minutes or so and paying about 15 € I left with the kit :)
So all in all Marvin and me paid about 85 € for the whole thing. That is still a good price I think, and I don‘t think it would have been cheaper had I bought all the supplies on my own. Apart from that I don‘t think I would have found all those supplies, I wouldn‘t even had known what to look for. Let alone the foam sheet. I haven‘t seen anything like that in a store. I made a picture of the leftovers, just in case you’re interested.
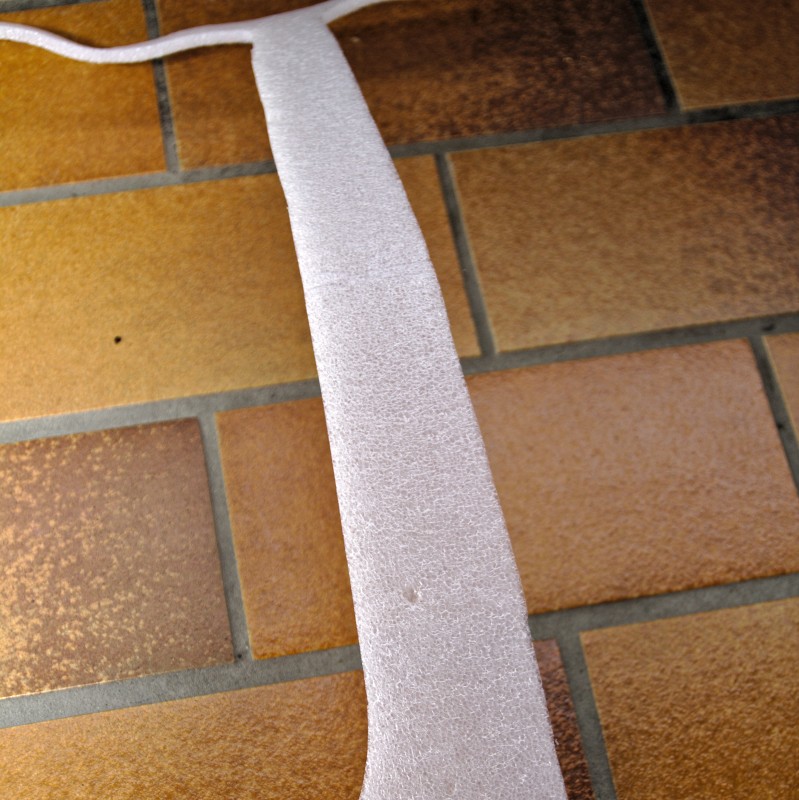
Or the water repellent cotton canvas. I never had something like this in my hands before. It is soo very sturdy and stiff and thick, perfect for a backpack! Or the black webbing, it looks like a seatbelt. Or all those leather parts. They were pre-cut and the holes were pre-punched, there was some kind of waxed thread and needles for the leather parts included.
Then there was a nylon lining included which felt like all linings of rtw backpack’s feel like and some contrasting fabric that felt like coated cotton. So really all I needed was thread, a sewing machine and needles.
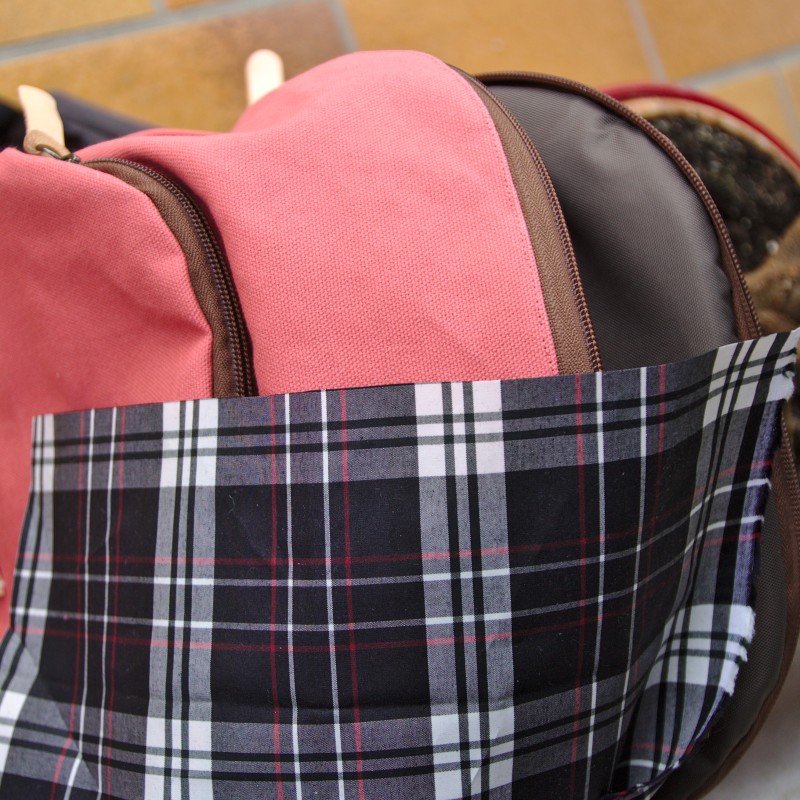
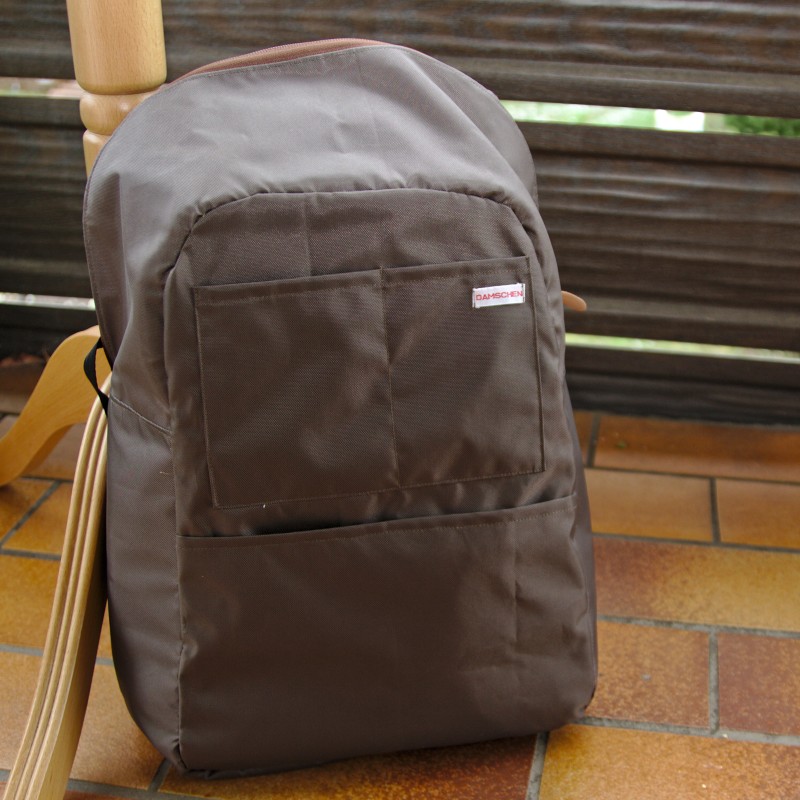
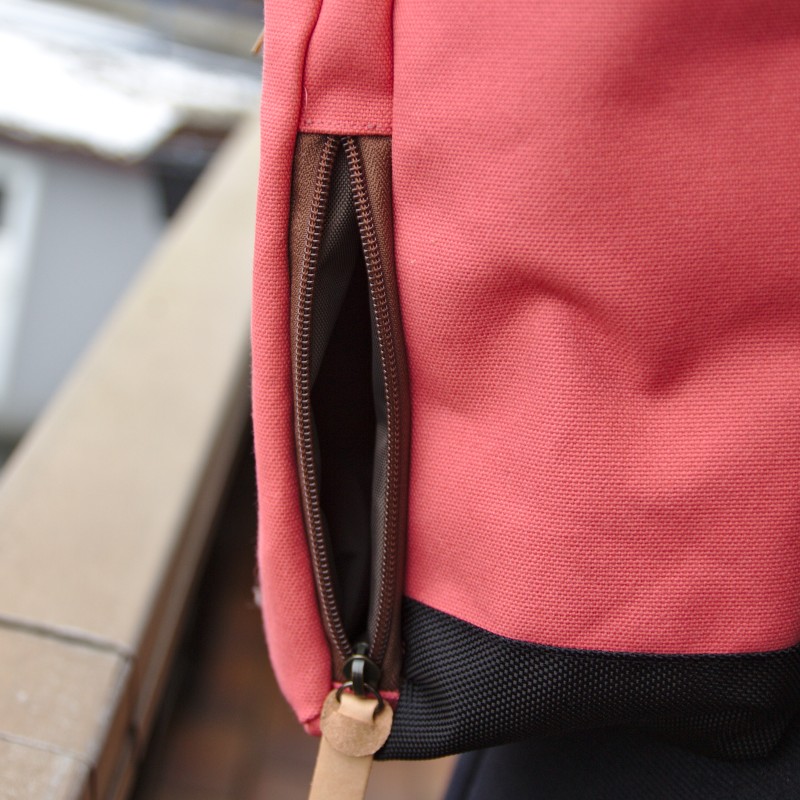
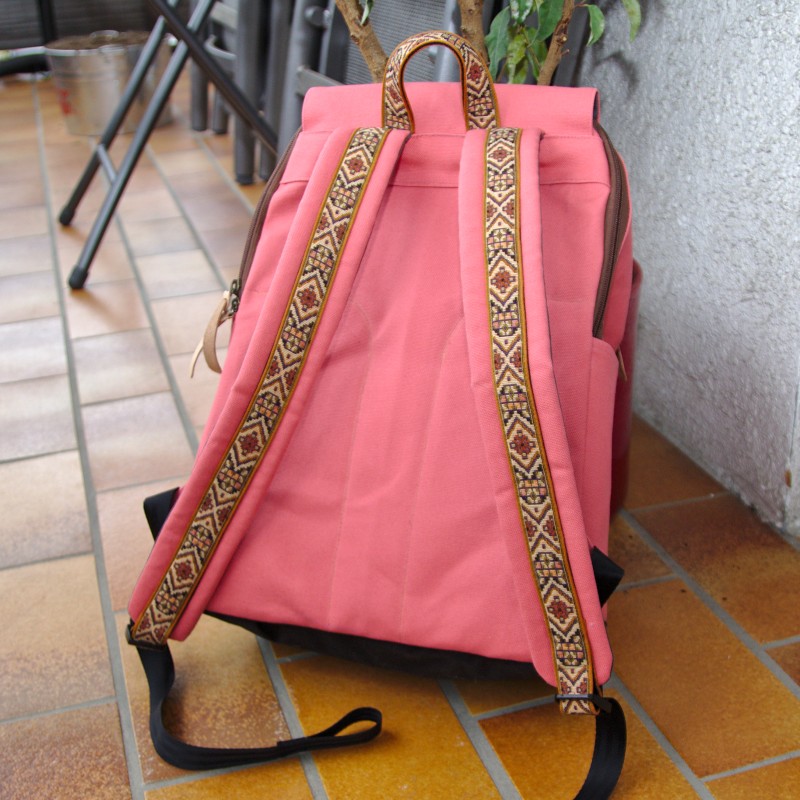
I didn‘t use the contrasting fabric. You can see the fabric on the pictures, but what you do not see is that the zippers for the Rose version (which I chose) are brown. And I wasn‘t that happy with mixing this brown with the contrasting fabric. Plus I found some old webbing that I inherited from Marvin’s grandma, that looked great with the brown of the zippers but too weird with the contrasting fabric. So I made a decision pro webbing and against contrasting fabric and used some gray cotton canvas instead that I had in my stash.

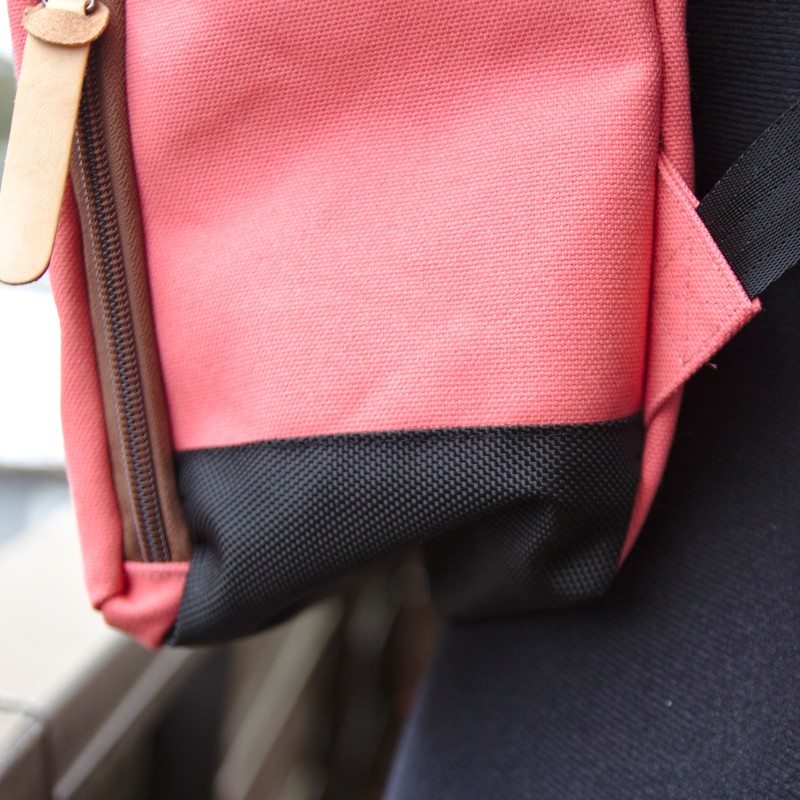
The bottom fabric, which is a very sturdy water repellent nylon something, is black, the straps are black too, but I decided I could live with that. Brown would have been nicer, but black was what I had. However, I think the webbing makes good for every little inconsistency :)

The whole ordering process was apart from these customs issues, very easy. I ordered midst of December and received the letter that I had to pick up the package on the 5th of January. The digital pattern and instructions were sent to me digitally one day after I placed my order. The pattern is only available as a print at home version. That is not a problem for me and most of the pattern pieces consisted of 2 papers maximum. Seam allowances are included in the pattern and at some places they are only 0.5 cm. The instructions tell you what the seam allowances is for every seam you make.
I found a little flaw while assembling the pattern pieces. On one it said „glue B3“ here or something and it should have been another number, no biggie. But during the process I found more of those little flaws and inconsistencies. Like there are cutting graphics only for the main and lining fabric. The cutting graphics for the foam, accessory and bottom fabric are missing. But as all of the fabrics had tags on them that were the same as in the instructions and because the pattern pieces say what they want to be cut from, that wasn‘t a big problem.
Overall I think that somebody put a lot of work into making the instructions. There are a lot of photos that helped me a lot when something was unclear. So sometime you might have to think a little or to search a little, but everything is there in an understandable form.
After cutting I had some fabric left. I was a little worried before about messing something up and not being able to reorder the fabric, but there was no need to worry.
I am not a very experienced bag sewer and I almost always lose track at some point about what part of the bag I am sewing right now. That was not different here. There were some strange things going on and I didn‘t even know what part I was sewing at the moment. But at those times I simply followed the pattern and everything worked out fine :)
 As mentioned before there are quite some seams in this pattern were you sew with a 0.5 cm seam allowances, which is tiny! I managed to do that but only at seams that weren‘t so hard to sew. In the end you have the whole bag assembled including foam and everything is very bulky and stiff and sewing with 0.5 cm seam allowance can be very annoying than. I tried my best and took my time, but the last seams, that attach the lining of the biggest pocket I surrendered and sewed by hand, which was a lot easier.
Another thing that was hard was pressing. There is no mentioning of pressing anything in the instructions. But as I think the end result is neater when you press sometimes I did that. It worked okay for the canvas fabric and not so well for the lining, which instantly melted. Oops. I used that for my advantage though. As the lining was also fraying a lot I used a lighter to finish the seam allowances what worked like a charm :)
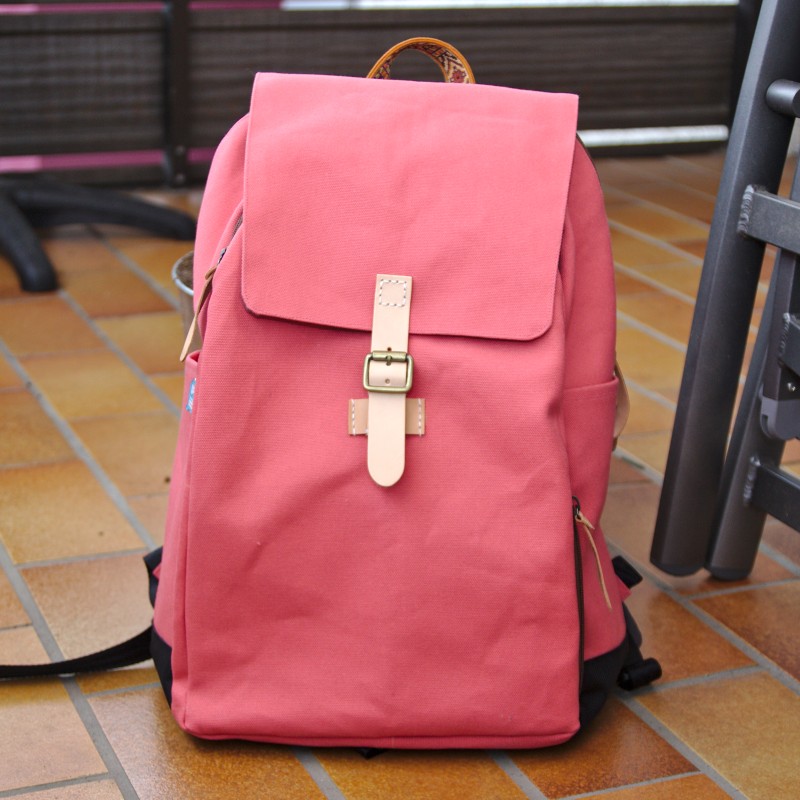
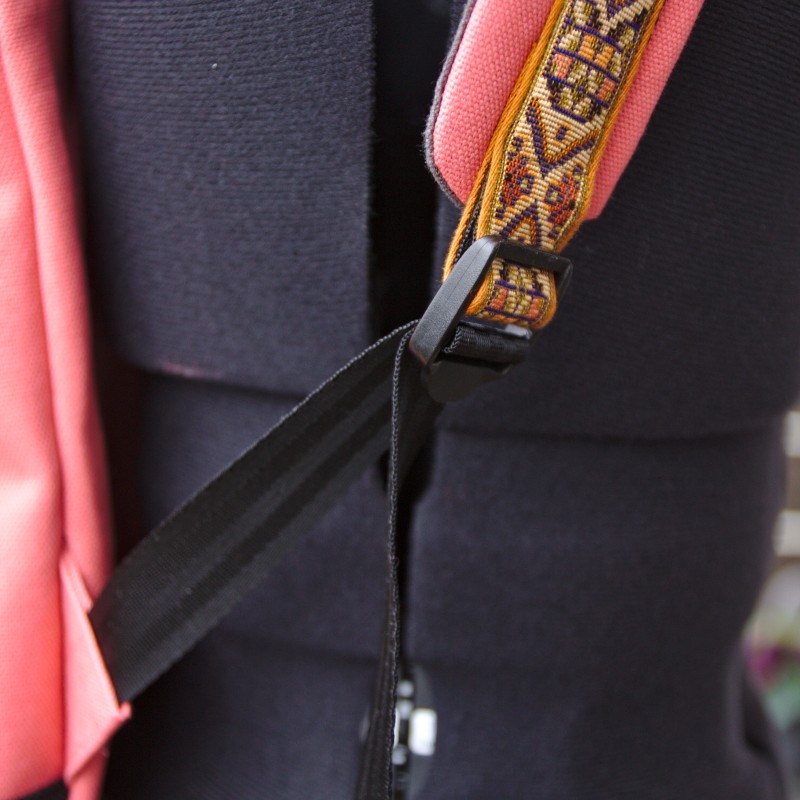
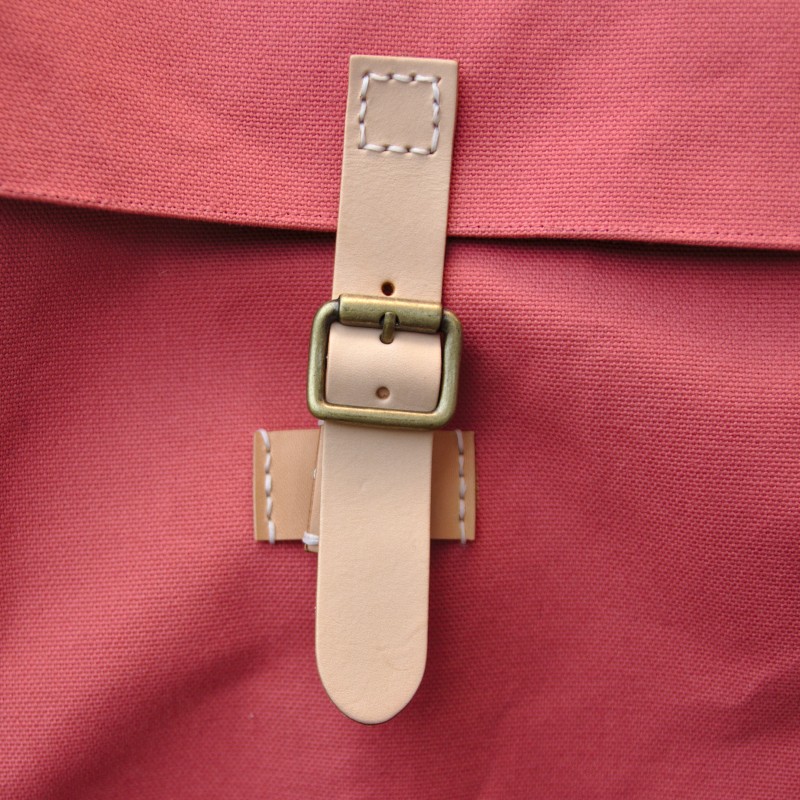
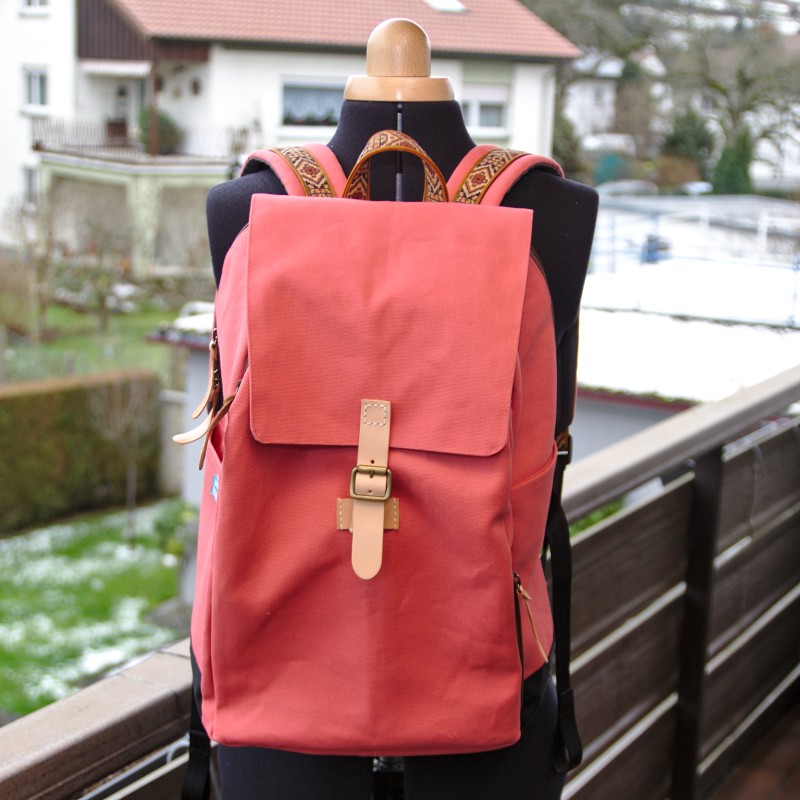
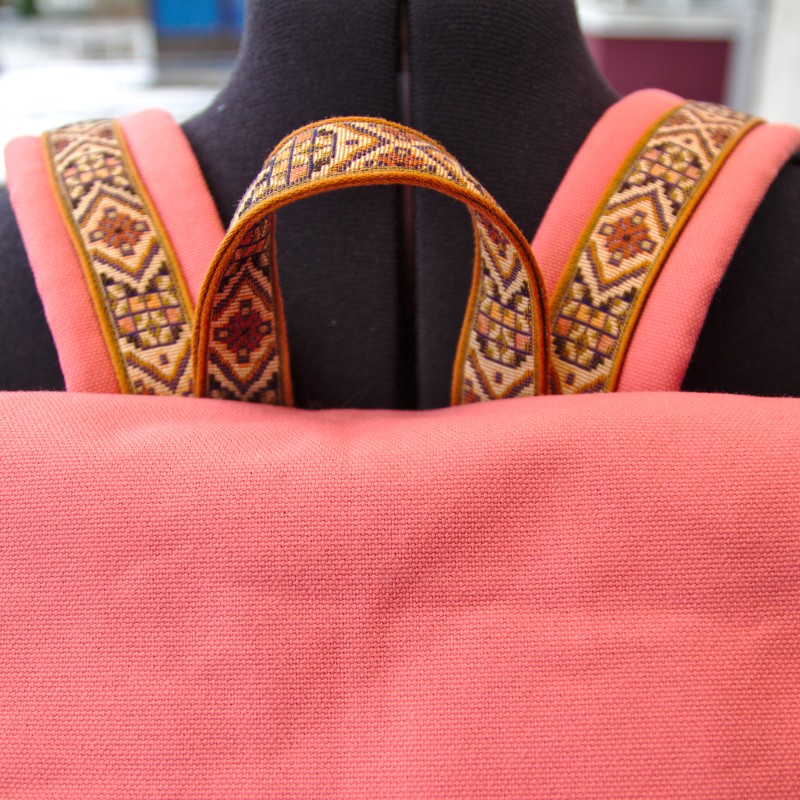
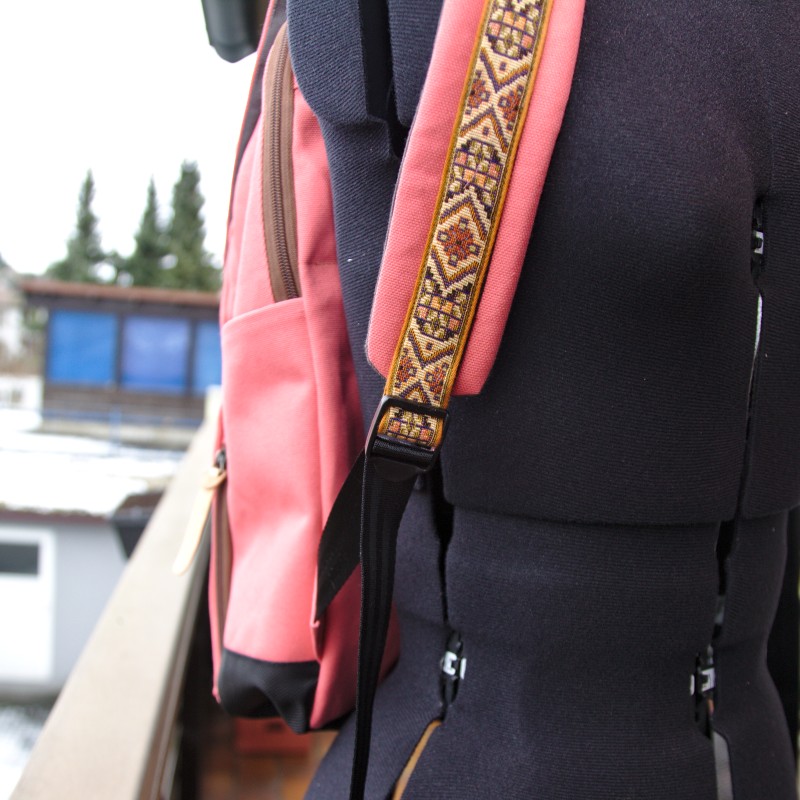
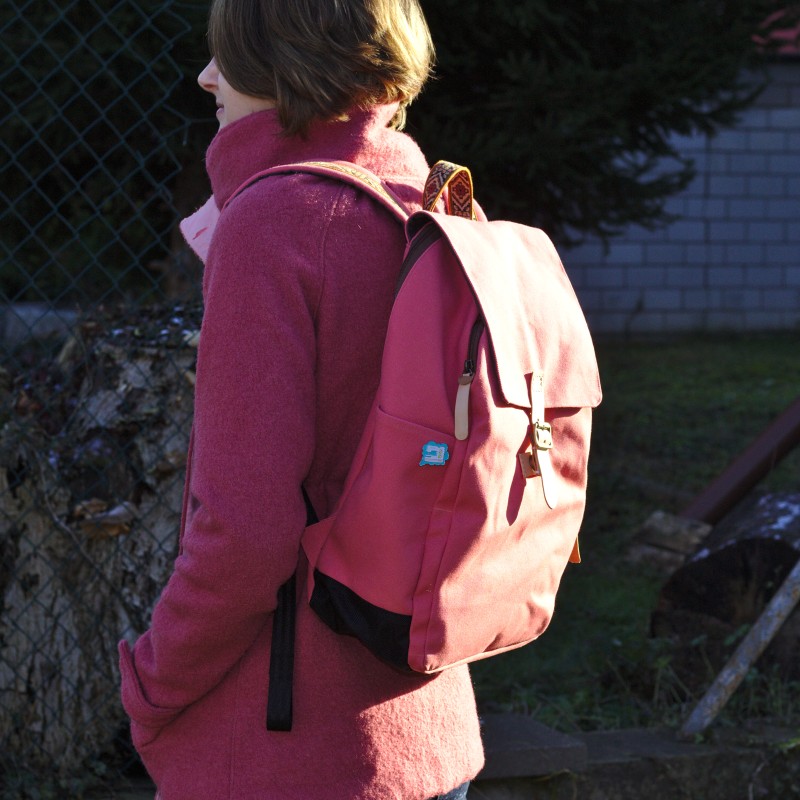
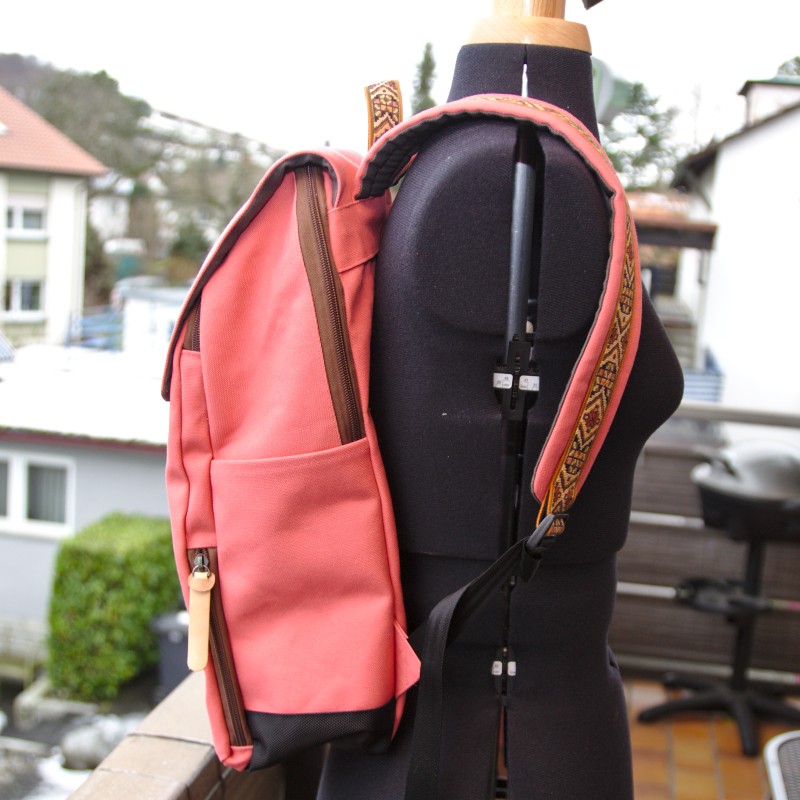
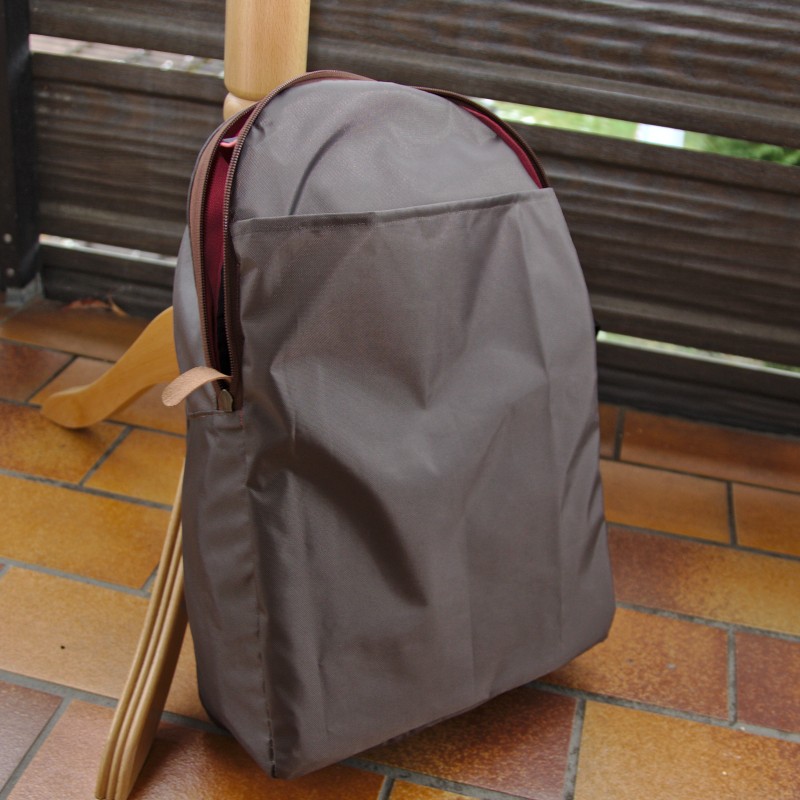
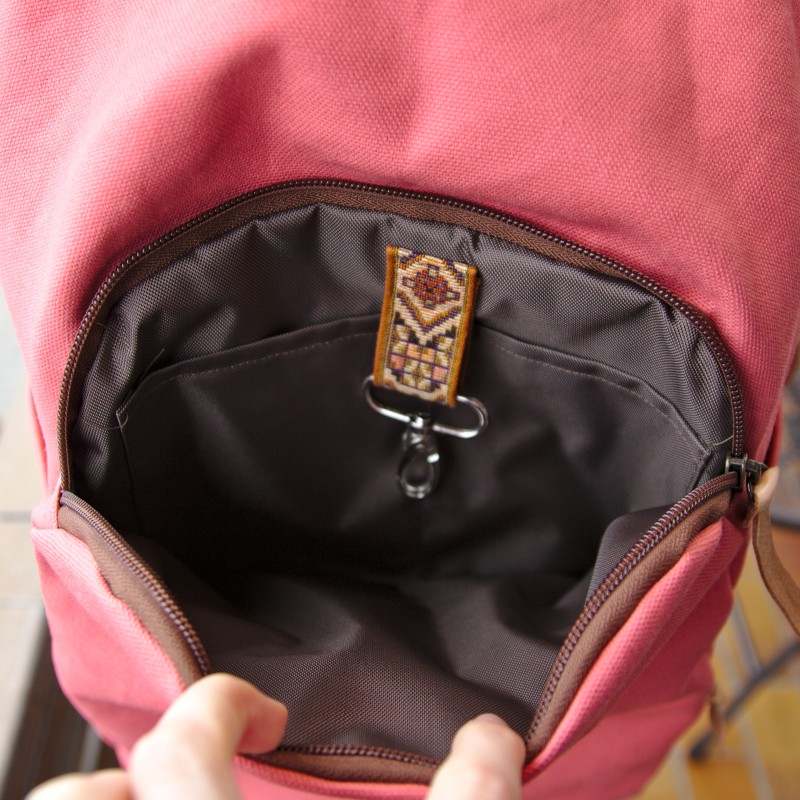
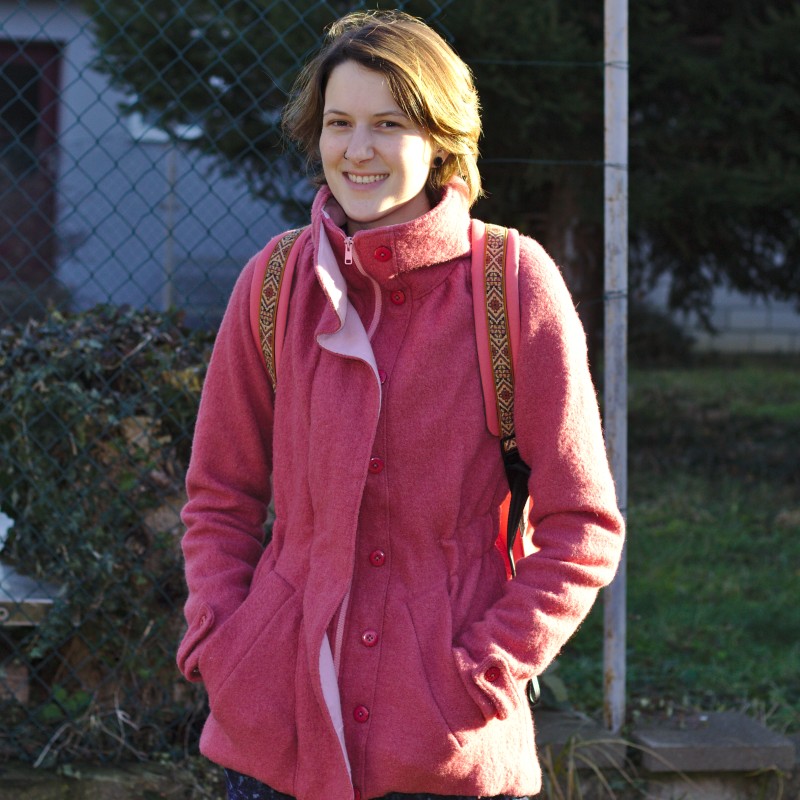
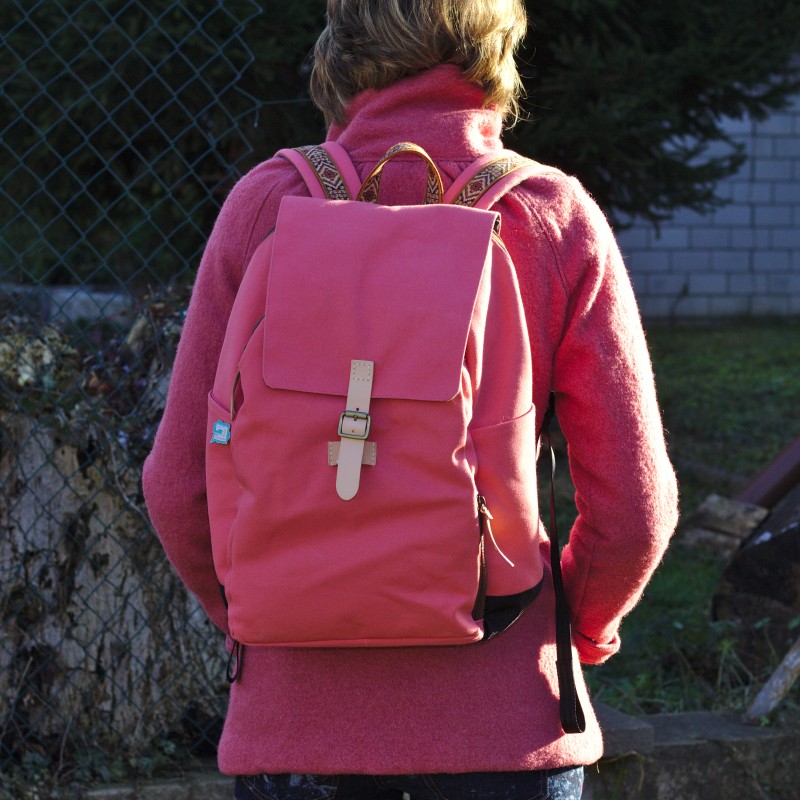
I didn‘t change the original design of the pattern much. All I did was changing the contrasting fabric, adding the webbing and sewing in a carabiner for my keys. I cannot live without that carabiner, for real, every bag needs one! Underneath the webbing on the straps is the black seatbelt webbing that was provided in the kit, because I figured it is sturdier.

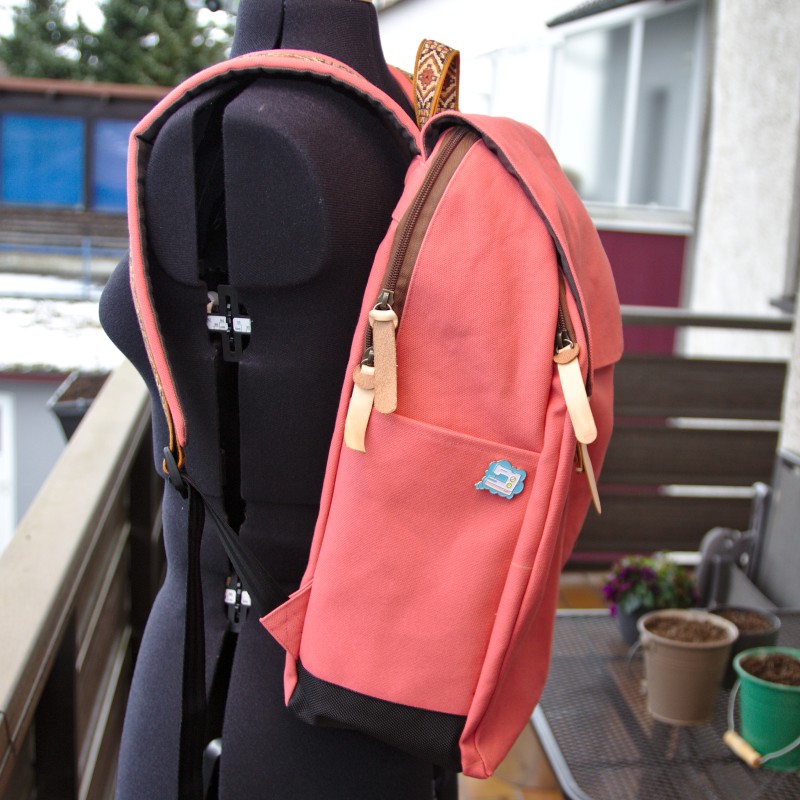
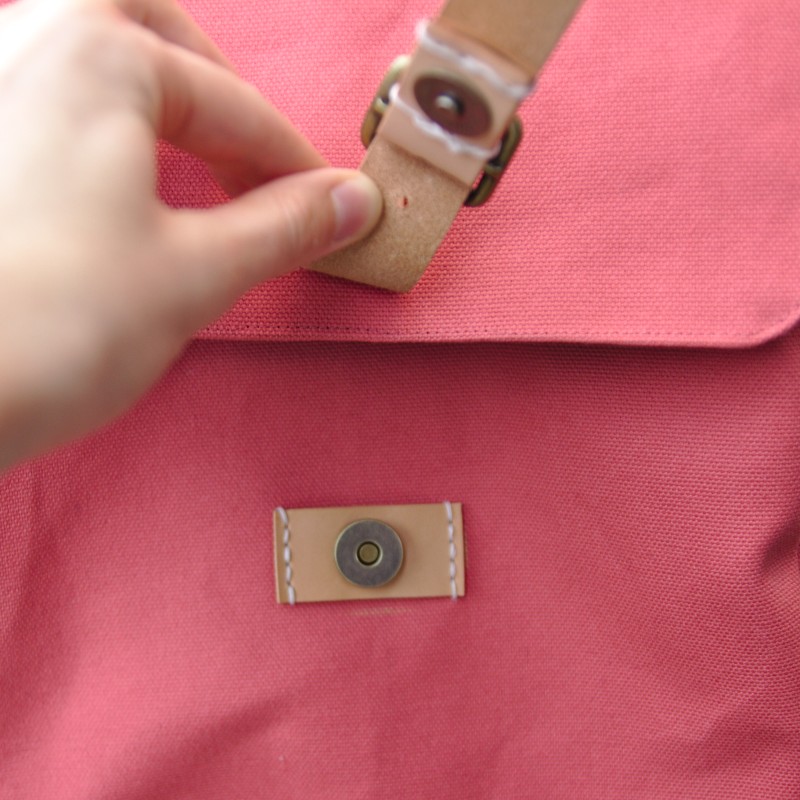
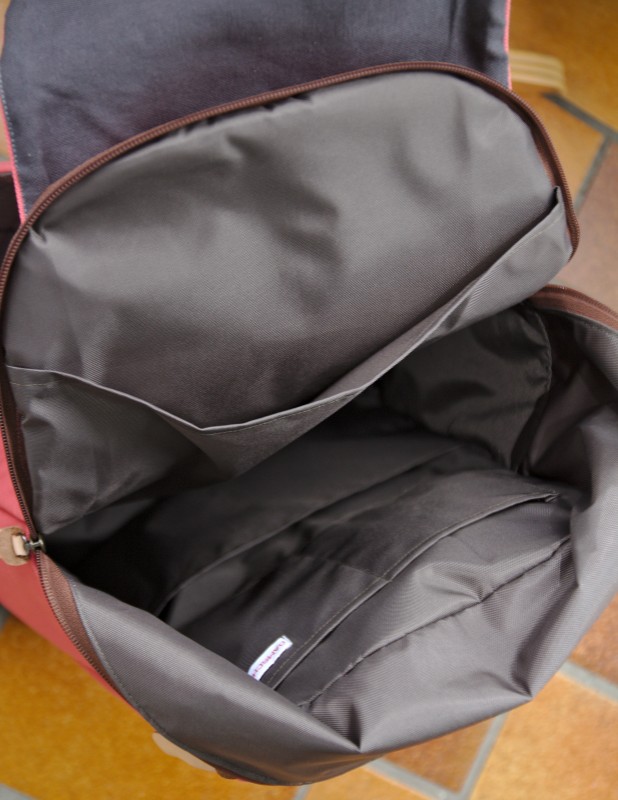
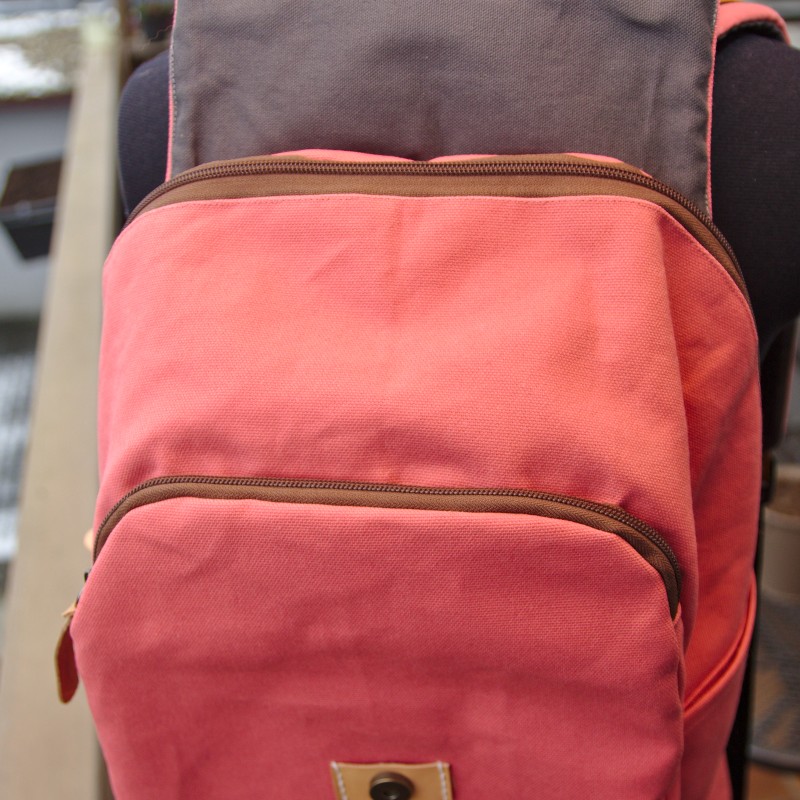
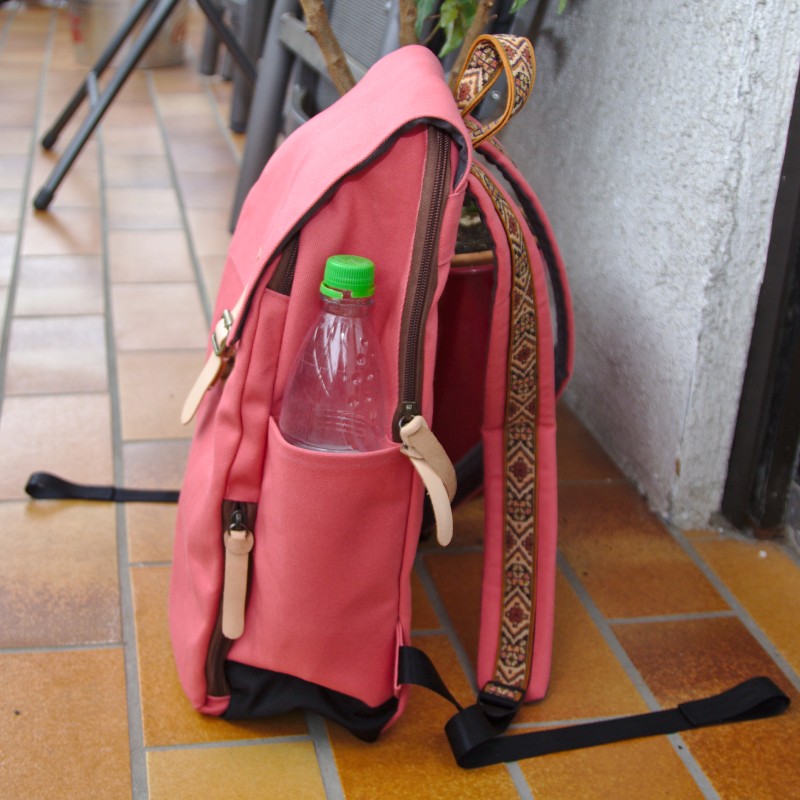
At the front of the back there are two pockets that are sewn at the same time an are later divided by a seam. The lower one can be opened from one side and I found that a small umbrella fits very nicely in there. The upper pocket contains the carabiner and some smaller pockets where I put stuff in, like pens, gums things that litter up the bag ;) I thought about putting my wallet in there but that is too unsecure I guess, I rather but in the large pocket!
In the large pocket there is another pocket that I can but my laptop in and some smaller pockets where I put my moneybag in. My sports clothing, lunch a notepad and books do fit into that large pocket too, I have already tested that :) Because that is what I usually carry around with me, hehe.

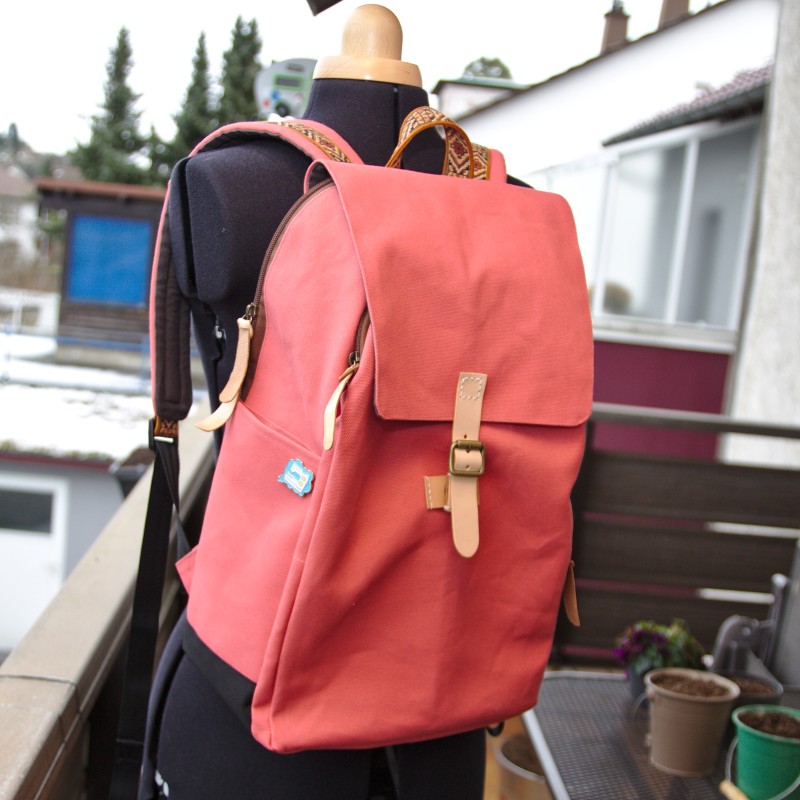
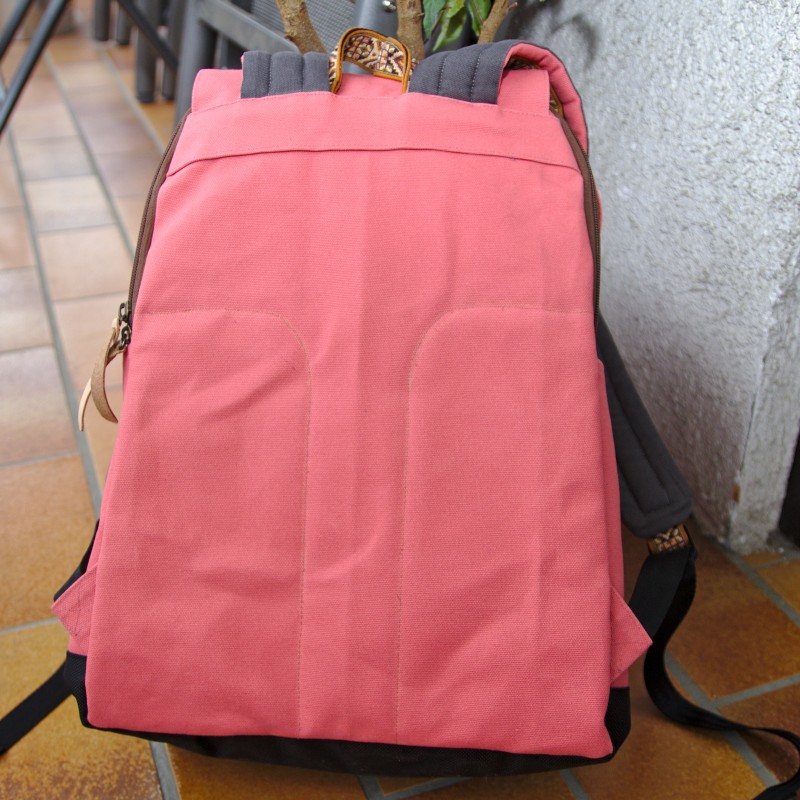
The foam is great! It is applied to the straps and the back and it makes both more comfortable and more stable. The whole backpack is very stable actually, there is no interfacing in it, just fabric and foam and looooove :D.
On the sides of the backpack there are pockets for bottles. I missed those on my old backpack. It feels a lot better transporting liquids apart from the laptop and vertically.

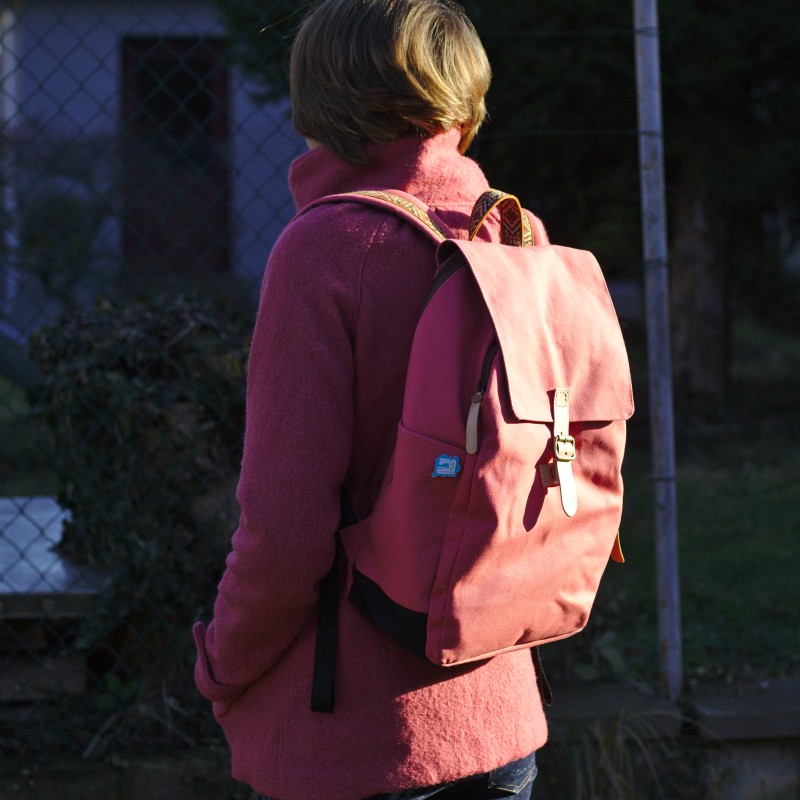
You might not be surprised that I ordered the kit in a pink main fabric. What might look a little strange is me wearing this with my pink winter jacket. The backpack is almost invisible ;) There was a time when I didn’t like pink and I don‘t know what happened then, but right now I cannot think of a better color than pink for a backpack. Okay, maybe purple, but that wasn‘t available.
After finishing this project and looking at it for too long I found some flaws. Like there is a small pleat in the bottom fabric and you can see a pink seam on the lining and such things, you know. So Marvinranted with me a little and everything was fine short time after. Because I will never be able to sew a perfect backpack. I don‘t have the experience and I don‘t have the tools. But this backpack is personalized I put a lot of work and love into it and I had so much fun sewing it! Those imperfections are proof that I made this backpack and they are a part of the overall concept. I am really proud that I made this, and I love how it looks and works!
Macht’s gut!
Katharina
Very impressive! It looks so professional. I showed this to Luke as he is on the hunt for the “perfect” backpack, but he wants to make some kind of weird military sack instead!
I must admit, I have really no idea what the “rocket” is that Martin gave you! :P
Thanks Kirsty :) weird military sack sounds good too :D
Thanks for the feedback. Sometimes I just type something really German into the online translator and that was what he gave me! Thank you Machine! ;)
Goodness! What a beautiful make!!
You’re a pro!!
I guess the price is in the end well worth the things you learned from working with all these new materials!!
I love it!!
<3
M
You’re so right! :-*
Wow. This is a feat of engineering! You have done such a good job it looks so professional!
Thank you :)
Oh boy, now I want a pink backpack! That braid is gorgeous, and I love your alternative fabric. I hope that it’s fully in service and living up to expectations. It certainly looks gorgeous!
Thanks so much :)
As I read your post, and looked at your photos….. all I could think of is ‘wow’! This is a ‘wow’ project! You did a fantastic job taking a kit and adding your own personalized touches to it to make it really yours. And all your love shows through! :)
:) Thank you! :)